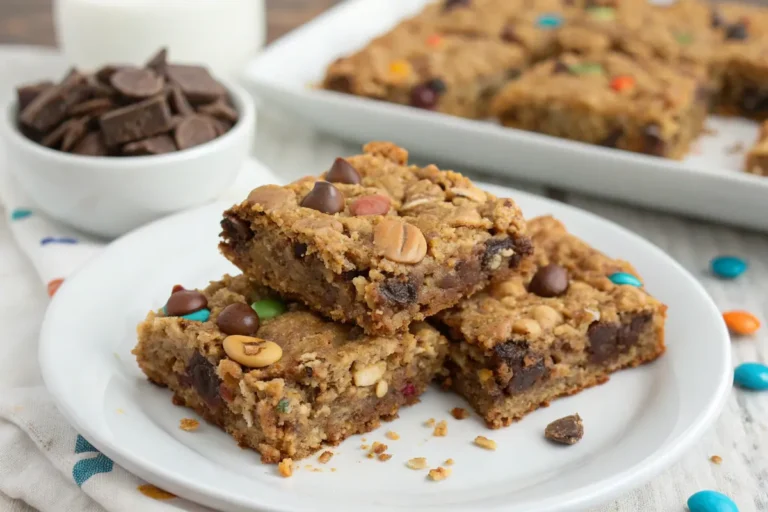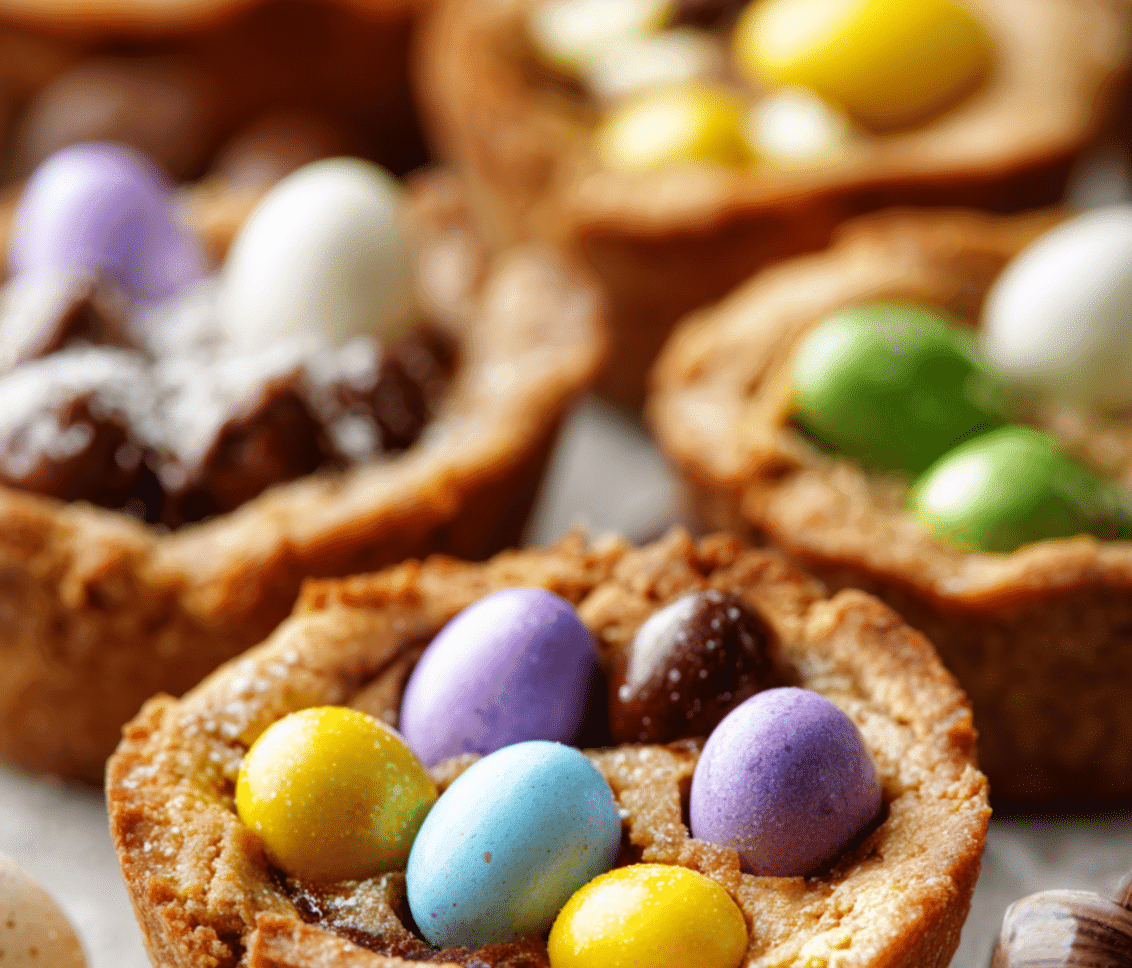
Easy Irresistible Easter Egg Cookie Cups for Bold Spring Gatherings
The Perfect Holiday Treat for Every Basket
Easter egg cookie cups combine the best of two worlds: buttery, soft-baked cookies shaped into adorable edible vessels filled with creamy chocolate and topped with colorful candy eggs. These eye-catching treats are not only delicious but also capture the vibrant spirit of spring with their pastel decorations and egg-shaped candies.
“The Mason jar cookie mix makes a wonderful homemade gift alternative if you want to share the joy of baking these treats with friends and family.”
These delightful cookie cups are perfect for Easter celebrations, spring-themed parties, or as a special after-school surprise for kids. The combination of a tender cookie base, smooth chocolate center, and colorful decorations makes them irresistible to both children and adults. Plus, they’re easy enough for bakers of all skill levels to create, making them a wonderful project to tackle with little helpers during the holiday season.
Sweet Ingredients for Your Easter Basket Treats
Cookie Cup Base Components
Creating these adorable Easter egg cookie cups requires simple pantry ingredients that come together to make something truly special. The base is a buttery cookie that holds its shape well, while providing the perfect edible vessel for chocolate and decorations. Here’s everything you’ll need:
| Ingredient | Amount | Notes |
|---|---|---|
| Unsalted butter, softened | 1 cup | Room temperature for best creaming results |
| Granulated sugar | 1 cup | Provides sweetness and structure |
| Large egg | 1 | Room temperature preferred |
| Vanilla extract | 1 tsp | Pure vanilla extract offers best flavor |
| All-purpose flour | 2¼ cups | Spoon and level for accurate measurement |
| Baking soda | ½ tsp | Provides gentle rise without puffing too much |
| Salt | ¼ tsp | Enhances flavor balance |
| Chocolate chips | 1 cup | Semi-sweet or milk chocolate based on preference |
| Pastel icing | ½ cup | Prepared or homemade in spring colors |
| Candy Easter eggs | 24-36 | Mini chocolate eggs work best |
Optional Enhancements
Take your Easter egg cookie cups to the next level with these flavorful additions:
| Optional Ingredient | Amount | Purpose |
|---|---|---|
| Almond extract | ¼ tsp | Adds subtle nutty flavor dimension |
| Pastel sprinkles | 2-3 tbsp | Fold into dough for confetti effect |
| White chocolate chips | ½ cup | Alternative to regular chocolate filling |
| Coconut flakes | ¼ cup | Creates “nest” effect around the eggs |
| Cream cheese | 4 oz | Mix with ½ cup butter for richer cookie base |
| Lemon zest | 1 tsp | Adds fresh spring flavor |
“Our holiday cookie gift box guide shows how these Easter egg cookie cups make perfect additions to seasonal treat packages for friends, neighbors, or teachers.”
Creating Perfect Easter Treat Cups: Detailed Instructions
Preparing Your Cookie Cup Base
Follow these carefully detailed steps to create irresistible Easter egg cookie cups that will delight everyone at your spring celebration. The method ensures perfectly shaped cups with the ideal texture—sturdy enough to hold fillings but tender enough to enjoy in every bite.
- Prepare your workspace. Preheat your oven to 350°F (175°C). Line a standard 12-cup muffin pan with paper liners. The liners make removal much easier and help the cups hold their shape. Gather all ingredients and allow butter and eggs to reach room temperature for optimal mixing.
- Mix the dry ingredients. In a medium bowl, whisk together 2¼ cups all-purpose flour, ½ teaspoon baking soda, and ¼ teaspoon salt until well combined. Whisking distributes the leavening agents evenly throughout the flour for consistent rising. Set aside.
- Cream the butter and sugar. In a large mixing bowl using a hand mixer or stand mixer with paddle attachment, beat the softened butter and granulated sugar on medium-high speed for 2-3 minutes until the mixture becomes light and fluffy. The mixture should turn pale yellow and increase slightly in volume, indicating air has been incorporated.
- Add wet ingredients. Add the egg and vanilla extract to the butter-sugar mixture. Beat on medium speed until completely incorporated and smooth, about 1 minute. Scrape down the sides of the bowl with a spatula to ensure even mixing.
- Combine wet and dry ingredients. Gradually add the dry ingredients to the wet mixture, about ⅓ at a time, mixing on low speed just until combined after each addition. Stop mixing as soon as the flour disappears to avoid overdeveloping the gluten, which would make tough cookies. The dough should be soft but not sticky.
- Form and bake the cookie cups. Using a cookie scoop or tablespoon measure, place approximately 2 tablespoons of dough into each paper liner, filling about ⅔ full. Gently press down the center of each dough ball with your thumb or the back of a rounded teaspoon to create a slight indentation. This helps the cups form their characteristic shape.
- Bake until perfectly golden. Place the muffin tin in the preheated oven and bake for 10-12 minutes until the edges are lightly golden but the centers still look slightly soft. The cookies will continue baking from residual heat after removal. Look for a matte finish on the surface—shiny centers indicate underbaking.
- Create deeper cups. While the cookie cups are still warm (but not hot), use the back of a rounded teaspoon or the handle of a wooden spoon to gently press down in the center of each cookie, reinforcing the cup shape. Be careful not to press through the bottom. Allow to cool in the pan for 5 minutes.
- Cool completely. Carefully remove the cookie cups to a wire rack and allow them to cool completely, about 30-45 minutes. The cups must be fully cooled before adding the chocolate filling to prevent melting issues.
- Prepare the chocolate filling. Place the chocolate chips in a microwave-safe bowl. Heat in 30-second intervals at 50% power, stirring between each interval, until completely melted and smooth. Alternatively, melt using a double boiler for more controlled heating.
- Fill the cookie cups. Spoon approximately 1-2 teaspoons of melted chocolate into the center of each cooled cookie cup, creating a smooth, even layer. Allow the chocolate to set slightly, about 10 minutes at room temperature or 5 minutes in the refrigerator.
- Decorate festively. Transfer your pastel icing to piping bags fitted with small round or star tips. Pipe a decorative border around the rim of each cookie cup in various pastel colors, mimicking an Easter basket. Work in small batches so the icing doesn’t set in the piping bag.
- Add the finishing touch. While the icing is still soft, place 1-3 candy Easter eggs in the center of each cup, nestling them gently into the chocolate layer. If the chocolate has hardened too much, add a tiny dot of icing underneath the eggs to help them adhere.
- Allow to set completely. Let the cookie cups sit at room temperature for at least 1 hour to allow all layers to set properly before serving. This ensures the cups maintain their structure when handled.
“For a sophisticated twist on these easter egg cookie cups, try the flavoring techniques from our red velvet cupcakes recipe by adding a touch of cocoa powder and food coloring to the cookie dough base.”

Expert Baking Secrets for Perfect Easter Cookie Cups
Troubleshooting Common Issues
Creating picture-perfect Easter egg cookie cups is within your reach with these professional tips. These pointers help ensure consistent results and make the baking process smoother:
- Room temperature ingredients matter. For the most uniform cookie dough, ensure your butter and egg are at room temperature. Cold ingredients won’t incorporate properly, leading to dense or unevenly baked cups.
- Prevent overflowing cups. Don’t overfill your muffin cups with cookie dough. Using exactly 2 tablespoons per cup and filling only ⅔ full leaves room for the slight expansion that happens during baking while maintaining the cup shape.
- Create stable cup shapes. If your cookie cups are puffing up too much in the center, deepen the indentation before baking by using a wine cork wrapped in plastic wrap to create a more defined well.
- Customize without compromising structure. When adding mix-ins to the cookie dough (like sprinkles or finely chopped nuts), limit additions to ⅓ cup total to maintain the cup’s structural integrity.
- Achieve perfect chocolate consistency. For the chocolate filling, adding ½ teaspoon of coconut oil or shortening to the chocolate chips when melting creates a smoother consistency that sets with a slight shine.
- Create multicolored effects easily. For rainbow pastel icing, divide white frosting into separate bowls, color each one, then add all colors to one piping bag (without mixing them) for a beautiful multicolored swirl effect.
- Pipe like a professional. Hold your piping bag at a 45-degree angle when decorating the rims for the most controlled, even application of frosting. Practice on parchment paper first if you’re new to piping.
“The decorating techniques used for our salted caramel cupcakes can be adapted perfectly for these Easter cookie cups, especially the rosette piping method that creates a beautiful nest-like appearance.”
Keeping Your Holiday Cookie Cups Fresh and Delicious
Short-Term and Long-Term Storage Solutions
Proper storage ensures your Easter egg cookie cups maintain their delightful taste and appearance whether you’re making them a day ahead or planning to save some for later enjoyment.
Room Temperature Storage
After your Easter egg cookie cups have completely set, store them at room temperature in an airtight container for up to 3 days. Layer them carefully using parchment paper between layers to prevent the decorations from getting smashed. Keep the container away from direct sunlight or heat sources that could melt the chocolate or cause the icing colors to fade.
Refrigerator Storage
If your kitchen is particularly warm or if you’ve used perishable ingredients in your variations (like cream cheese in the dough or frosting), refrigerate your cookie cups in an airtight container. They’ll stay fresh for up to 5 days. Remove them from the refrigerator about 20-30 minutes before serving to allow them to come to room temperature, which improves their flavor and texture.
Freezing Options
These holiday cookie cups freeze surprisingly well when properly prepared:
1. Freeze the baked, unfilled cookie cups in an airtight container with parchment paper between layers for up to 2 months.
2. Thaw at room temperature for 1-2 hours before filling and decorating.
3. Alternatively, freeze fully assembled cookie cups by placing them on a baking sheet until solid (about 1 hour), then transfer to a freezer-safe container with parchment paper between layers.
4. Thaw frozen decorated cookie cups in the refrigerator overnight, then bring to room temperature before serving.
Traveling With Cookie Cups
If you need to transport your Easter egg cookie cups to a gathering or party:
1. Place cookie cups in a single layer in a shallow container with a tight-fitting lid.
2. If stacking is necessary, use small pieces of parchment paper between individual cups and layers to prevent sticking.
3. Keep the container level during transport, and if possible, place it in a cooler with an ice pack if traveling more than 30 minutes in warm weather.
“Our lemon poppy seed cake uses similar storage techniques to maintain freshness, especially the freezing method that works perfectly for make-ahead holiday treats like these Easter egg cookie cups.”
Delightful Twists on Classic Easter Cookie Cups
Seasonal and Dietary Adaptations
These creative variations keep the essence of Easter egg cookie cups while offering exciting new flavor profiles and accommodating different preferences or dietary needs.
Chocolate Nest Cookie Cups
Transform your cookie cups into realistic chocolate nests by adding 1/4 cup cocoa powder to the dough and reducing the flour by the same amount. After baking and cooling, pipe chocolate icing in thin lines around the rim to resemble twigs, then sprinkle with finely shredded coconut tinted green with food coloring to mimic grass before placing the candy eggs on top. This creates a more realistic nest appearance with chocolate flavor throughout.
Citrus Spring Cookie Cups
Add 2 teaspoons of lemon, lime, or orange zest to the cookie dough and replace the vanilla extract with 1/2 teaspoon of the corresponding citrus extract. Fill the baked cups with white chocolate tinted with a drop of the matching citrus-colored food coloring. The bright citrus flavor creates a refreshing spring variation that pairs beautifully with the sweet candy eggs.
Gluten-Free Easter Egg Cookie Cups
Substitute the all-purpose flour with a high-quality cup-for-cup gluten-free flour blend and add 1/2 teaspoon xanthan gum if your blend doesn’t already include it. The texture will be slightly different but still delicious, and the cups hold their shape well, making this a perfect inclusive option for guests with gluten sensitivities.
Coconut Cream Cookie Cups
Replace 1/2 cup of flour with 1/2 cup finely shredded coconut and add 1/4 teaspoon coconut extract to the dough. Fill the baked cups with coconut-flavored white chocolate (add 1/4 teaspoon coconut extract to melted white chocolate). The tropical coconut flavor complements the spring theme while providing a unique taste experience.
Almond Cookie Cups with Berry Filling
Add 1/2 teaspoon almond extract and 1/3 cup finely chopped almonds to the cookie dough. After baking, fill the cups with a thin layer of seedless raspberry or strawberry jam before adding the chocolate layer. The fruit adds a tangy contrast to the sweet cookie and chocolate, creating a more sophisticated flavor profile while maintaining the spring theme.
No-Bake Cookie Cup Alternative
For a quick, heat-free version, press 2 tablespoons of store-bought cookie dough into each muffin cup and chill until firm (about 1 hour). No baking required! Fill with melted chocolate and decorate as usual. While not exactly the same texture, this variation is perfect for busy bakers or for making with young children during hot weather.
Presenting Your Festive Easter Cookie Creations
Elegant Display Ideas for Maximum Impact
After crafting your beautiful Easter egg cookie cups, showcase them in ways that enhance their charm and appeal. These serving suggestions elevate your treats from simple desserts to memorable holiday centerpieces.
Easter Brunch Table Centerpiece
Arrange your cookie cups on a tiered cake stand, placing the most decorative ones on the top tier. Surround the base with fresh spring flowers like tulips or daffodils and add some decorative Easter grass. This creates a stunning centerpiece for your Easter brunch table that doubles as dessert. Guests can simply take a cookie cup from the display when they’re ready for something sweet.
Individual Place Settings
Place a single Easter egg cookie cup on each person’s dessert plate at your holiday dinner. Wrap the base in a small colorful cupcake wrapper for additional visual impact. Add a personalized name tag using a small paper flag on a toothpick for an extra special touch that also serves as a place card for seating arrangements.
Cookie Cup Gift Packages
For a thoughtful Easter gift, place 4-6 cookie cups in a small basket lined with pastel tissue paper or Easter grass. Wrap with clear cellophane and tie with a ribbon. Add a gift tag with the recipe or a personalized note. These make perfect teacher gifts, hostess presents, or special deliveries to neighbors and friends during the spring season.
Children’s Easter Egg Hunt Addition
Use cookie cups as special prizes for an Easter egg hunt. Place them in small clear plastic dome containers (like those used for individual cupcakes) to protect them outdoors, then hide them along with regular Easter eggs. The finder of a cookie cup gets an extra special treat!
Garden Party Dessert Station
Create a springtime dessert bar with Easter egg cookie cups as the star. Fresh salads with light dressings make perfect accompaniments to balance the sweetness of these treats. Add fresh fruit, lemonade, and iced tea for a complete garden party spread that celebrates the flavors of spring.
Dessert Platter Arrangement
For casual gatherings, arrange cookie cups on a large platter interspersed with fresh strawberries, clusters of grapes, and sprigs of mint. The fresh fruit provides a refreshing counterpoint to the sweet cookie cups and creates a visually appealing, balanced dessert offering.

Your Easter Cookie Cup Questions Answered
Common Baking Concerns Resolved
Can I make Easter egg cookie cups without a muffin pan?
While a standard muffin pan creates the best shape, you can use alternatives. Ramekins work well if you have enough of them, or you can create freeform cups by shaping the cookie dough around the bottom of a small glass on a baking sheet. The key is to maintain the cup shape while baking, so whatever you use should have sides to support the dough. If using the glass method, you’ll need to reshape the cups while still warm as they will spread somewhat during baking.
Why are my cookie cups cracking around the edges?
Cracking usually happens when the cookie cups cool too quickly or if they’re overcooked. Try reducing your baking time by 1-2 minutes, and let them cool in the pan for at least 5 minutes before transferring to a cooling rack. Another helpful trick is to make your thumb indentation a bit deeper before baking to accommodate the rising dough. If cracks still appear, don’t worry—they’ll be covered by your decorative icing border.
How far in advance can I make these for an Easter celebration?
You can bake the unfilled cookie cups up to 3 days in advance and store them in an airtight container at room temperature. For longer storage, freeze the unfilled cups for up to 2 months. The chocolate filling and decorating is best done within 24 hours of serving for the freshest appearance and taste. If you need to completely assemble them ahead of time, store in the refrigerator for up to 3 days, but be aware that the candy eggs may develop a slight sugar bloom (whitish appearance) if refrigerated too long.
What can I use instead of candy Easter eggs for a less sugary version?
For a healthier alternative, consider using fresh berries like raspberries, blueberries, or sliced strawberries shaped into egg forms. Small pieces of dried fruit like apricots cut into egg shapes also work well. For a completely different look that still captures the spring theme, use edible flower petals, small fondant flowers, or natural food-colored marzipan shaped into tiny carrots or flowers. These alternatives reduce the overall sweetness while maintaining the festive Easter appearance.
Can these cookie cups be made dairy-free?
Yes! Substitute the butter with a high-quality dairy-free butter substitute (the stick variety works better than tub versions for baking). Use dairy-free chocolate chips for the filling, and ensure your candy eggs are dairy-free (or use one of the alternatives suggested above). The texture might be slightly different, but the cookie cups will still hold their shape and taste delicious. Be sure to check all your decorating ingredients for hidden dairy if making them for someone with a dairy allergy.
Celebrating Spring with Sweet Traditions
Creating Lasting Easter Memories
Easter egg cookie cups represent more than just a delicious dessert—they embody the joy and creativity of springtime celebrations. With their colorful appearance, delightful taste, and endless possibilities for personalization, these charming treats are sure to become a beloved tradition in your holiday repertoire. The combination of a tender cookie base, rich chocolate filling, and festive candy decoration captures everything we love about spring: color, sweetness, and new beginnings.
What makes these cookie cups truly special is their versatility. Whether you’re hosting an elaborate Easter brunch, contributing to a school celebration, or simply creating a special moment for your family, these adaptable treats fit perfectly. They’re approachable enough for novice bakers yet offer plenty of creative potential for those looking to showcase their decorating skills.
Remember that the joy of these Easter egg cookie cups comes as much from the making as the eating. Consider involving children in the decorating process—their creativity often leads to the most memorable designs. “Our pumpkin spice bundt cake brings the same kind of seasonal joy to autumn gatherings that these Easter egg cookie cups bring to spring celebrations.”
Don’t hesitate to start your own Easter egg cookie cup tradition this year. With the detailed instructions, helpful tips, and creative variations provided here, you have everything needed to create picture-perfect spring treats that will delight everyone who sees—and tastes—them. Happy baking and happy spring!
PrintEaster Egg Cookie Cups
Adorable cookie cups filled with chocolate and topped with colorful candy Easter eggs.
Perfect for spring celebrations and holiday dessert tables.
Kid-friendly treats that double as festive decorations.
- Prep Time: 25
- Cook Time: 12
- Total Time: 37 minutes
- Yield: 12 cookie cups 1x
- Category: Dessert
- Method: Baking
- Cuisine: American
Ingredients
- 1 cup unsalted butter, softened
- 1 cup granulated sugar
- 1 large egg, room temperature
- 1 teaspoon vanilla extract
- 2¼ cups all-purpose flour
- ½ teaspoon baking soda
- ¼ teaspoon salt
- 1 cup chocolate chips (semi-sweet or milk)
- ½ cup pastel-colored icing
- 24–36 candy Easter eggs
- 2 tablespoons pastel sprinkles (optional)
- ¼ teaspoon almond extract (optional)
- ¼ cup shredded coconut (optional)
Instructions
- Preheat oven to 350°F (175°C) and line a muffin pan with paper liners.
- In a medium bowl, whisk together flour, baking soda, and salt until well combined.
- Cream butter and sugar in a large bowl until light and fluffy, about 2-3 minutes.
- Add egg and vanilla extract to the butter mixture and beat until completely incorporated.
- Gradually mix dry ingredients into the wet mixture, stirring just until a soft cookie dough forms.
- Scoop about 2 tablespoons of dough into each muffin liner and press down slightly in the center.
- Bake for 10-12 minutes until edges are lightly golden but centers still look slightly soft.
- While cookies are still warm, use the back of a rounded teaspoon to deepen the centers, creating cups.
- Allow to cool in the pan for 5 minutes, then transfer to a wire rack to cool completely.
- Melt chocolate chips in 30-second intervals in the microwave, stirring between each interval until smooth.
- Spoon 1-2 teaspoons of melted chocolate into the center of each cooled cookie cup.
- Allow chocolate to set slightly, about 10 minutes.
- Transfer pastel icing to piping bags and pipe decorative borders around the rim of each cup.
- Place 1-3 candy Easter eggs in the center of each cup while the icing is still soft.
- Allow to set completely for at least 1 hour before serving.
Notes
For best results, make sure ingredients are at room temperature before beginning.
Unfilled cookie cups can be frozen for up to 2 months in an airtight container.
Add a drop of food coloring to the cookie dough for pastel-colored cups.
Nutrition facts are estimates and may vary based on ingredients used, portion sizes, and preparation methods.
Nutrition
- Serving Size: 1 cookie cup
- Calories: 298
- Sugar: 24
- Sodium: 105
- Fat: 16
- Saturated Fat: 10
- Unsaturated Fat: 5
- Carbohydrates: 36
- Fiber: 1
- Protein: 3
- Cholesterol: 45
Keywords: easter egg cookie cups, holiday cookie cups, spring chocolate treats, kid friendly desserts, candy egg garnish, easter desserts
Let’s connect! Follow me for more Joylicious Recipes: Facebook, Instagram, Pinterest