Baked Pears with Blue Cheese: A Simple Sweet and Savory Dessert
Introduction: The Elegant Simplicity of Baked Pears
The Perfect Balance of Flavors
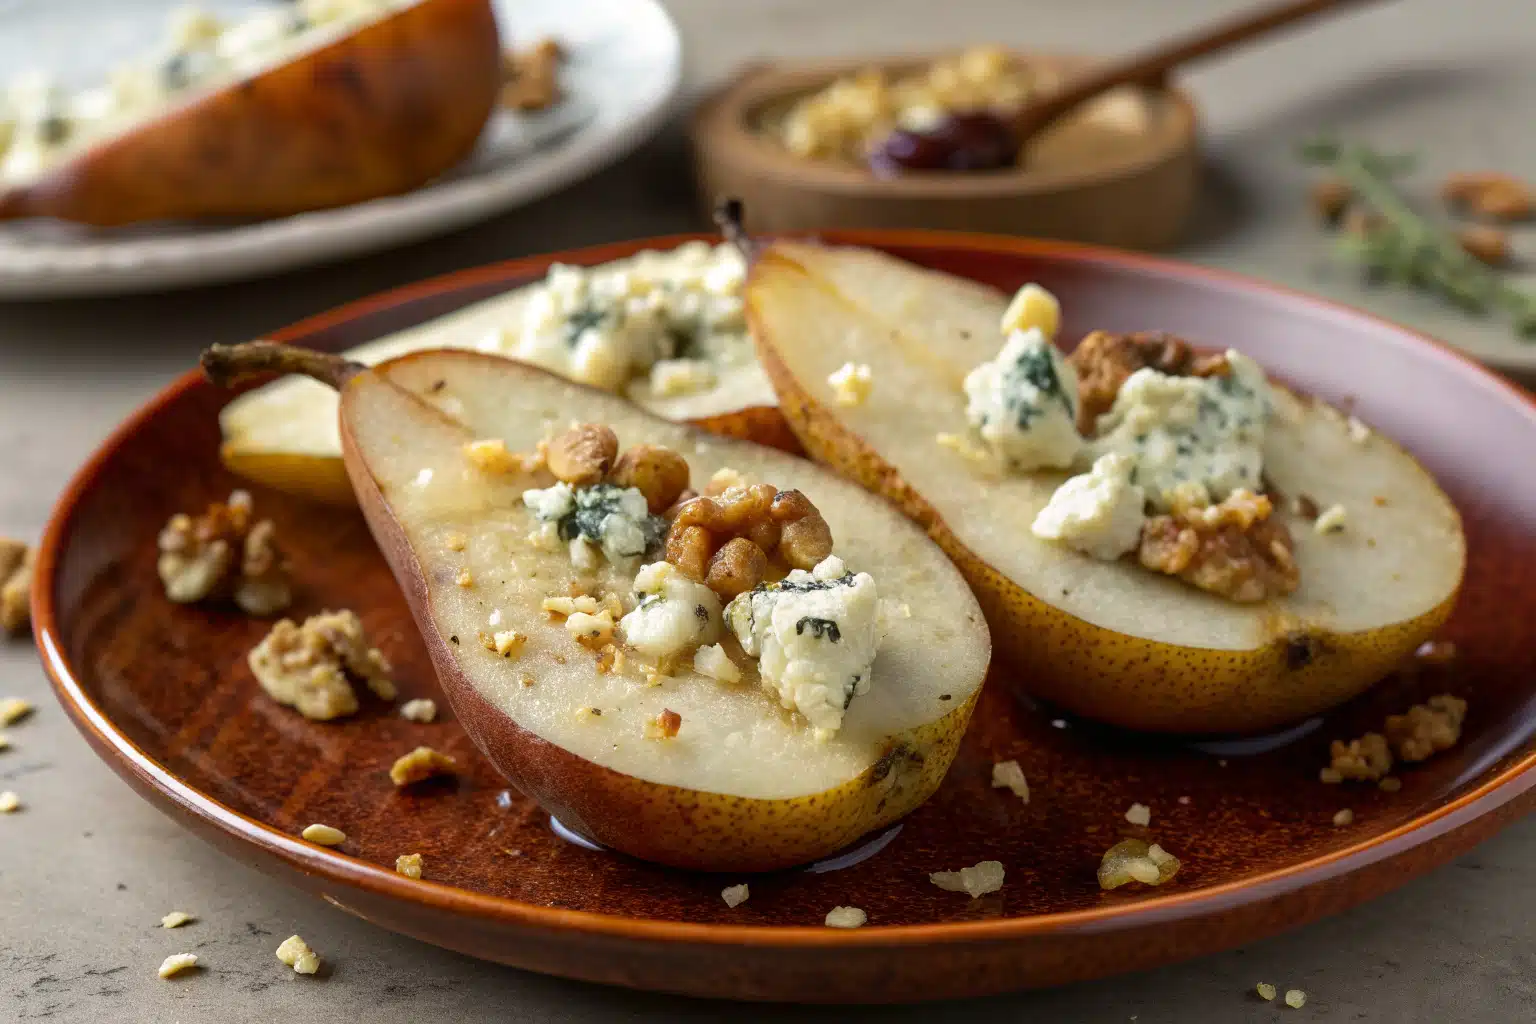
Baked pear with blue cheese represents one of the most elegant yet simple dessert options you can create at home. This sophisticated treat combines the natural sweetness of tender baked pears with the bold, tangy flavor of blue cheese, creating a remarkable flavor profile that dances between sweet and savory. When preparing this delightful dessert, you’re not just making food—you’re crafting an experience that appeals to refined palates while remaining surprisingly accessible.
“Looking for inspiration? Try our creamy peach salad recipe for another fruit-forward dish that balances sweet and savory elements.”
A Seasonal Delight for Special Occasions
The baked pear with blue cheese shines especially bright during fall and winter months when pears reach their peak ripeness. This isn’t just an everyday dessert but rather a showstopper for dinner parties, holiday gatherings, or romantic evenings. The visual appeal—with the caramelized pear adorned with vibrant berries, crunchy walnuts, and crumbled blue cheese—makes it worthy of any special occasion. Moreover, despite its impressive presentation, this dessert requires minimal effort and just a handful of ingredients.
Ingredients: Everything You Need for Baked Pear with Blue Cheese
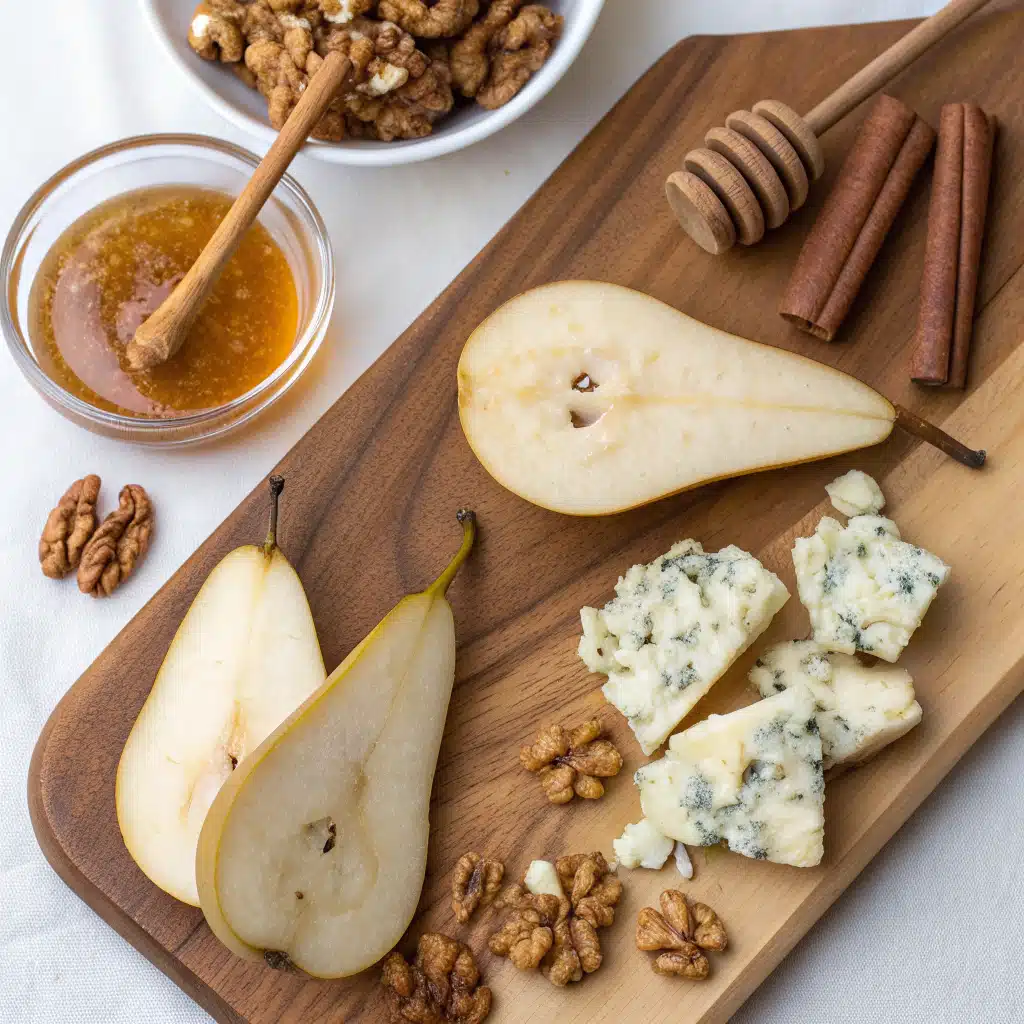
The Fresh Produce Components
| Ingredient | Quantity | Notes |
|---|---|---|
| Medium pear | ½ | Choose a firm but ripe pear |
| Lemon | ½ | For rubbing cut surface to prevent browning |
| Blueberries | 2 tablespoons | Fresh provides best texture |
| Raspberries | 2 tablespoons | Adds tartness to balance sweetness |
| Blackberries | 2 tablespoons | Provides deep berry flavor |
| Purple grapes | 2 tablespoons, halved | Adds juicy sweetness |
| Pomegranate seeds | 1 tablespoon | For crunch and color |
| Strawberries | 3, sliced | For natural sweetness |
The Flavor Enhancers
| Ingredient | Quantity | Notes |
|---|---|---|
| Honey | 1 teaspoon (divided) | Natural sweetener that caramelizes beautifully |
| Walnuts | 3 whole, chopped | Adds essential crunch and nuttiness |
| Blue cheese | ½ tablespoon, crumbled | The star flavor component |
Step-by-Step: Creating Your Perfect Baked Pear with Blue Cheese
Preparing the Pear for Baking
- Preheat your oven to 350°F (175°C), allowing it to reach full temperature while you prepare the ingredients.
- Take your medium pear and carefully cut it in half lengthwise. For this recipe, you’ll only need one half.
- Using half a lemon, gently rub the cut surface of the pear. This important step prevents the pear from browning and adds a subtle citrus note.
- Place the prepared pear half on a small baking sheet, positioning it cut-side up to create a natural “bowl” for the honey.
- Take ½ teaspoon of honey and drizzle it evenly over the cut surface of the pear, allowing it to settle into the core area.
The Baking Process and Toasting Walnuts
- While the oven heats, take 3 whole walnuts and roughly chop them into smaller pieces.
- In a small, dry skillet over medium heat, add the chopped walnuts and toast them for 2-3 minutes, stirring frequently. You’ll know they’re ready when they become fragrant and slightly darker. Be careful not to burn them.
- Set the toasted walnuts aside and place your honey-drizzled pear in the preheated oven.
- Bake for 15-20 minutes, checking occasionally. “Here’s your guide to how to cook bone-in chicken breast for another perfectly baked protein option that requires similar attention to cooking times.”
- The pear is done when it’s tender enough to easily pierce with a fork and has developed a light caramelization on the surface.
Creating the Berry Medley and Final Assembly
- While the pear bakes, prepare your colorful berry mixture by combining the sliced strawberries, blueberries, raspberries, blackberries, halved purple grapes, and pomegranate seeds in a small bowl.
- Gently toss the fruit mixture to combine without crushing the delicate berries.
- Once the pear is baked to perfection, carefully transfer it to a serving plate.
- Top the warm pear with generous spoonfuls of the mixed berry medley, arranging them for maximum visual appeal.
- Drizzle the remaining ½ teaspoon of honey over the entire dessert.
- Finish by sprinkling the toasted walnuts over the berries and pear.
- As the final touch, add the crumbled blue cheese, allowing it to slightly melt from the warmth of the pear.
- Serve immediately while the pear is still warm and the contrast between warm pear and cool toppings is at its peak.
Tips: Mastering Your Baked Pear with Blue Cheese
Selecting the Perfect Pear
Choosing the right pear is crucial for this baked pear with blue cheese recipe. Bartlett, Anjou, and Bosc pears work exceptionally well because they maintain their shape during baking while becoming perfectly tender. The ideal pear should be firm but yield slightly to gentle pressure—if it’s too hard, it won’t bake properly; too soft, and it might become mushy. Additionally, consider the ripening time at home. If your pears are still firm, allow them to ripen at room temperature for 1-2 days before baking for optimal flavor development and texture.
Blue Cheese Selection and Alternatives
The blue cheese component of this baked pear with blue cheese dessert deserves special attention. Milder varieties like Gorgonzola dolce or Danish blue work beautifully for those new to blue cheese, offering a gentle introduction to its distinctive flavor. For more experienced palates, stronger options like Roquefort or Stilton create a more pronounced contrast with the sweet pear. If blue cheese isn’t your preference, acceptable alternatives include creamy goat cheese for tanginess without the blue mold flavor, mascarpone for a sweeter option, or even a sharp white cheddar for a completely different but equally delicious sweet-savory balance.
“Discover great ideas like our fresh watermelon juice recipe for a refreshing beverage pairing with this dessert.”
Balancing Sweetness and Texture
Achieving the perfect balance in your baked pear with blue cheese requires attention to both sweetness and texture. If your pears are particularly sweet, consider reducing the honey slightly or adding extra lemon juice for balance. Conversely, if using tart pears, a touch more honey might be needed. For texture, the contrast between the soft, warm pear, juicy berries, crunchy nuts, and creamy cheese creates the dish’s signature appeal. Don’t skip toasting the walnuts—this simple step adds significant depth of flavor and enhances their crunch. For an additional texture element, consider adding a sprinkle of granola or crushed amaretti cookies to the topping.
Storage: Keeping Your Baked Pear with Blue Cheese Fresh
Immediate Storage Solutions
While baked pear with blue cheese is best enjoyed immediately after preparation, there may be instances where you need to store leftovers. If you’ve already assembled the complete dessert with all toppings, it can be refrigerated for up to 24 hours. Place it in an airtight container to prevent it from absorbing other flavors from your refrigerator. The texture will change somewhat—the pear will soften further, and the berries may release juices—but the flavor profile remains enjoyable. Before serving refrigerated leftovers, allow them to come to room temperature for about 15-20 minutes to soften the blue cheese and take the chill off the pear.
“Don’t miss our easy fruit pizza recipe for another fruit-based dessert that stores well.”
Preparing Components in Advance
For make-ahead convenience, you can prepare the components of your baked pear with blue cheese separately. The pears can be baked up to 48 hours in advance, cooled completely, and stored in an airtight container in the refrigerator. The berry mixture stays fresh for up to 24 hours when stored separately, though pomegranate seeds and firmer berries like blueberries maintain their texture better than softer berries.
Toasted walnuts can be prepared several days ahead and stored at room temperature in an airtight container. When ready to serve, gently reheat the pear in a 250°F oven for about 10 minutes or microwave it for 20-30 seconds, then assemble with the cold components as directed in the recipe.
Freezing Options and Considerations
Freezing a fully assembled baked pear with blue cheese dessert is not recommended as the texture of the berries and cheese will deteriorate significantly upon thawing. However, you can freeze the baked pear halves alone for up to one month. To do this, allow the baked pears to cool completely, then wrap each half individually in plastic wrap followed by aluminum foil or place in a freezer-safe container.
To use, thaw the pear overnight in the refrigerator, then gently reheat in a 300°F oven for about 15 minutes before assembling with fresh toppings. This method allows you to enjoy this elegant dessert with minimal preparation time even on busy evenings.
Variations: Creative Twists on Baked Pear with Blue Cheese
Seasonal Adaptations
The basic baked pear with blue cheese recipe serves as an excellent canvas for seasonal adaptations. In summer, replace some of the berries with fresh peaches, nectarines, or cherries for a bright, juicy variation. Fall calls for warming spices—try adding a pinch of cinnamon, nutmeg, or cardamom to the honey before drizzling it over the pear, or incorporate diced apples into the fruit mixture.
Winter versions benefit from the addition of citrus segments like blood orange or candied citrus peel. Spring variations might include edible flowers as a garnish or a touch of fresh mint. Each seasonal adaptation keeps the core concept of baked pear with blue cheese while embracing the unique produce available throughout the year.
Dietary Modifications
Adapting this baked pear with blue cheese recipe to accommodate various dietary needs is surprisingly straightforward. For a vegan version, substitute the honey with maple syrup or agave nectar and replace the blue cheese with a plant-based cheese alternative or a dollop of coconut yogurt mixed with nutritional yeast for umami.
Gluten-free diners can enjoy this dessert as is, though be careful if adding any granola or cookie toppings. For lower-sugar options, reduce or eliminate the honey and rely on the natural sweetness of the riper pears and berries. A keto-friendly adaptation might focus on the pear, blue cheese, and nuts while minimizing the higher-sugar fruits, perhaps substituting with berries only.
“Want more ideas? Check out mango panna cotta recipe for another customizable dessert.”
Gourmet Elevations
For special occasions, consider elevating your baked pear with blue cheese to create an even more impressive dessert. A drizzle of aged balsamic reduction adds sophisticated depth and visual contrast. For textural complexity, incorporate a layer of crushed amaretti cookies or almond praline between the pear and berry topping. A splash of liqueur in the honey—such as Frangelico, Grand Marnier, or amaretto—adds complexity to the sweetener.
For presentation, serve on a slate board with additional blue cheese, honey, and nuts artfully arranged around the pear. Consider serving with a quenelle of mascarpone or crème fraîche on the side. These refinements maintain the essence of the dish while transforming it into a restaurant-worthy finale to any gourmet meal.
Serving: Perfect Presentation for Baked Pear with Blue Cheese
Temperature and Timing Considerations
Serving temperature dramatically impacts the experience of enjoying baked pear with blue cheese. Ideally, serve the dessert when the pear is still warm (not hot) from the oven, as this creates the perfect contrast with the cool, fresh berries. The warmth also slightly softens the blue cheese, releasing its aromatic qualities and creating a subtle melt that enhances the creamy texture.
If you’ve prepared the components in advance, time your reheating to coincide with the end of your meal. Allow approximately 5-10 minutes between reheating the pear and serving—this gives the temperature time to moderate while you assemble the toppings. Remember that the dessert will continue to cool at the table, so slightly warmer is better than too cool when initially serving.
Plating Techniques for Visual Appeal
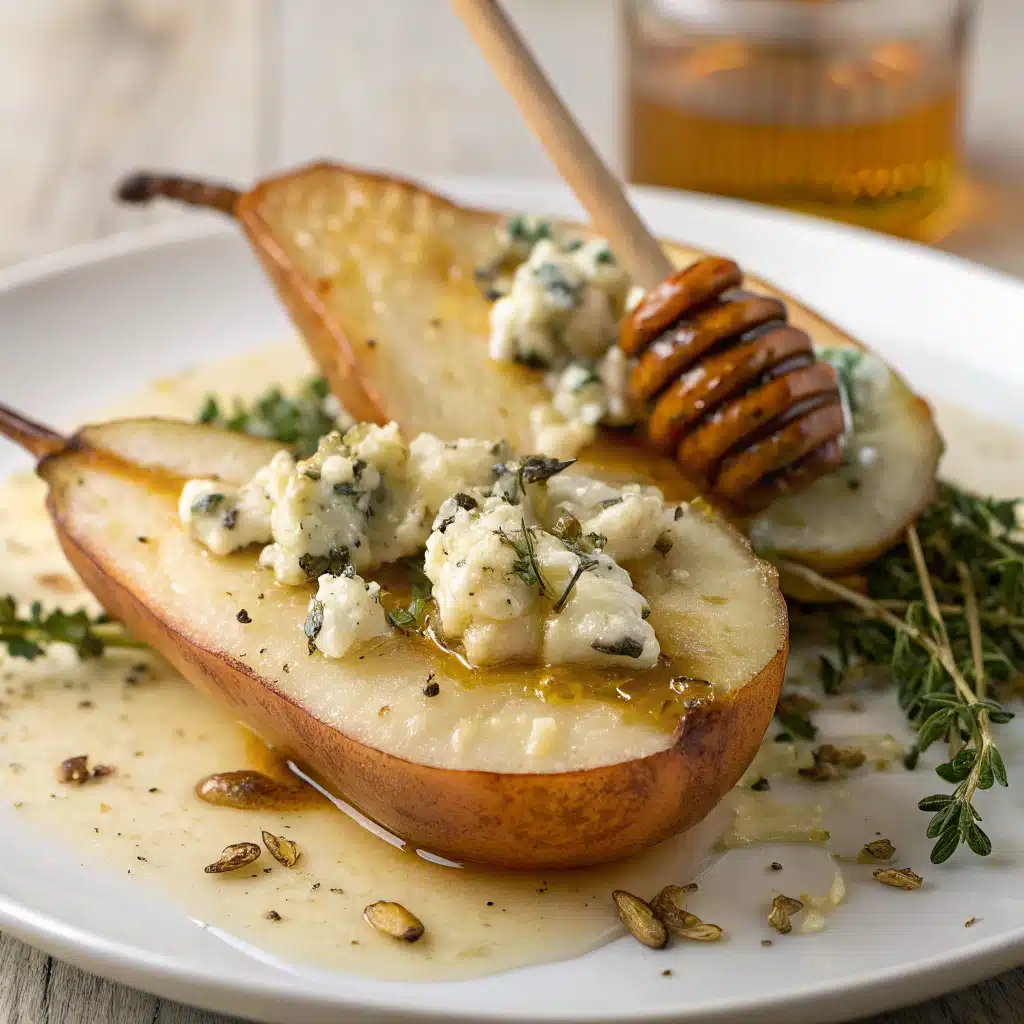
The visual presentation of your baked pear with blue cheese creates anticipation before the first bite. For maximum impact, use white or light-colored plates to showcase the vibrant colors of the berries against the golden baked pear. Position the pear half slightly off-center on the plate, with the cut side facing up at a slight angle toward the diner.
Arrange the berry mixture to cascade naturally over the pear rather than piling it too high. Scatter the walnuts primarily around the edges of the berries for visibility and texture contrast. Place the blue cheese crumbles last, positioning them where they’ll be visible against the darker berries. A final light drizzle of honey should trace a path over the entire creation, catching the light beautifully.
“Learn more about strawberry shortcake ice cream for another visually stunning dessert presentation.”
Accompaniments and Menu Pairings
While baked pear with blue cheese stands beautifully on its own, thoughtfully chosen accompaniments can enhance the experience. A small scoop of vanilla bean ice cream or a dollop of mascarpone on the side provides a creamy counterpoint to the warm fruit. A butter cookie or thin almond biscotti offers textural contrast and a vehicle for scooping up every last bit of the dessert.
When planning a full menu, this dessert follows beautifully after lighter main courses—particularly those featuring chicken, fish, or vegetarian options. The sweet-savory profile makes it an excellent bridge to a cheese course if one follows. For beverage pairings, consider a small glass of dessert wine like Sauternes or ice wine, or a hot herbal tea with honey notes to echo the flavors in the dish.
FAQs: Common Questions About Baked Pear with Blue Cheese
Can I replace blue cheese?
Absolutely! While blue cheese provides a distinctive tangy flavor that beautifully contrasts with the sweet pear, it’s not everyone’s preference. Excellent alternatives include creamy goat cheese, mascarpone mixed with a pinch of salt, ricotta with honey, or even a sharp white cheddar for a completely different but equally delicious flavor profile. Each alternative creates a unique dessert experience while maintaining the appealing sweet-savory balance.
What pears bake best?
Bartlett, Anjou, and Bosc pears are ideal for baking. These varieties maintain their shape during the heating process while becoming perfectly tender. Bartlett pears offer the sweetest flavor, Anjou provides a juicy texture with balanced sweetness, and Bosc pears have a firmer, more dense flesh that holds up extremely well to baking. Avoid overly ripe pears as they may become mushy during baking.
Can I make this dessert ahead?
Yes, you can prepare components ahead of time. The pear can be baked up to 48 hours in advance and refrigerated. The berry mixture stays fresh for 24 hours when refrigerated separately. Toasted walnuts can be prepared several days ahead and stored at room temperature in an airtight container. For best results, reheat the pear before assembly and add the blue cheese just before serving.
Can I use frozen berries?
Frozen berries can work in a pinch, but fresh berries provide superior texture and appearance. If using frozen, don’t thaw them completely—this prevents excessive juice release that could make the dessert soggy. Add frozen berries to the pear just before serving to minimize bleeding, and consider increasing the quantity slightly as frozen berries tend to collapse more than fresh ones.
Do baked pears store well?
Baked pears can be stored in an airtight container in the refrigerator for up to 3 days. The texture will soften further during storage, but the flavor remains enjoyable. For best results when using stored baked pears, gently reheat them before adding toppings to restore some of their original warmth and texture.
Can I serve it cold?
While this dessert is traditionally served warm, a cold version can be refreshing, especially in summer. If serving cold, assemble the dessert at least 30 minutes before serving to allow the blue cheese to soften slightly at room temperature, which improves its flavor. Consider adding an additional drizzle of honey just before serving to enhance sweetness, as cold temperatures can diminish perceived sweetness.
Conclusion: Why Baked Pear with Blue Cheese Deserves a Place in Your Recipe Collection
A Year-Round Versatile Dessert
The baked pear with blue cheese recipe deserves a permanent place in your culinary repertoire because of its remarkable versatility throughout the seasons. In winter, it provides a warming, comforting dessert that feels substantial without heaviness. During spring and summer, its fresh berry components and light nature make it refreshingly appropriate. Fall brings pears at their peak quality, creating the ideal time to showcase this fruit-forward dessert.
Furthermore, the recipe’s adaptability to different dietary needs—from vegan to gluten-free with simple substitutions—ensures you can serve it to almost any guest. Its ability to transform based on available ingredients makes it an excellent last-minute option when you need an impressive dessert without an extensive shopping trip.
“Check out lemon blueberry sheet cake for another versatile dessert option that works year-round.”
Balancing Simplicity and Sophistication
Perhaps the most compelling reason to embrace the baked pear with blue cheese dessert is its perfect balance between simplicity and sophistication. Despite its elegant appearance and complex flavor profile, this dessert requires minimal technical skill and just a handful of quality ingredients. The preparation time remains remarkably short, particularly if you’ve pre-baked the pears.
For home cooks looking to impress without stress, few desserts deliver such outstanding results with so little effort. Moreover, the natural, wholesome ingredients make this a healthier dessert option that still feels indulgent. By mastering this recipe, you gain a reliable, impressive finale for everything from casual family dinners to sophisticated dinner parties—a truly invaluable addition to any cook’s collection of trusted recipes.
PrintBaked Pear with Blue Cheese
This elegant dessert combines warm, caramelized pear with tangy blue cheese, fresh berries, and toasted walnuts for a perfect sweet-savory balance.
- Prep Time: 10
- Cook Time: 20
- Total Time: 30 minutes
- Yield: 1 1x
- Category: Dessert
- Cuisine: American
Ingredients
- ½ medium pear
- ½ lemon
- 1 teaspoon honey (divided)
- 2 tablespoons blueberries
- 2 tablespoons raspberries
- 2 tablespoons blackberries
- 2 tablespoons purple grapes, halved
- 1 tablespoon pomegranate seeds
- 3 strawberries, sliced
- 3 whole walnuts, chopped
- ½ tablespoon crumbled blue cheese
Instructions
- Preheat oven to 350°F. Cut pear in half and rub cut side with lemon.
- Place pear cut-side up on baking sheet and drizzle with ½ teaspoon honey.
- Toast chopped walnuts in dry skillet until fragrant.
- Bake pear for 15-20 minutes until tender and lightly caramelized.
- Combine all berries, grapes, and pomegranate seeds in a small bowl.
- Transfer warm baked pear to serving plate and top with berry mixture.
- Drizzle with remaining honey, sprinkle with toasted walnuts and blue cheese.
- Serve immediately while warm.
Notes
Nutrition facts are estimates and may vary based on ingredients used, portion sizes, and preparation methods.
Nutrition
- Serving Size: 1
- Calories: 220 Kcal
- Sugar: 24g
- Sodium: 105mg
- Fat: 9g
- Saturated Fat: 2g
- Carbohydrates: 32g
- Fiber: 6g
- Protein: 4g
- Cholesterol: 5mg
Keywords: baked pear, blue cheese dessert, fruit dessert, pear recipe
Let’s connect! Follow me for more Joylicious Recipes: Facebook, Instagram, Pinterest