Ultimate Coconut Shrimp Crispy Recipe: Restaurant-Quality Results at Home
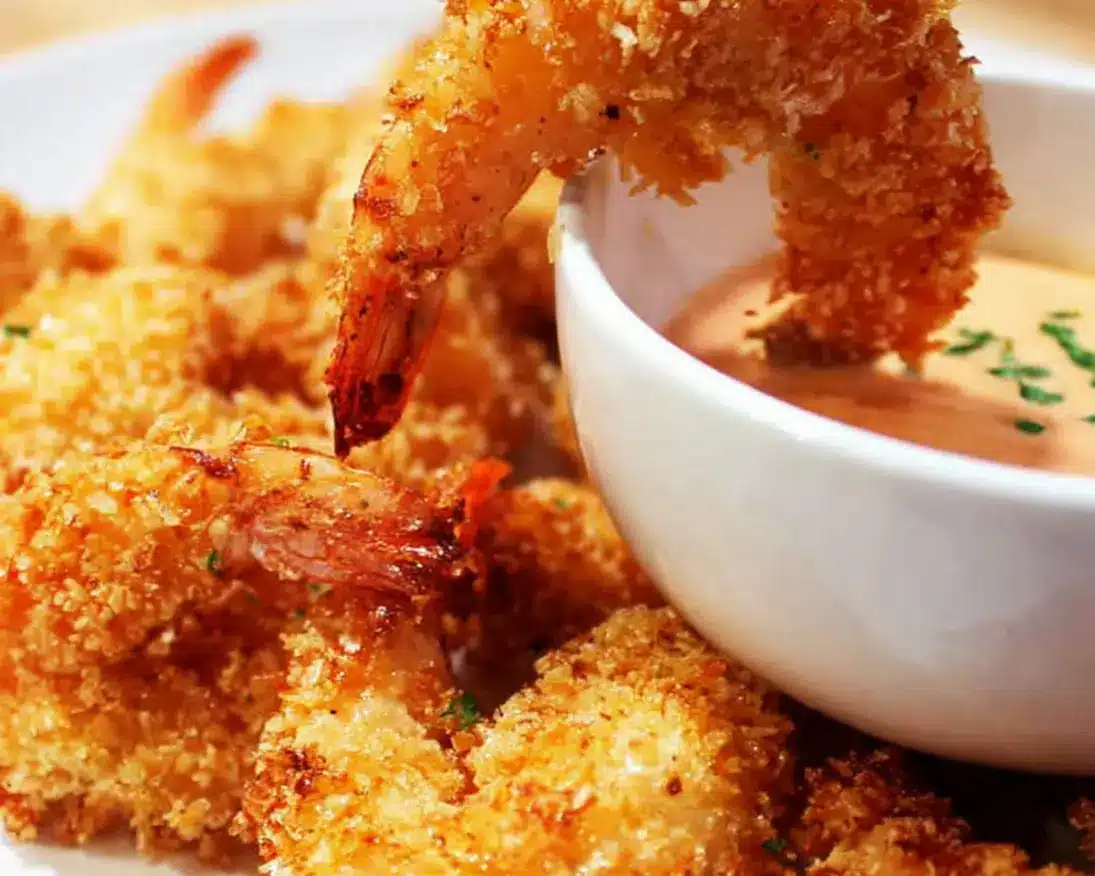
Coconut shrimp crispy perfection is within your reach with this restaurant-quality recipe that delivers exceptional results every time. The combination of sweet coconut and crunchy panko creates an irresistible texture that will have everyone reaching for seconds.
Whether you’re planning a casual dinner or looking for an impressive appetizer, these golden-brown beauties deliver maximum flavor with minimal effort. Let’s dive into creating this tropical-inspired seafood dish that’s guaranteed to become a family favorite.
Tropical Treasure: Your Coconut Shrimp Ingredients
Quality Components for Superior Crunch
The secret to truly exceptional coconut shrimp lies in selecting the right ingredients. Fresh, high-quality shrimp forms the foundation of this dish, while the breading elements work together to create that signature crunch.
| Ingredient | Amount | Notes |
|---|---|---|
| Large shrimp | 1 pound | Peeled and deveined, tail-on preferred for easier handling |
| Shredded coconut | 1 cup | Sweetened or unsweetened based on preference |
| All-purpose flour | 1/2 cup | Creates the initial adhesive layer |
| Large eggs | 2 | Beaten until smooth |
| Panko breadcrumbs | 1 cup | Japanese-style for extra crispiness |
| Salt | To taste | Approximately 1/2 teaspoon |
| Black pepper | To taste | Approximately 1/4 teaspoon |
| Vegetable oil | For frying | About 2-3 cups depending on pan size |
Optional Dipping Sauce Ingredients
While these coconut shrimp are delicious on their own, a complementary dipping sauce elevates them to new heights. Consider preparing one of these options:
| Sauce Type | Key Ingredients |
|---|---|
| Sweet Chili Sauce | Store-bought or homemade with honey, red pepper flakes, and vinegar |
| Pineapple Dip | Crushed pineapple, mayo, honey, and a dash of lime juice |
| Mango Salsa | Fresh diced mango, red onion, cilantro, lime juice, and jalapeño |
Golden Perfection: Crafting Your Crispy Coconut Shrimp
The Essential Breading Technique
Follow these steps carefully to achieve the perfect texture and ensure your coconut shrimp crispy coating adheres beautifully to each piece.
- Pat the shrimp dry thoroughly with paper towels to remove excess moisture, which is essential for proper breading adhesion.
- Season shrimp evenly with salt and pepper, ensuring each piece receives flavor before the breading process begins.
- Set up a three-step breading station: place flour in the first shallow dish, beaten eggs in the second, and a well-mixed combination of shredded coconut and panko breadcrumbs in the third.
- Working with one shrimp at a time, dredge it first in the flour, shaking off any excess to prevent clumping.
- Dip the floured shrimp into the beaten eggs, allowing any excess to drip back into the bowl for an even coating.
- Finally, press the shrimp firmly into the coconut-panko mixture, ensuring complete coverage and gently pressing the coating to adhere properly.
- Heat vegetable oil in a deep skillet or frying pan over medium-high heat until it reaches approximately 350°F (175°C).
- Carefully place several breaded shrimp into the hot oil, being careful not to overcrowd the pan which would lower the oil temperature.
- Fry the shrimp until they develop a beautiful golden-brown color and crispy texture, about 2 minutes per side, adjusting heat as needed.
- Using a slotted spoon, transfer the fried shrimp to a plate lined with paper towels to absorb excess oil.
- Serve immediately while hot and crispy, accompanied by your favorite dipping sauce for maximum enjoyment.
“The classic shrimp salad recipe technique offers similar staged-cooking approaches to prevent burning while developing maximum flavor.”
Expert Insights: Mastering Your Coconut Shrimp
Pro Tips for Perfect Results Every Time
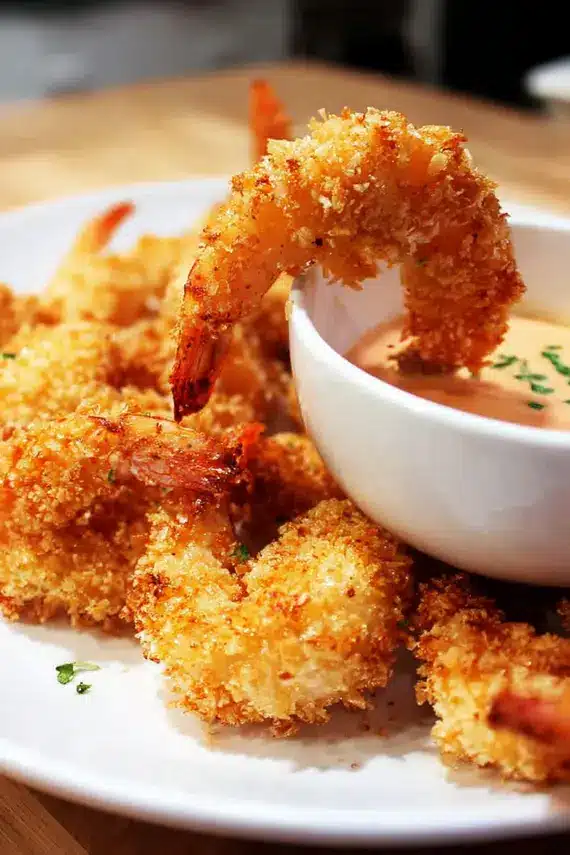
These professional tips will help you achieve restaurant-quality coconut shrimp with that signature crispy exterior and juicy interior:
- Temperature matters: Ensure your oil maintains a consistent 350°F (175°C) throughout the cooking process. Too hot, and the coating burns before the shrimp cooks; too cool, and the shrimp become oil-soaked and soggy.
- Double-dredge for extra crunch: For an even crispier result, repeat the egg and coconut-panko steps a second time for a thicker coating.
- Toast your coconut: For enhanced flavor, lightly toast half the coconut flakes in a dry skillet before mixing with the panko.
- Keep them separated: After breading, arrange shrimp on a baking sheet without touching to prevent the coating from sticking together before frying.
- Work in batches: Avoid overcrowding the pan, which lowers oil temperature and creates steam that softens the crispy coating.
- Maintain crispy texture: If making ahead for a party, keep finished shrimp warm in a 200°F (95°C) oven on a wire rack to maintain crispness.
- Test oil readiness: Drop a small piece of bread into the oil – if it sizzles immediately and turns golden in about 30 seconds, your oil is ready for frying.
“The perfect roasted cauliflower technique technique offers similar controlled-heat principles that can be applied to other crispy foods.”
Freshness Matters: Proper Storage Guidelines
Maintaining Quality and Texture
While coconut shrimp are best enjoyed immediately after cooking for maximum crispiness, sometimes you’ll have leftovers that need proper storage:
For refrigerator storage, allow the coconut shrimp to cool completely before placing them in an airtight container lined with paper towels to absorb moisture. Properly stored, they’ll remain good for up to 3 days in the refrigerator. Note that the crispy texture will naturally diminish over time.
When reheating, avoid the microwave which will make the coating soggy. Instead, place the shrimp on a baking sheet in a preheated 350°F (175°C) oven for 7-10 minutes until heated through and re-crisped.
“The garlic noodle preservation method technique offers similar insights for maintaining texture in stored foods.”
Freezing Options
You can freeze uncooked breaded shrimp for future use. After breading, arrange them in a single layer on a parchment-lined baking sheet and freeze until solid, about 2 hours. Transfer to freezer bags and store for up to 2 months. When ready to cook, fry directly from frozen, adding an extra minute or two to the cooking time.
For cooked shrimp, freezing is possible but will impact the texture. If needed, freeze in a single layer, then transfer to airtight containers for up to 1 month. Reheat from frozen in a 375°F (190°C) oven until heated through, about 12-15 minutes.
Delicious Twists: Coconut Shrimp Variations
Creative Adaptations for Every Palate
The basic coconut shrimp recipe is wonderfully versatile. Here are some exciting variations to try:
Baked Version: For a lighter alternative, arrange breaded shrimp on a wire rack set over a baking sheet. Spray with cooking oil and bake at 425°F (220°C) for 10-12 minutes, flipping halfway through, until golden brown and crispy.
Air Fryer Method: Place breaded shrimp in a single layer in your air fryer basket, spray lightly with oil, and cook at 380°F (193°C) for 8-10 minutes, shaking halfway through cooking time.
Spicy Coconut Shrimp: Add 1 teaspoon of cayenne pepper or red pepper flakes to your coconut-panko mixture for a heat-infused variation that balances the sweet coconut.
Curry Coconut Shrimp: Mix 2 teaspoons of curry powder into your flour for an aromatic twist that pairs beautifully with the sweet coconut exterior.
Lime-Infused Coating: Add 1 tablespoon of lime zest to your coconut-panko mixture for a bright, citrusy note that enhances the tropical flavor profile.
“The protein cooking techniques technique offers similar flavor-enhancing approaches that work well with seafood recipes.”
Perfect Pairings: Serving Your Coconut Shrimp
Elevating Your Seafood Experience
Transform your coconut shrimp crispy masterpiece into a complete meal with these serving suggestions:
Tropical Rice Bowl: Serve your coconut shrimp over coconut rice with diced mango, avocado, and a drizzle of sweet chili sauce for a complete meal with island vibes.
Fresh Citrus Salad: Pair with a light salad of mixed greens, orange segments, thin-sliced red onions, and a citrus vinaigrette for a refreshing contrast to the rich shrimp.
Appetizer Platter: Arrange coconut shrimp on a serving board alongside fresh pineapple chunks, several dipping sauces, and lime wedges for an impressive starter at your next gathering.
Taco Twist: Stuff crispy coconut shrimp into warm tortillas with mango slaw and chipotle mayo for a creative fusion taco night option that everyone will love.
Asian-Inspired Bowl: Serve over rice noodles with julienned vegetables and a peanut-coconut sauce for an Asian-inspired dish that highlights the coconut flavor profile.
“The Asian fusion serving style technique offers similar complementary flavor combinations that work beautifully with seafood.”
FAQ
Why isn’t my coconut shrimp coating sticking properly?
The most common reason for coating not adhering is moisture on the shrimp. Make sure to pat the shrimp completely dry before starting the breading process. Also, follow the correct order: flour first (it acts as a glue), then egg, then the coconut-panko mixture. Pressing the coating gently onto each shrimp also helps it stick better.
Can I use frozen shrimp for this recipe?
Yes, frozen shrimp work perfectly well. Just ensure they’re fully thawed, then pat them completely dry before breading. Removing excess moisture is crucial for a crispy result. For best results, use raw frozen shrimp rather than pre-cooked, as cooking twice can make the shrimp tough and rubbery.
What’s the best oil for frying coconut shrimp?
Vegetable oil, canola oil, and peanut oil all work well for frying coconut shrimp due to their high smoke points. Coconut oil can also be used for an additional layer of coconut flavor, though it’s more expensive. Avoid olive oil, which has too low a smoke point for deep frying and can impart an unwanted flavor.
How do I know when coconut shrimp are fully cooked?
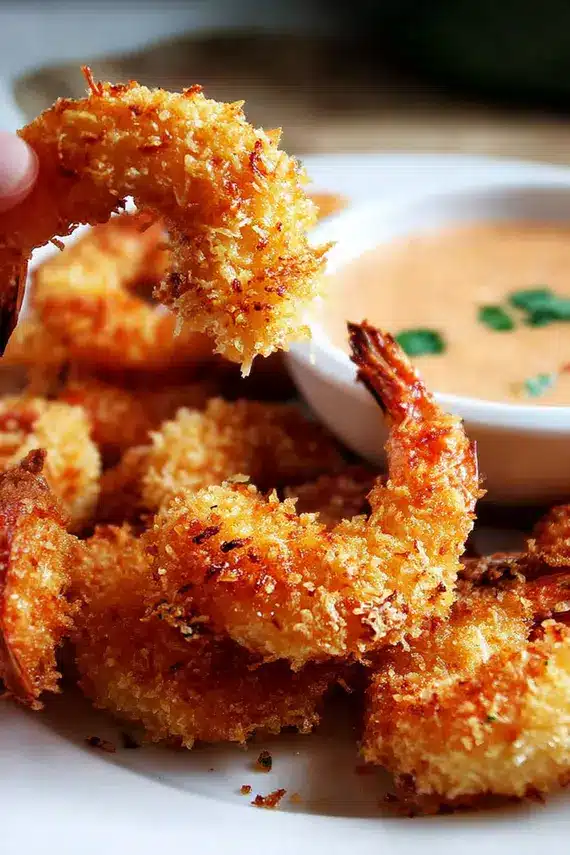
Properly cooked shrimp will turn from translucent gray to opaque white with a hint of pink. They’ll also form a “C” shape when fully cooked. This typically takes about 2 minutes per side when frying at 350°F (175°C). If you’re unsure, cut one open – it should be completely opaque with no translucent parts in the center.
Why is my coconut shrimp burning before cooking through?
This usually indicates your oil is too hot. Use a cooking thermometer to maintain oil at 350°F (175°C). If you don’t have a thermometer, test with a small piece of bread – it should sizzle and turn golden in about 30 seconds. Also, coconut can burn quickly because of its sugar content, so if using sweetened coconut, consider mixing it thoroughly with the panko to help prevent burning.
Tropical Delight: Coconut Shrimp Success
Your New Signature Dish
Creating restaurant-quality coconut shrimp crispy enough to impress any guest is well within your reach with this detailed guide. The combination of sweet coconut, crunchy panko, and succulent shrimp creates a memorable dish that works equally well as an appetizer or main course.
Remember that achieving the perfect golden exterior while maintaining juicy shrimp inside is all about temperature control and proper breading technique. With practice, this tropical-inspired seafood dish will become one of your signature recipes that friends and family request again and again.
From casual weeknight dinners to special occasions, these coconut shrimp deliver impressive results without complicated techniques, proving that sometimes the simplest recipes create the most extraordinary flavors.
Crispy Coconut Shrimp
Coconut shrimp crispy perfection is within your reach with this restaurant-quality recipe that delivers exceptional results every time. The combination of sweet coconut and crunchy panko creates an irresistible texture that will have everyone reaching for seconds.
Category: Dinner
Cuisine: American
Calories: 310 kcal
Ingredients
- 1 pound large shrimp, peeled and deveined
- 1 cup shredded coconut
- 1/2 cup all-purpose flour
- 2 eggs, beaten
- 1 cup panko breadcrumbs
- Salt and pepper to taste
- Vegetable oil for frying
Equipment
- Mixing Bowl
- Measuring Cups
- Cooking Tool
Instructions
- Pat the shrimp dry with paper towels.
- Season shrimp with salt and pepper.
- Set up three bowls: flour, beaten eggs, and a mixture of shredded coconut and panko.
- Dredge each shrimp in flour, then dip in egg.
- Coat thoroughly with coconut-panko mixture, pressing gently to adhere.
- Heat oil to 350°F (175°C) in a deep skillet.
- Fry shrimp until golden and crispy, about 2 minutes per side.
- Drain on paper towels and serve immediately with dipping sauce.
Notes
- For extra crunch, double-dredge the shrimp in egg and coconut mixture. The shrimp can also be baked at 425°F for 10-12 minutes or air-fried at 380°F for 8-10 minutes for a lighter version.
Let’s connect! Follow me for more Joylicious Recipes: Facebook, Instagram, Pinterest