Tantalizing Lemon Garlic Chicken Kiev: A Citrus Twist on a Classic
A Perfect Blend of Crunch and Flavor
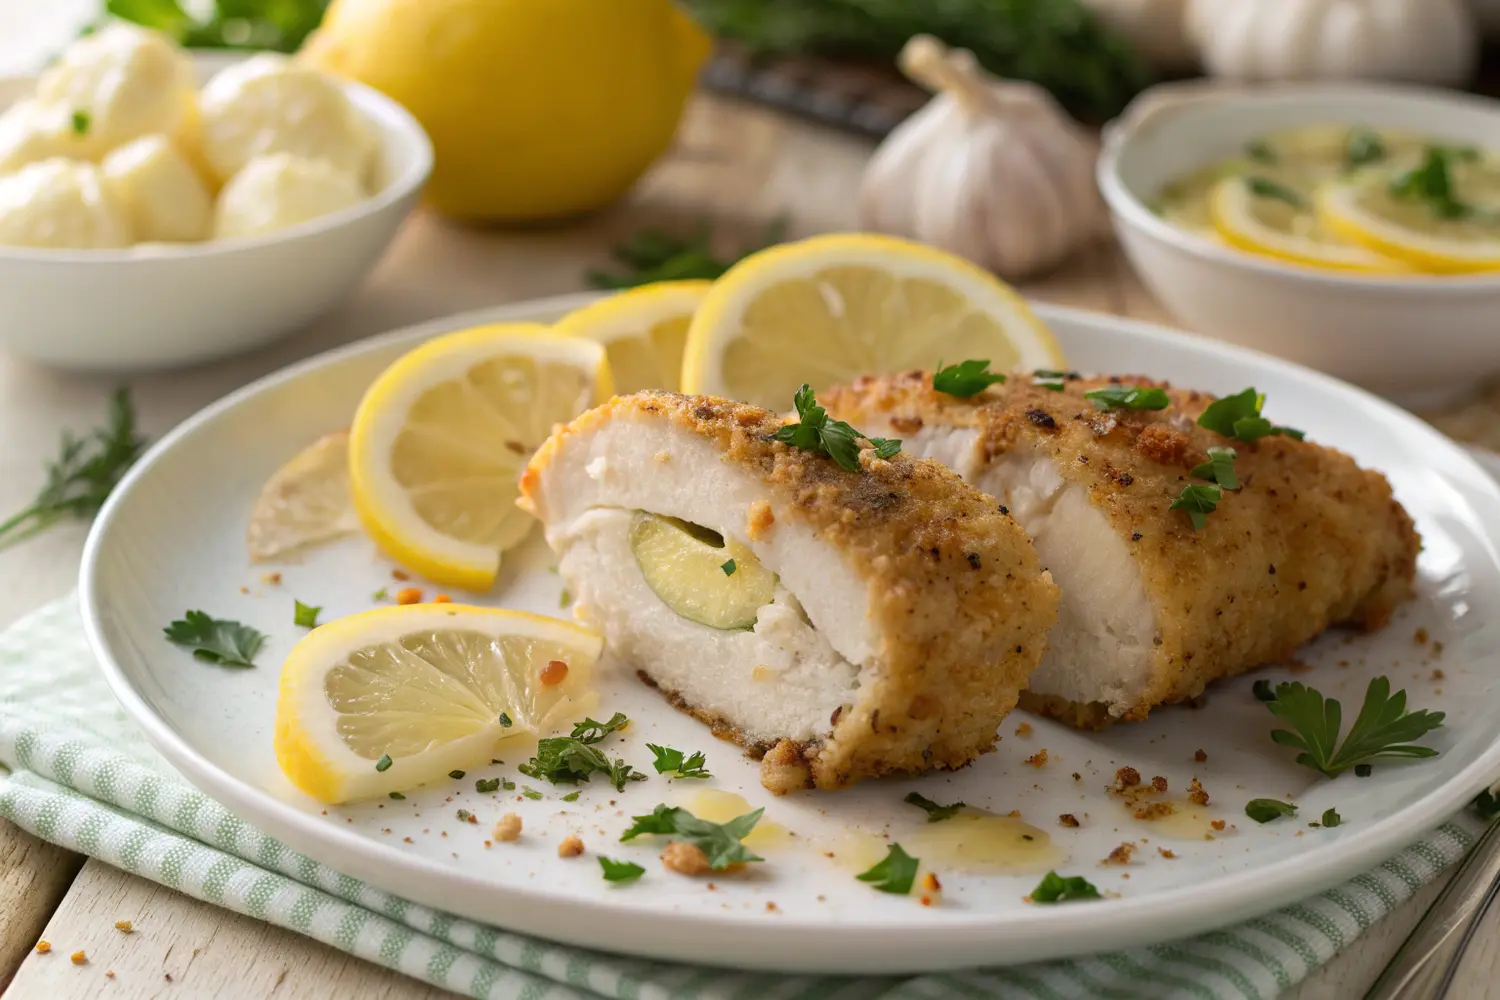
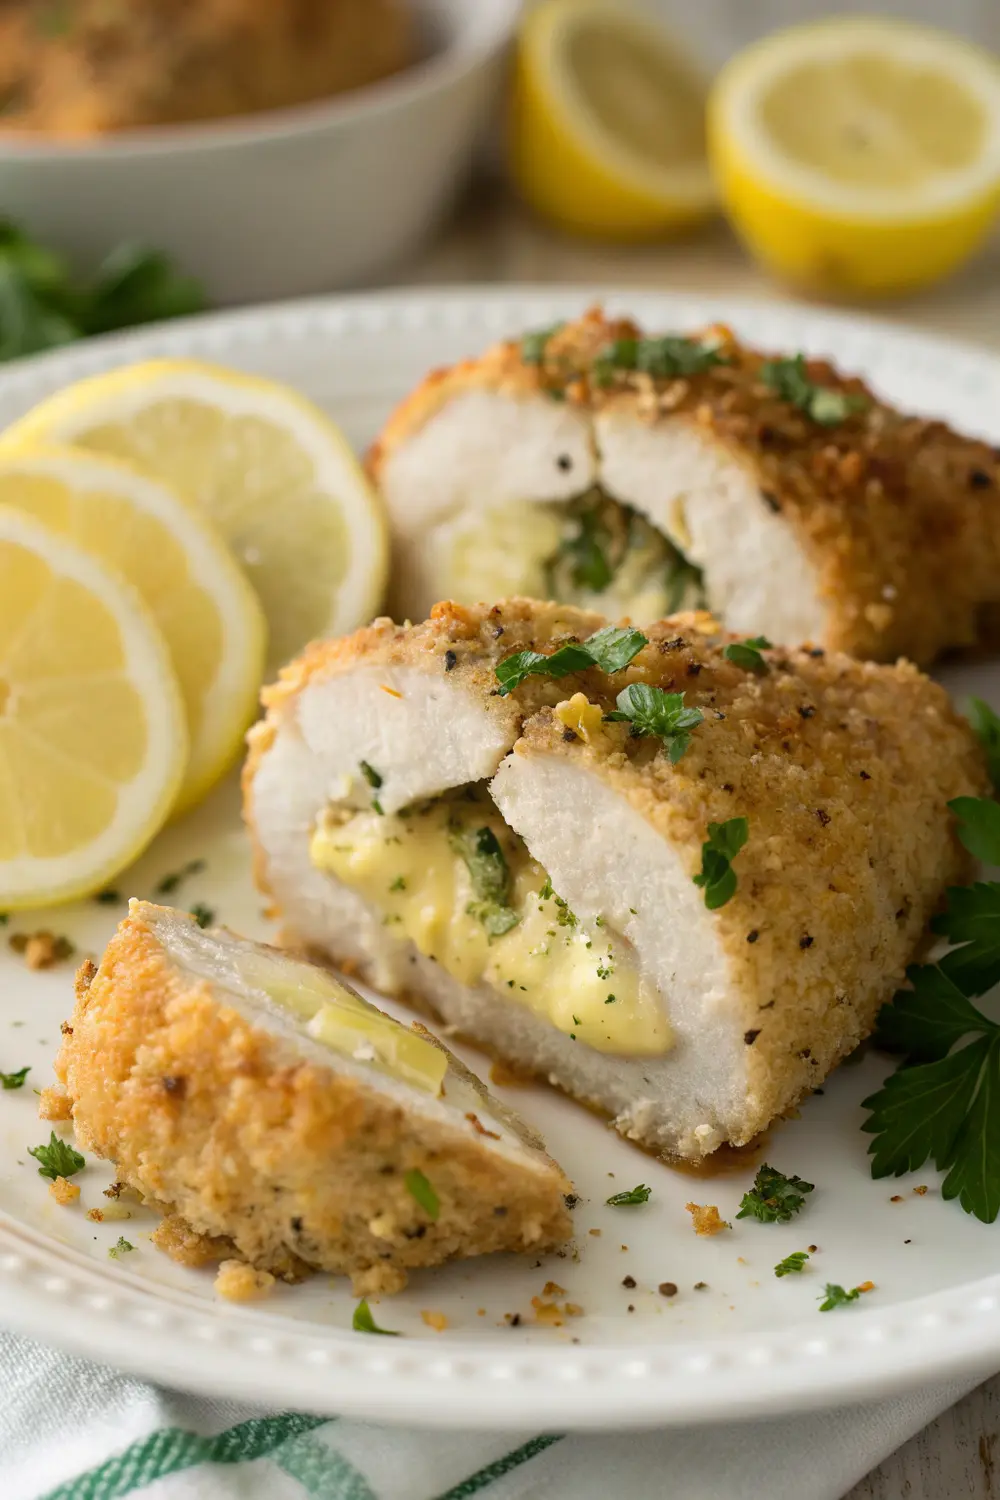
Lemon garlic chicken kiev brings a bright, citrusy spin to the traditional Ukrainian dish that everyone adores. This version maintains the iconic crispy exterior and buttery interior while introducing refreshing lemon notes and aromatic garlic that elevate the classic recipe to new heights. The contrasting textures of the crunchy coating and the herb-infused butter that oozes out with each cut make this dish truly special.
“The Garlic Butter Chicken Bites technique offers similar flavor combinations but in a quick-cooking, bite-sized format.”
This elegant yet approachable dish is perfect for weekend dinners when you want to impress without spending hours in the kitchen. It’s versatile enough for a cozy family meal but sophisticated enough for entertaining guests. Serve it on a bed of fluffy mashed potatoes or alongside a fresh green salad to create a well-rounded dinner that everyone will rave about.
Essential Components for the Perfect Chicken Kiev
Core Ingredients and Flavor Enhancers
Creating the perfect lemon garlic chicken kiev requires quality ingredients that work together to deliver that signature combination of crispy exterior and flavorful, butter-filled interior. Here’s everything you’ll need to prepare this delightful dish:
| Ingredient Category | Items |
|---|---|
| Main Protein | 4 boneless, skinless chicken breasts (about 6-8 oz each) |
| Compound Butter | 4 tbsp unsalted butter, softened 2 cloves garlic, minced Zest of 1 lemon 1 tbsp fresh lemon juice 2 tbsp fresh parsley, chopped ½ tsp sea salt ¼ tsp white pepper (for a cleaner look) |
| Breading Station | ½ cup all-purpose flour 1 tsp garlic powder (optional, for extra flavor) 2 large eggs, beaten 1 tbsp water (to thin egg mixture) 1 cup panko breadcrumbs (for extra crunch) ½ cup regular breadcrumbs 1 tbsp lemon zest (optional, for coating) |
| Seasonings | 1 tsp kosher salt ½ tsp black pepper ½ tsp dried thyme (optional) ¼ tsp paprika (for color and flavor) |
| For Cooking | 2 tbsp olive oil (for pan-searing) 1 tbsp butter (for added flavor while searing) |
| Optional Garnishes | Lemon wedges Fresh parsley, chopped Flaky sea salt |
“For a lighter version with similar bright flavors, you might enjoy trying the Lemon Rosemary Chicken which uses many of the same aromatics but with a different preparation method.”
Master the Art of Creating Perfect Lemon Garlic Chicken Kiev
Detailed Preparation Guide
Follow these comprehensive steps to create chicken kiev that’s crispy on the outside with a pocket of flavorful lemon garlic butter on the inside:
- Preheat your oven to 375°F (190°C) and line a baking sheet with parchment paper or a silicone mat. Place an oven-safe wire rack on top if available for maximum crispiness.
- Prepare the compound butter by combining softened butter, minced garlic, lemon zest, lemon juice, chopped parsley, and a pinch of salt and white pepper in a small bowl. Mix thoroughly until well combined. Shape the mixture into a small rectangle on a piece of plastic wrap, wrap tightly, and freeze for 15 minutes until firm but not completely frozen.
- While the butter chills, place each chicken breast between two sheets of plastic wrap or parchment paper. Using a meat mallet or rolling pin, gently pound the chicken to an even thickness of about ¼-inch, being careful not to tear the meat. Season both sides with salt and pepper.
- Remove the chilled compound butter from the freezer and cut into 4 equal portions. Place one portion in the center of each flattened chicken breast. Carefully fold the sides of the chicken over the butter, then roll it up, ensuring the butter is completely enclosed. Secure with toothpicks if needed.
- Set up your breading station: Place flour seasoned with a pinch of salt and pepper in one shallow dish, beaten eggs mixed with a tablespoon of water in a second dish, and combined breadcrumbs (regular and panko) in a third dish. For extra flavor, add the optional lemon zest and herbs to the breadcrumb mixture.
- Carefully coat each chicken roll in flour, shaking off excess. Next, dip in the egg mixture, allowing excess to drip off. Finally, roll in the breadcrumb mixture, pressing gently to ensure an even coating. For an extra-crispy coating, repeat the egg and breadcrumb steps.
- Heat olive oil and butter in a large oven-safe skillet over medium-high heat. Once hot, carefully add the breaded chicken rolls and sear for 2-3 minutes on each side until golden brown. Work in batches if necessary to avoid overcrowding.
- Transfer the skillet to the preheated oven (or move chicken to the prepared baking sheet). Bake for 15-20 minutes or until the chicken reaches an internal temperature of 165°F (74°C) and juices run clear. The exact cooking time will depend on the thickness of your chicken.
- Remove from the oven and let the chicken rest for 5 minutes before serving. This resting period is crucial as it allows the juices to redistribute throughout the meat and the butter to settle.
- Carefully remove any toothpicks, slice the chicken kiev on a diagonal to reveal the butter center, and garnish with fresh parsley and lemon wedges before serving.
“If you prefer a simpler preparation with similar bright lemon and garlic flavors, the Lemon Garlic Chicken Pitas offer a casual alternative that’s perfect for weeknight meals.”
Expert Tricks for Spectacular Chicken Kiev Success
Avoid Common Pitfalls with These Pro Tips
Make your lemon garlic chicken kiev exceptional with these helpful tips from experienced home chefs:
- Prevent Butter Leakage: Freeze the compound butter for at least 15 minutes before using, and ensure the chicken is properly sealed around it. Double-checking your wrapping technique can save you from disappointing butter loss during cooking.
- Perfect Thickness: Pound the chicken evenly to about ¼-inch thickness. Too thin and it may tear; too thick and it won’t cook evenly or roll properly around the butter.
- Secure Your Kiev: If your chicken rolls seem to be unwrapping, use toothpicks to secure them before breading. Just remember to remove them before serving!
- Double Dredging: For an extra-crispy coating, consider double-dipping in the egg wash and breadcrumbs. This creates a sturdier shell that helps prevent butter leakage.
- Temperature Matters: Let the chicken sit at room temperature for 10-15 minutes before cooking. This helps it cook more evenly and reduces the risk of having a perfectly crispy exterior but undercooked interior.
- Rest Before Slicing: Allow the chicken kiev to rest for 5 minutes after baking. This gives the butter time to slightly set so it doesn’t all run out when you cut into it, resulting in a more enjoyable dining experience.
- Use a Meat Thermometer: The safest way to ensure your chicken is perfectly cooked without cutting into it (and losing the butter) is to use an instant-read meat thermometer inserted into the thickest part of the chicken (not the butter pocket). The chicken is done when it reaches 165°F (74°C).
Keeping Your Lemon Garlic Chicken Kiev Fresh and Delicious
Storage and Reheating Guidelines
Proper storage is key to maintaining the quality of your lemon garlic chicken kiev, whether you have leftovers or want to prepare components ahead of time:
For cooked chicken kiev, allow it to cool completely before storing in an airtight container in the refrigerator for up to 3 days. The crispy coating will soften somewhat in the refrigerator, but the flavor will remain delicious. To reheat, place the chicken kiev on a wire rack over a baking sheet and warm in a 350°F (175°C) oven for about 15 minutes or until heated through. Avoid microwave reheating as it will make the breading soggy.
If you’d like to prepare components ahead of time, the compound butter can be made up to a week in advance and stored in the refrigerator, or frozen for up to a month. Simply shape the butter into a log, wrap in plastic wrap or parchment paper, and store until needed. This advance preparation makes assembly much quicker on cooking day.
For make-ahead convenience, you can prepare the chicken kiev completely up through the breading step, then refrigerate for up to 24 hours before cooking. Place the breaded, uncooked chicken on a parchment-lined tray, cover loosely with plastic wrap, and refrigerate. When ready to cook, simply follow the searing and baking instructions as written, adding about 5 minutes to the baking time since you’re starting with cold chicken.
“The Garlic Parmesan Chicken Pasta makes excellent use of similar flavor combinations and can be a great way to repurpose any leftover chicken kiev for a completely different meal the next day.”
Delightful Twists on the Classic Chicken Kiev
Creative Variations to Keep Things Interesting
While traditional lemon garlic chicken kiev is magnificent on its own, these variations offer exciting new flavor profiles while maintaining the essence of the dish:
Herb Garden Kiev: Enhance the herb profile by adding 1 tablespoon each of fresh dill, chives, and tarragon to the compound butter. This garden-fresh version is perfect for spring and summer meals, creating a vibrant burst of herbaceous notes with each bite.
Mediterranean Kiev: Transform your chicken kiev with Mediterranean flavors by adding 2 tablespoons of crumbled feta cheese, 1 tablespoon of finely chopped sun-dried tomatoes, and 1 teaspoon of dried oregano to the butter mixture. The tangy feta melts beautifully alongside the herb butter for an exciting flavor combination.
Spicy Citrus Kiev: Add some heat to your chicken kiev by incorporating 1 teaspoon of red pepper flakes and the zest of one orange along with the lemon in your compound butter. The combination of citrus and spice creates a warming sensation that’s especially welcome during colder months.
Parmesan-Crusted Kiev: Add ¼ cup of finely grated Parmesan cheese to your breadcrumb mixture for an extra layer of savory flavor. The cheese creates a more golden, crispy exterior with a delicious umami boost that complements the lemon and garlic beautifully.
Gluten-Free Kiev: Make this dish accessible to those with gluten sensitivities by substituting the all-purpose flour with rice flour and using gluten-free breadcrumbs or crushed Rice Chex. The result is just as crispy and delicious as the original version.
Air Fryer Kiev: For a lighter version with less oil, prepare the chicken kiev as directed through the breading step, then cook in an air fryer at 375°F (190°C) for about 16-18 minutes, flipping halfway through. Spray the breaded chicken lightly with cooking spray before air frying to help achieve that golden-brown exterior.
Presenting Your Lemon Garlic Chicken Kiev With Style
Elegant Plating and Perfect Pairings
Enhance your dining experience with these beautiful serving suggestions for your lemon garlic chicken kiev:
For an elegant dinner presentation, place a sliced chicken kiev on a warmed plate with the butter visible, nestled alongside creamy mashed potatoes that can capture any escaping butter sauce. Add color and freshness with steamed asparagus or broccolini arranged artfully on the side. Finish with a light sprinkle of microgreens or fresh herbs and a wedge of lemon for an extra touch of brightness.
When serving for a family meal, consider creating a composed plate with roasted baby potatoes and a medley of colorful roasted vegetables like bell peppers, zucchini, and cherry tomatoes. The roasted vegetables provide a wonderful contrast to the rich chicken kiev and absorb any of the flavorful butter that escapes when cutting into the chicken.
For a lighter option, serve your chicken kiev over a bed of peppery arugula dressed with a lemon dill vinaigrette that complements the flavors in the chicken perfectly. The warmth of the chicken will slightly wilt the greens, creating a delicious warm salad experience.
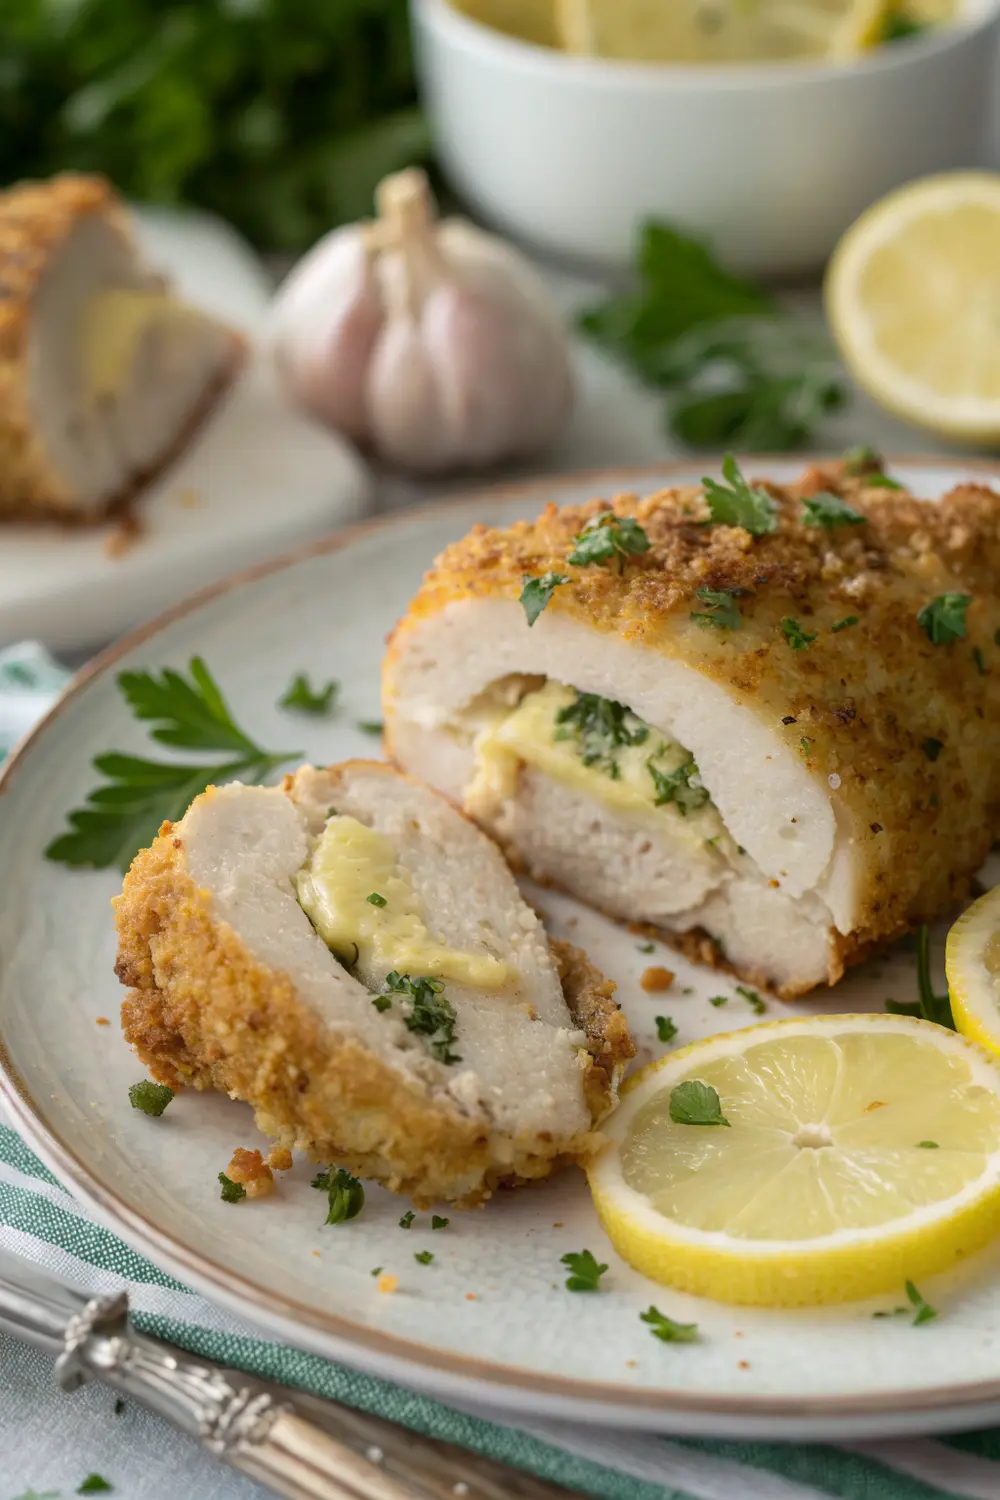
If you’re entertaining, slice the chicken kiev on a diagonal to reveal the butter center, and arrange on a large platter surrounded by various sides for a family-style presentation. Include small bowls of extra lemon wedges and fresh herbs so guests can customize their plates.
For portion sizing, one chicken kiev per person is typically sufficient as a main course, though you may want to prepare extra for hearty eaters or those who might want seconds of this delicious dish. The combination of protein, butter, and breading makes it quite satisfying, especially when paired with complementary side dishes.
Common Questions About Lemon Garlic Chicken Kiev
Expert Answers to Your Kiev Concerns
Why does the butter leak out of my chicken kiev when cooking?
There are several potential causes for butter leakage. First, ensure your butter is properly chilled or even frozen before placing it inside the chicken. Second, check that you’ve completely sealed the chicken around the butter—any gaps will allow butter to escape. Finally, make sure your chicken is pounded to an even thickness so it cooks uniformly without developing weak spots. Double-dipping in breadcrumbs can also create a stronger barrier against leakage.
Can I prepare chicken kiev in advance for a dinner party?
Absolutely! You can prepare chicken kiev up to the breading stage a day ahead. Complete all steps through breading, then place on a parchment-lined baking sheet, cover loosely with plastic wrap, and refrigerate. When ready to cook, simply follow the searing and baking instructions, adding about 5 minutes to the baking time since the chicken will be cold from the refrigerator. This advance preparation makes dinner party hosting much more manageable.
What’s the best way to reheat leftover chicken kiev without drying it out?
To maintain moisture and some crispiness, reheat leftover chicken kiev in a 350°F (175°C) oven on a wire rack over a baking sheet for about 15 minutes or until heated through. The wire rack helps air circulate around the chicken, preventing a soggy bottom. Avoid microwave reheating as it will make the breading soggy and may cause the remaining butter to leak out too quickly. If you’re in a hurry, you can slice the cold chicken kiev and gently warm the slices in a skillet over medium-low heat.
Bring Citrusy, Buttery Elegance to Your Dinner Table
A Memorable Meal Worth Mastering
Lemon garlic chicken kiev represents the perfect balance between everyday comfort and special-occasion elegance. With its crispy golden exterior, tender chicken, and that magical moment when the aromatic herb-infused butter oozes out with each slice, it’s a dish that creates lasting impressions and happy diners. The bright notes of lemon perfectly cut through the richness of the butter, while the garlic adds depth and complexity to every bite.
While it might seem intimidating at first, the techniques you’ve learned in this guide—from properly pounding the chicken to creating the perfect compound butter and achieving that golden crust—are versatile skills that will serve you well in many other culinary adventures. The effort is more than worth it when you see the delighted expressions of those enjoying your creation.
“The Grilled Lemon Herb Chicken offers another delicious way to enjoy these bright citrus flavors in a more casual, outdoor-friendly preparation that’s perfect for summer entertaining.”
We encourage you to try this lemon garlic chicken kiev recipe soon, perhaps for your next weekend dinner or special gathering. With a little practice, it might just become one of your signature dishes—one that friends and family specifically request when they come to visit. Enjoy the process, embrace the learning experience, and most importantly, savor every butter-soaked, lemony, garlicky bite!
PrintLemon Garlic Chicken Kiev

A citrus twist on the classic chicken kiev featuring bright lemon and aromatic garlic.
Crispy golden exterior with a hidden pocket of herb-infused butter that creates a luxurious sauce.
The perfect balance of elegant and approachable for special dinners or weekend meals.
- Prep Time: 30
- Cook Time: 25
- Total Time: 55 minutes
- Yield: 4 servings 1x
- Category: Dinner
- Method: Baking
- Cuisine: European-Inspired
Ingredients
- 4 boneless, skinless chicken breasts (6–8 oz each)
- 4 tbsp unsalted butter, softened
- 2 cloves garlic, minced
- Zest of 1 lemon
- 1 tbsp fresh lemon juice
- 2 tbsp fresh parsley, chopped
- ½ tsp sea salt
- ¼ tsp white pepper
- ½ cup all-purpose flour
- 1 tsp garlic powder (optional)
- 2 large eggs, beaten
- 1 tbsp water
- 1 cup panko breadcrumbs
- ½ cup regular breadcrumbs
- 1 tbsp lemon zest (optional, for coating)
- 1 tsp kosher salt
- ½ tsp black pepper
- ½ tsp dried thyme (optional)
- ¼ tsp paprika
- 2 tbsp olive oil (for pan-searing)
- 1 tbsp butter (for searing)
- Lemon wedges and fresh parsley for garnish
Instructions
- Preheat oven to 375°F (190°C) and line a baking sheet with parchment paper.
- Make compound butter: combine softened butter, garlic, lemon zest, lemon juice, parsley, salt and white pepper. Shape into a rectangle on plastic wrap, wrap tightly, and freeze for 15 minutes.
- Place chicken breasts between plastic wrap and pound to ¼-inch thickness. Season with salt and pepper.
- Divide chilled compound butter into 4 portions and place one in the center of each chicken breast.
- Fold the sides of the chicken over the butter, then roll up completely, securing with toothpicks if needed.
- Prepare breading station: place seasoned flour in one dish, beaten eggs mixed with water in a second dish, and combined breadcrumbs in a third dish.
- Dredge each chicken roll in flour, then dip in egg mixture, and coat thoroughly in breadcrumbs, pressing gently to adhere.
- Heat olive oil and butter in an oven-safe skillet over medium-high heat. Sear the chicken for 2-3 minutes per side until golden.
- Transfer to the oven and bake for 15-20 minutes until chicken reaches 165°F (74°C) internal temperature.
- Let rest for 5 minutes before removing toothpicks and slicing on a diagonal to reveal the butter center.
- Garnish with fresh parsley and lemon wedges before serving.
Notes
For extra crispiness, double-dip the chicken in egg wash and breadcrumbs.
Freezing the compound butter for 15 minutes is crucial to prevent it from melting too quickly during cooking.
Make sure to completely seal the chicken around the butter to prevent leakage.
Resting the chicken after cooking allows the juices to redistribute and the butter to slightly set.
Nutrition facts are estimates and may vary based on ingredients used, portion sizes, and preparation methods.
Nutrition
- Serving Size: 1 chicken breast
- Calories: 520
- Sugar: 2
- Sodium: 680
- Fat: 32
- Saturated Fat: 12
- Unsaturated Fat: 17
- Carbohydrates: 24
- Fiber: 1
- Protein: 38
- Cholesterol: 215
Keywords: lemon garlic chicken kiev, chicken kiev, lemon garlic chicken, garlic butter chicken, crispy chicken kiev
Let’s connect! Follow me for more Joylicious Recipes: Facebook, Instagram, Pinterest