The Perfect Burnt Cheesecake with Berries: A Caramelized Delight
An Irresistible Basque-Style Dessert
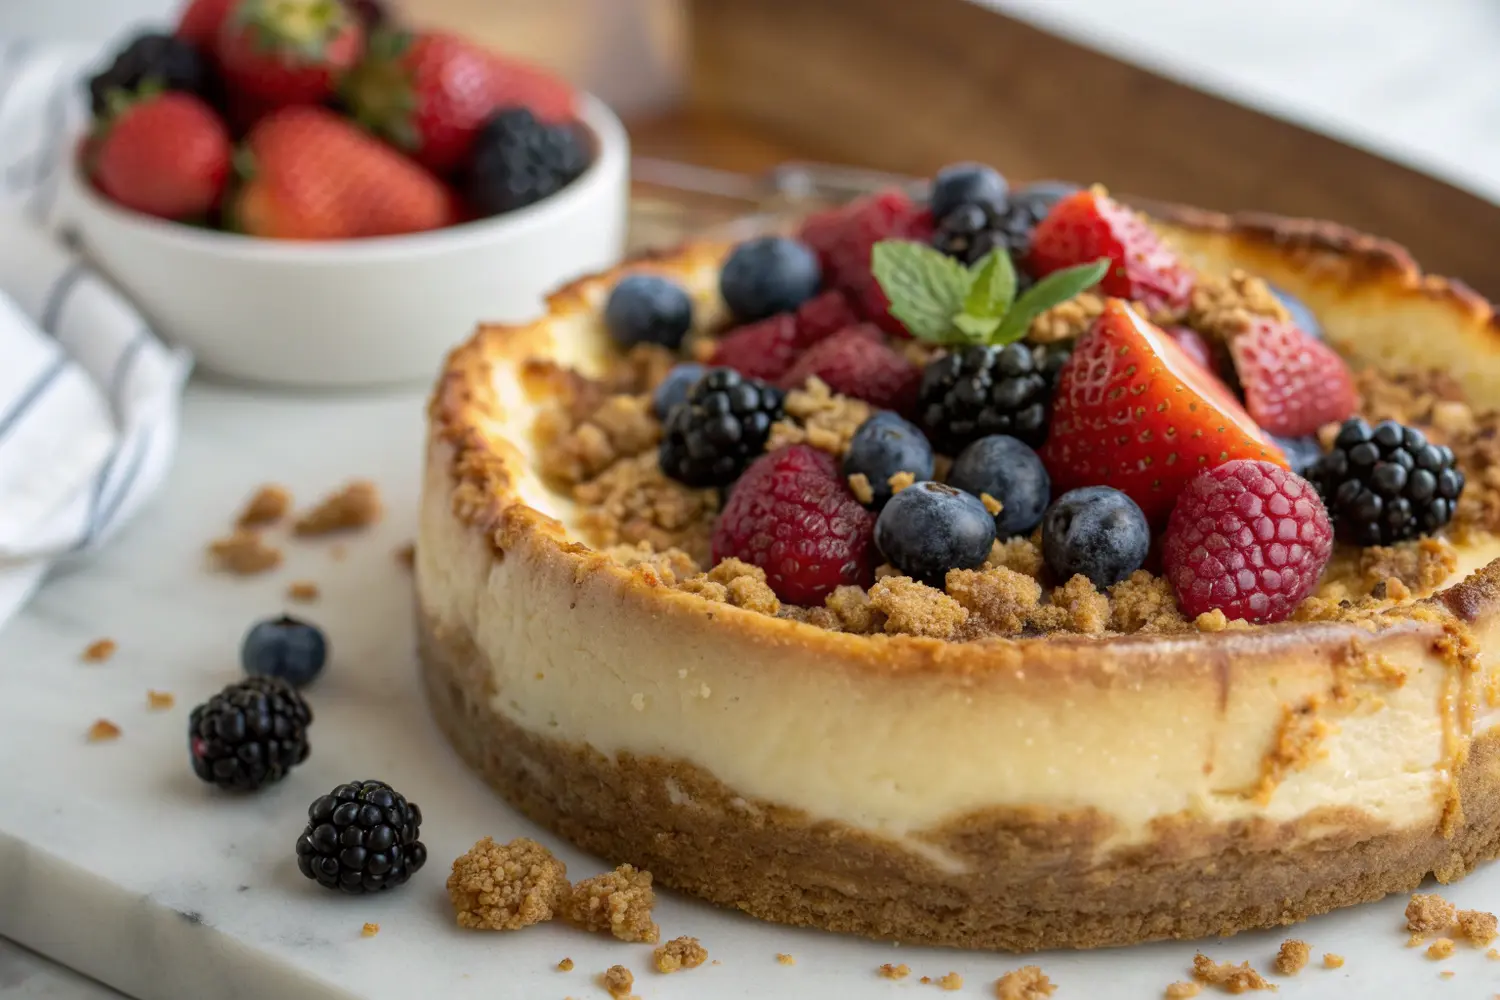
Burnt cheesecake with berries combines the caramelized, toasty exterior with a lusciously creamy interior that melts in your mouth. This intentionally “burnt” dessert has taken the culinary world by storm with its rustic appearance and incredible flavor contrast—crisp edges giving way to an almost custard-like center. “For another decadent cheesecake experience with warm spices, the pumpkin cheesecake offers similar richness with seasonal flair.” The beauty of this dessert lies in its imperfection—those dark, caramelized edges are precisely what makes it special.
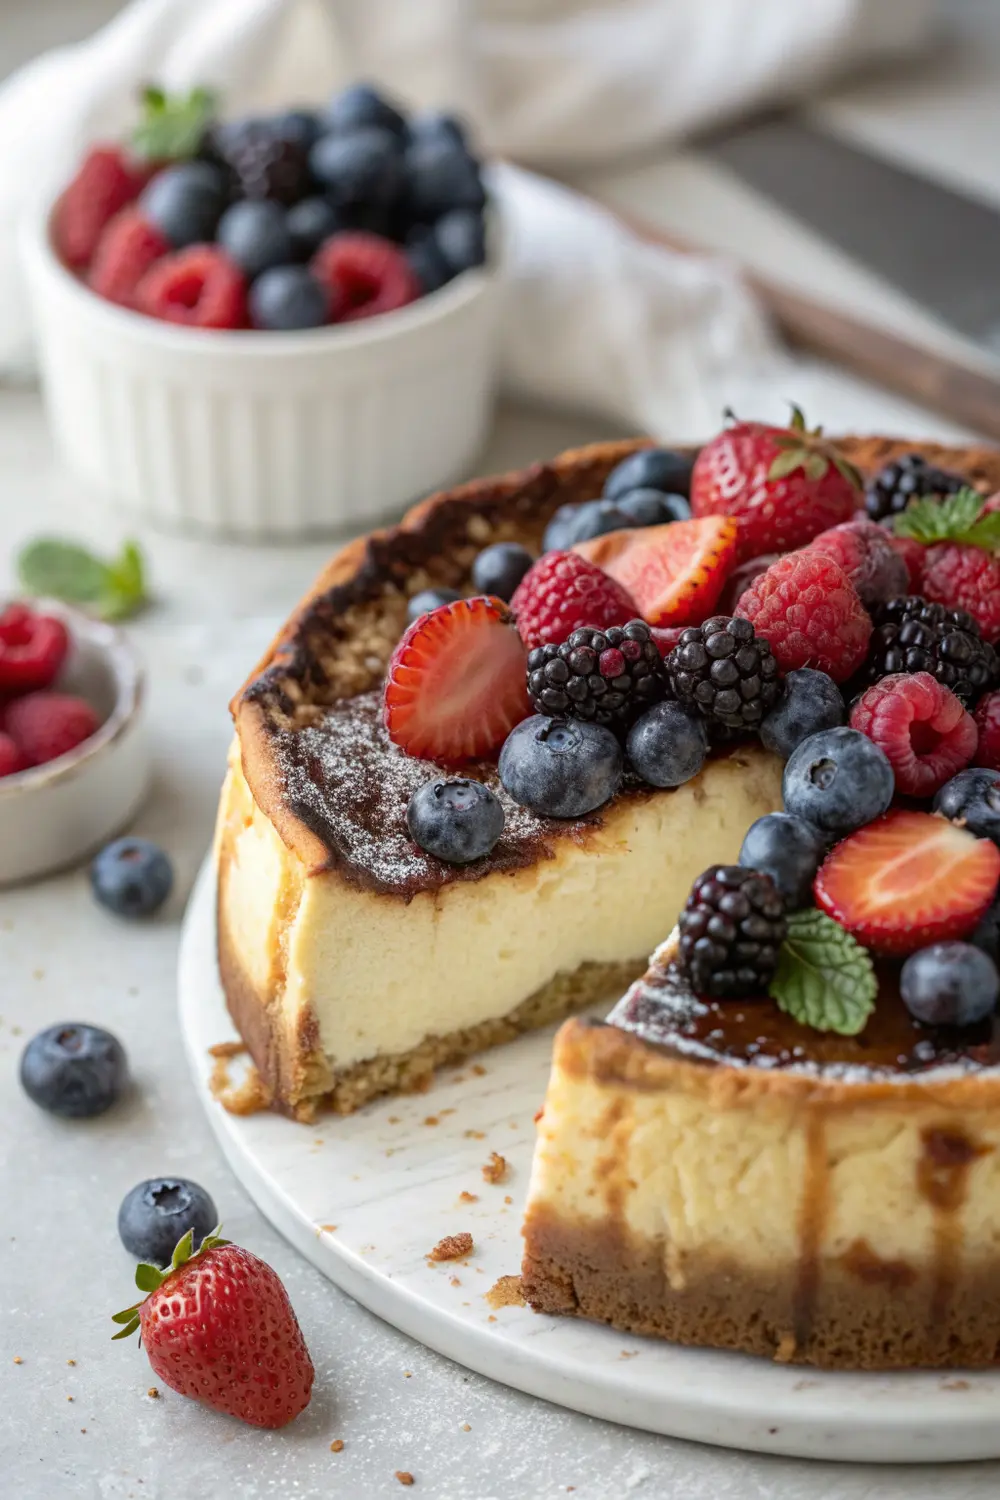
This stunning dessert is perfect for dinner parties, holiday gatherings, or anytime you want to impress without spending hours on complicated techniques. The dramatic presentation of the deeply browned top adorned with vibrant berries makes it as visually striking as it is delicious. Serve it at room temperature to appreciate its full flavor complexity or chilled for a firmer, more traditional cheesecake experience.
Gathering Your Sweet Essentials: Ingredients for Caramelized Perfection
The Building Blocks of Flavor
Creating the perfect burnt cheesecake with berries requires quality ingredients that work together to create that signature contrast between the caramelized exterior and creamy interior. “The cottage cheese cheesecake uses a similar base but with a lighter texture and different flavor profile.” The foundation starts with cream cheese, but the magic happens when high heat transforms the surface into a beautiful burnished top.
| For the Crust | Amount |
|---|---|
| Graham cracker crumbs | 1 cup |
| Melted unsalted butter | 3 tablespoons |
| Brown sugar | 2 tablespoons |
| Pinch of salt | 1/8 teaspoon |
| For the Cheesecake Filling | Amount |
|---|---|
| Cream cheese, softened to room temperature | 2 cups (500g) |
| Granulated sugar | 1 cup |
| Large eggs, at room temperature | 3 |
| Heavy cream | 1/2 cup |
| Vanilla extract | 2 teaspoons |
| All-purpose flour | 1/4 cup |
| Lemon zest (optional for brightness) | 1 teaspoon |
| Cream of tartar (helps stabilize) | 1/4 teaspoon |
| For the Berry Topping | Amount |
|---|---|
| Mixed berries (strawberries, blueberries, raspberries) | 1 cup |
| Blackberries (optional) | 1/4 cup |
| Honey or maple syrup (for drizzling) | 2 tablespoons |
| Fresh mint leaves (optional garnish) | 4-6 leaves |
| Powdered sugar (optional for dusting) | 1 tablespoon |
Creating Your Masterpiece: Detailed Burnt Cheesecake Process
Preparing for Success
The key to a perfectly burnt cheesecake with berries lies in both the preparation and understanding the visual cues that indicate doneness. Unlike traditional cheesecakes where cracks are considered flaws, this Basque-inspired dessert celebrates its rustic appearance and caramelized top. Let’s break down the process into manageable steps that will lead to success.
1. **Prepare your oven and pan:** Preheat oven to 325°F (160°C). Place a water bath pan (a large, shallow pan filled with about 1 inch of hot water) on the lower rack. Line a 9-inch springform pan with parchment paper, ensuring the paper comes up at least 2 inches above the rim of the pan on all sides. The excess paper will help with removal and gives the cheesecake its characteristic rustic look.
2. **Create the crust foundation:** In a medium bowl, combine graham cracker crumbs, melted butter, and brown sugar until the mixture resembles wet sand. Press this mixture firmly and evenly into the bottom of your prepared springform pan, using the bottom of a measuring cup to compact it. For best results, refrigerate the crust for 15 minutes to set while preparing the filling.
3. **Mix the cheesecake filling:** In a large bowl, beat the softened cream cheese and sugar with an electric mixer on medium speed until completely smooth and no lumps remain, about 2-3 minutes. Scrape down the sides of the bowl frequently. The mixture should be silky and light, not grainy.
4. **Add eggs and flavorings:** Reduce mixer speed to low and add eggs one at a time, allowing each to fully incorporate before adding the next. After all eggs are incorporated, add vanilla extract and lemon zest (if using). The batter should look glossy and smooth at this stage.
5. **Incorporate remaining ingredients:** Sift the flour and cream of tartar over the batter to avoid lumps, then mix on low until just combined. Pour in the heavy cream and mix until the batter is uniform but still light and airy. Avoid overmixing which can incorporate too much air and cause the cheesecake to crack excessively.
6. **Fill the pan and bake:** Pour the batter over the prepared crust in the springform pan. Tap the pan gently on the counter several times to release any large air bubbles. Place the pan on the middle rack of the preheated oven, above the water bath pan.
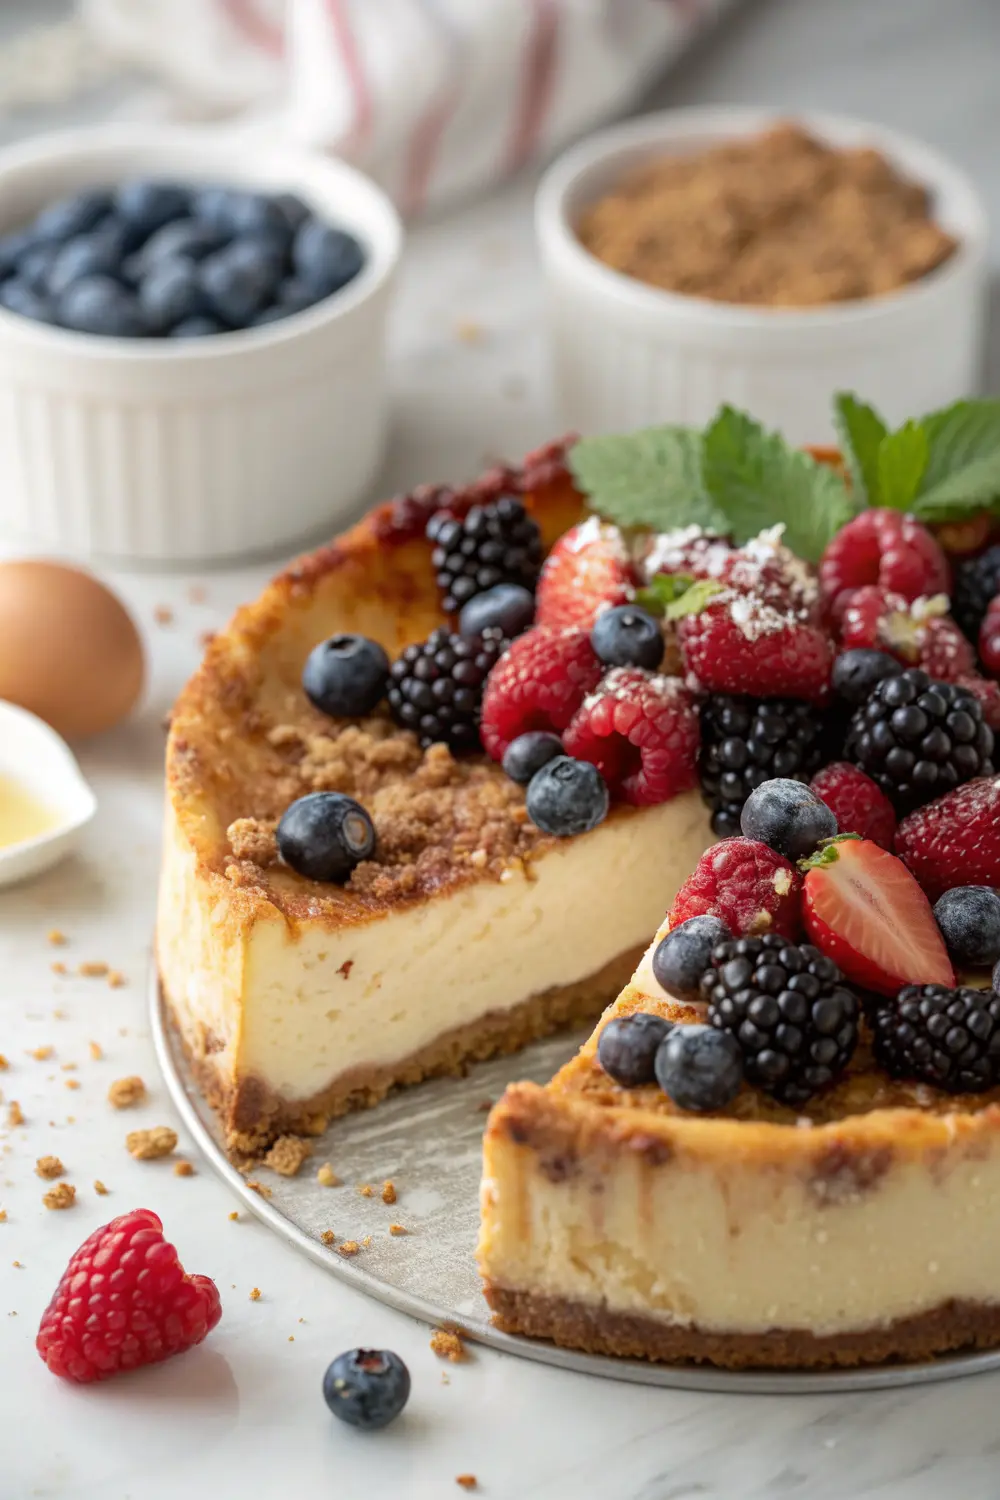
7. **Bake to perfection:** Bake for 45-55 minutes until the edges are set but the center still has a significant jiggle (it will continue to set as it cools). The top should be deeply browned—almost burnt-looking—but not black. The dramatic color contrast between the dark exterior and creamy interior is signature to this cheesecake style.
8. **Cool properly:** When done, remove from oven but do not remove from the pan. Let cool completely at room temperature for at least 2 hours. As it cools, the cheesecake will pull away from the sides slightly and may sink in the middle—this is normal and creates the perfect well for your berry topping.
9. **Chill thoroughly:** Once at room temperature, cover loosely and refrigerate for at least 4 hours or preferably overnight. This resting period allows the flavors to develop and the texture to set properly.
10. **Prepare the berry topping:** Shortly before serving, wash and dry the mixed berries. Slice larger strawberries into halves or quarters. Arrange the berries artfully on top of the cooled cheesecake, concentrating them in the center depression. Drizzle with honey or maple syrup for a beautiful gloss and added sweetness.
11. **Final presentation:** For an elegant finish, add a few fresh mint leaves and a light dusting of powdered sugar if desired. The vibrant berries against the deeply caramelized cheesecake create a stunning visual contrast that’s as impressive as the flavor combination.
Expert Advice for Cheesecake Success Every Time
Temperature and Texture Secrets
Achieving that perfect balance between caramelized exterior and creamy interior requires attention to detail and a few expert tricks. “The churro cheesecake recipe offers similar techniques for creating textural contrast in a dessert.” These tips will help you master the burnt cheesecake with berries and adapt it to your preferences:
* **Room temperature ingredients are non-negotiable.** Cream cheese, eggs, and even heavy cream should sit out for at least 1-2 hours before mixing. Cold ingredients don’t blend properly and can cause lumps that never fully incorporate.
* **The parchment paper collar is crucial.** Use a large piece that extends at least 2 inches above the pan rim. This not only prevents batter spillage during baking but also creates that rustic, crinkled edge characteristic of traditional Basque cheesecake.
* **Adjust baking time for your desired interior texture.** For a more custardy, almost molten center, reduce baking time by 5-7 minutes. For a firmer, more traditional cheesecake texture, increase by 5 minutes.
* **Look for visual doneness cues rather than strictly following time.** The perfect burnt cheesecake should have a deeply caramelized top that’s dark mahogany brown, puffy edges that are set, and a center that jiggles like jello when gently shaken.
* **Don’t panic about cracks or sinking.** Unlike traditional cheesecake, this style celebrates its imperfections. The center naturally falls as it cools, creating the perfect pocket for your berry topping.
* **Let the cheesecake cool naturally in the turned-off oven with the door slightly ajar for the first 30 minutes.** This gradual cooling helps prevent dramatic temperature changes that can cause excessive cracking.
Keeping Your Creation Fresh: Storage Guidelines
Maintaining Maximum Flavor and Texture
The burnt cheesecake with berries offers excellent make-ahead potential, but proper storage is essential to maintain its distinctive texture contrast and flavor profile. With the right approach, you can enjoy this decadent dessert over several days without sacrificing quality.
Store your baked and cooled burnt cheesecake (without berries) in the refrigerator, covered loosely with plastic wrap or in an airtight container for up to 5 days. The caramelized top may soften slightly in the refrigerator due to moisture, but the flavor remains delicious. “If you enjoy berry desserts, you might also appreciate the fresh approach in berries and cream for a lighter alternative.”
For the best texture experience, remove the cheesecake from the refrigerator about 30-45 minutes before serving to take the chill off. The creaminess and flavor complexity are most pronounced at slightly below room temperature. Add the fresh berry topping only just before serving to prevent the fruit from weeping moisture onto the cheesecake surface.
If you need longer storage, burnt cheesecake freezes remarkably well for up to 2 months. Wrap the plain cheesecake (without berries) tightly in plastic wrap and then aluminum foil to prevent freezer burn. Thaw overnight in the refrigerator and then let stand at room temperature for 30-45 minutes before adding fresh berries and serving.
For convenience, you can also freeze individual slices separated by parchment paper in an airtight container. This allows you to thaw just what you need for unexpected guests or late-night cravings.
Creative Twists on a Classic: Delicious Variations
Seasonal and Flavor Adaptations
One of the joys of this burnt cheesecake with berries recipe is its adaptability. The base recipe provides a perfect canvas for experimentation with different flavors, textures, and seasonal ingredients. Here are some inspired variations to try:
**Chocolate Swirl Burnt Cheesecake:** Add 4 ounces of melted, cooled dark chocolate to half of your cheesecake batter. Pour the plain batter into the pan first, then pour the chocolate batter on top. Use a knife to gently swirl the two batters together for a marbled effect. The chocolate will caramelize differently, creating an even more complex flavor profile. Top with fresh raspberries for a classic chocolate-raspberry combination.
**Citrus-Infused Variation:** Incorporate the zest of one orange and one lemon into your batter, plus 1 tablespoon of fresh juice from each. This bright, aromatic version pairs beautifully with a mixed berry topping and delivers a refreshing twist on the classic. The citrus notes complement the caramelized flavors while adding complexity.
**Seasonal Autumn Spice:** Add 1 teaspoon of cinnamon, 1/4 teaspoon of nutmeg, and 1/8 teaspoon of cloves to your batter for a warm, spiced version perfect for fall and winter. Instead of mixed berries, top with sautéed apple slices tossed in cinnamon and a touch of maple syrup for a seasonal adaptation that celebrates autumn flavors.
**No-Bake Berry Swirl Option:** For hot summer days when you don’t want to use the oven, transform this into a no-bake cheesecake by omitting the eggs, reducing the sugar to 3/4 cup, and adding 1 envelope of gelatin bloomed in 1/4 cup cold water then dissolved in 1/4 cup hot water. Swirl in 1/2 cup of berry purée before chilling until set. While you’ll miss the caramelized top, you’ll gain a refreshing summer dessert.
**Coconut Variation:** Replace 1/4 cup of the sugar with coconut sugar and add 1/2 cup toasted coconut flakes to the batter. The coconut sugar enhances the caramelized flavor while the coconut flakes add texture. Top with a mixture of berries and diced mango for a tropical twist that transports your taste buds to island paradise.
**Individual Mini Burnt Cheesecakes:** Divide the batter among 12 parchment-lined muffin cups for personal-sized desserts. Reduce baking time to about 20-25 minutes. These individual portions are perfect for gatherings where guests appreciate having their own dessert, and the higher crust-to-filling ratio provides more textural contrast in each bite.
Presenting Your Masterpiece: Elegant Serving Ideas
Elevating Your Dessert Experience
The distinctive appearance of burnt cheesecake with berries already makes it a showstopper, but these thoughtful serving suggestions will elevate your dessert experience from memorable to unforgettable. Consider these presentation ideas for different occasions:
For an elegant dinner party finale, serve thin slices of the burnt cheesecake on white plates with a smear of berry coulis. Arrange a few fresh berries alongside and add a small quenelle of lightly sweetened whipped cream. The vibrant colors against the white plate and dark cheesecake create a sophisticated visual impact. Ambrosia fruit salad makes an excellent light accompaniment for guests who might want something extra alongside their cheesecake.
For family-style service, place the entire cheesecake on a wooden board surrounded by additional fresh berries, small bowls of whipped cream, and perhaps some honey or berry sauce for drizzling. This interactive approach encourages guests to customize their slices according to preference and creates a communal dessert experience.
During summer gatherings, serve slightly smaller slices with a scoop of vanilla bean ice cream on the side. The contrast between the warm-temperature cheesecake and cold ice cream creates a delightful sensory experience, while the vanilla complements both the caramelized flavors and the fresh berries.
For a brunch setting, cut the cheesecake into smaller, bite-sized squares and serve on a tiered dessert stand alongside other petit fours or breakfast pastries. This approach transforms the dessert into an approachable daytime treat that pairs perfectly with coffee or tea.
Holiday presentations can be enhanced by selecting berries that complement the season—cranberries and pomegranate seeds for winter holidays, or strawberries and blueberries for patriotic celebrations. A light dusting of powdered sugar over the berries resembles a gentle snowfall for winter gatherings.
For portion sizing, remember that burnt cheesecake with berries is rich and satisfying. A 9-inch cheesecake typically serves 12-16 people comfortably, depending on how substantial your meal has been. Smaller slices (about 2 inches at the outer edge) are appropriate following a full dinner, while larger wedges can be served when the cheesecake is the main dessert attraction.
Common Questions About Burnt Cheesecake Success
Troubleshooting Your Baking Journey
How do I know when my burnt cheesecake is perfectly done?
The perfect burnt cheesecake should have a deeply caramelized top that’s dark brown (but not black), set edges that have risen slightly, and a center that jiggles like firm jello when the pan is gently shaken. Don’t worry if it looks underbaked in the center—it will continue to set as it cools. The internal temperature should reach about 150°F (65°C) for that signature creamy center. Remember that overbaking will result in a drier, more traditional cheesecake texture rather than the custardy interior that makes burnt cheesecake special.
Can I make burnt cheesecake without a springform pan?
Yes! While a springform pan is traditional and makes removal easiest, you can use a regular 9-inch cake pan lined with parchment paper that extends well above the edges (to use as “handles” for removal). After cooling completely and chilling, you can carefully lift the entire cheesecake out using the parchment handles. Alternatively, a deep pie dish works well if you’re comfortable serving directly from the dish rather than removing the entire cheesecake. The key is having enough parchment to help with removal or serving.
Why did my cheesecake crack excessively, and does it matter for this style?
Some cracking is normal and even desirable in burnt cheesecake, contributing to its rustic appearance. However, excessive cracking usually happens when the cheesecake bakes too quickly or cools too rapidly. The water bath on the lower rack helps create a humid environment that reduces cracking. If your cheesecake still cracks too much, try reducing your oven temperature by 25°F and extending baking time slightly. Remember that unlike traditional cheesecakes where a smooth top is prized, burnt cheesecake celebrates these imperfections, and the berry topping will cover any cracks beautifully.
Can I use frozen berries for the topping?
While fresh berries provide the best visual appeal and texture contrast, you can use frozen berries in a pinch. The key is to thaw them completely, drain thoroughly on paper towels, and pat dry to remove excess moisture that could make your cheesecake soggy. “For exceptional results with berries in baked goods, check out these blueberry muffins that showcase how to properly incorporate berries into desserts.”
Your Path to Dessert Perfection Awaits
Embracing the Art of Burnt Cheesecake
Creating a stunning burnt cheesecake with berries is a delicious journey into a dessert that celebrates contrasts—the deeply caramelized exterior against the creamy interior, the tangy cheesecake base complemented by sweet, vibrant berries. This is a dessert that forgives imperfections and even celebrates them, making it perfect for bakers of all experience levels.
What makes this burnt cheesecake truly special is its ability to impress without requiring professional pastry skills. The intentionally rustic appearance combined with sophisticated flavors creates a dessert that’s simultaneously accessible and elegant. “If you enjoy the caramelization in this recipe, you’ll also love our pumpkin spice bundt cake which develops similar flavor complexity through caramelization.”
Whether you’re preparing this for a special occasion or simply treating yourself to a luxurious dessert experience, this burnt cheesecake with berries recipe delivers consistent results that will have everyone asking for seconds. The balance of tangy, creamy cheesecake with the sweet-tart pop of fresh berries creates a dessert that satisfies on every level.
Take the plunge into this caramelized delight—embrace the process, enjoy the aroma as it bakes, and prepare for the compliments that will inevitably follow when you slice into this masterpiece. Your burnt cheesecake with berries isn’t just a dessert; it’s a celebration of flavor, texture, and visual drama that makes any meal memorable.
PrintBurnt Cheesecake with Berries
A stunning Basque-inspired burnt cheesecake with a deeply caramelized exterior and creamy center.
Topped with fresh mixed berries for the perfect sweet-tart contrast.
Easier than it looks with a dramatic presentation that impresses every time.
- Prep Time: 30
- Cook Time: 55
- Total Time: 1 hour 25 minutes
- Yield: 12 servings 1x
- Category: Salad & Dessert
- Method: Baking
- Cuisine: Basque-Inspired
Ingredients
- For the Crust:
- 1 cup graham cracker crumbs
- 3 tablespoons melted unsalted butter
- 2 tablespoons brown sugar
- 1/8 teaspoon salt
- For the Filling:
- 2 cups (500g) cream cheese, softened to room temperature
- 1 cup granulated sugar
- 3 large eggs, at room temperature
- 1/2 cup heavy cream
- 2 teaspoons vanilla extract
- 1/4 cup all-purpose flour
- 1 teaspoon lemon zest (optional)
- 1/4 teaspoon cream of tartar
- For the Topping:
- 1 cup mixed berries (strawberries, blueberries, raspberries)
- 1/4 cup blackberries (optional)
- 2 tablespoons honey or maple syrup
- 4–6 fresh mint leaves (optional garnish)
- 1 tablespoon powdered sugar (optional for dusting)
Instructions
- Preheat oven to 325°F (160°C). Place a water bath pan on the lower rack. Line a 9-inch springform pan with parchment paper, ensuring it extends 2 inches above the rim.
- In a medium bowl, combine graham cracker crumbs, melted butter, brown sugar, and salt until mixture resembles wet sand. Press firmly into the bottom of the springform pan. Refrigerate for 15 minutes.
- In a large bowl, beat cream cheese and sugar with an electric mixer on medium speed until completely smooth, about 2-3 minutes, scraping down sides frequently.
- Reduce mixer to low speed and add eggs one at a time, allowing each to fully incorporate before adding the next. Add vanilla extract and lemon zest if using.
- Sift flour and cream of tartar over the batter, then mix on low until just combined. Add heavy cream and mix until uniform but still light.
- Pour batter over the prepared crust. Tap the pan gently on the counter to release air bubbles.
- Bake for 45-55 minutes until edges are set but center still jiggles. The top should be deeply browned—almost burnt-looking but not black.
- Remove from oven and cool completely at room temperature for at least 2 hours. The cheesecake will pull away from sides slightly and may sink in the middle.
- Cover loosely and refrigerate for at least 4 hours or preferably overnight.
- Before serving, arrange mixed berries on top, concentrating them in the center depression. Drizzle with honey or maple syrup.
- Garnish with mint leaves and a light dusting of powdered sugar if desired.
- For best flavor, let the cheesecake stand at room temperature for 30 minutes before serving.
Notes
Room temperature ingredients are essential for a smooth, lump-free batter.
The center should still jiggle when done—it will continue to set as it cools.
This cheesecake is meant to sink in the middle, creating the perfect cradle for berries.
Store covered in the refrigerator for up to 5 days.
Freeze without berries for up to 2 months, thaw overnight in refrigerator.
Nutrition facts are estimates and may vary based on ingredients used, portion sizes, and preparation methods.
Nutrition
- Serving Size: 1 slice
- Calories: 320
- Sugar: 22
- Sodium: 210
- Fat: 23
- Saturated Fat: 13
- Unsaturated Fat: 8
- Carbohydrates: 26
- Fiber: 1
- Protein: 5
- Cholesterol: 115
Keywords: burnt cheesecake with berries, caramelized cheesecake, berry topping, creamy cheesecake filling, basque cheesecake
Let’s connect! Follow me for more Joylicious Recipes: Facebook, Instagram, Pinterest