The Ultimate Caramelized Onion Dip That Will Elevate Your Snack Game
Why This Dip Stands Out From Store-Bought Versions
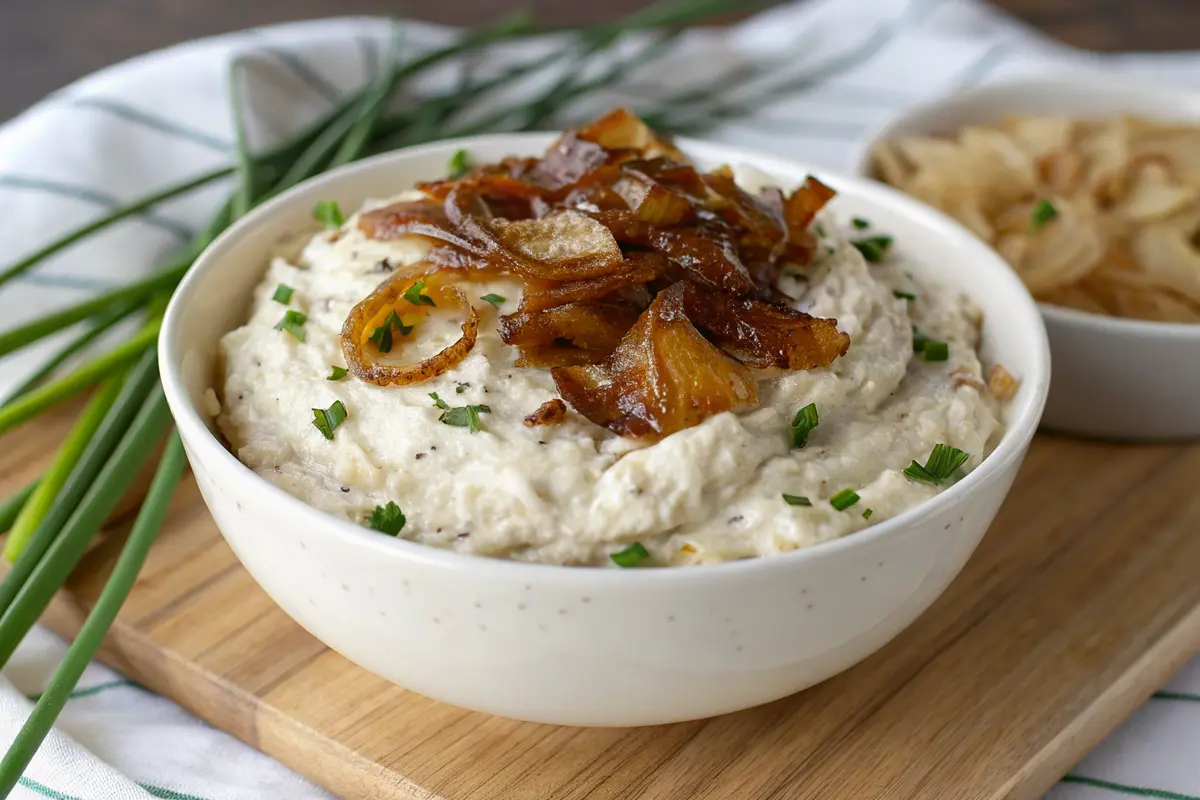
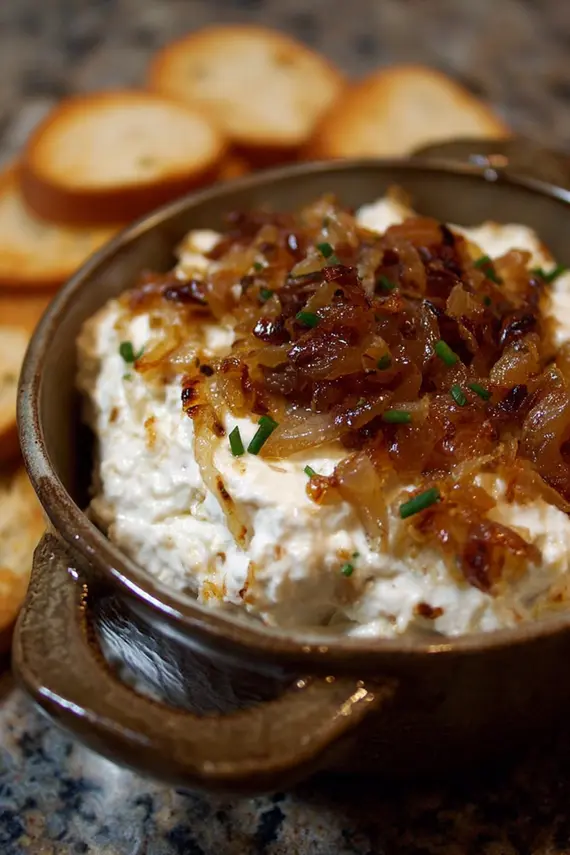
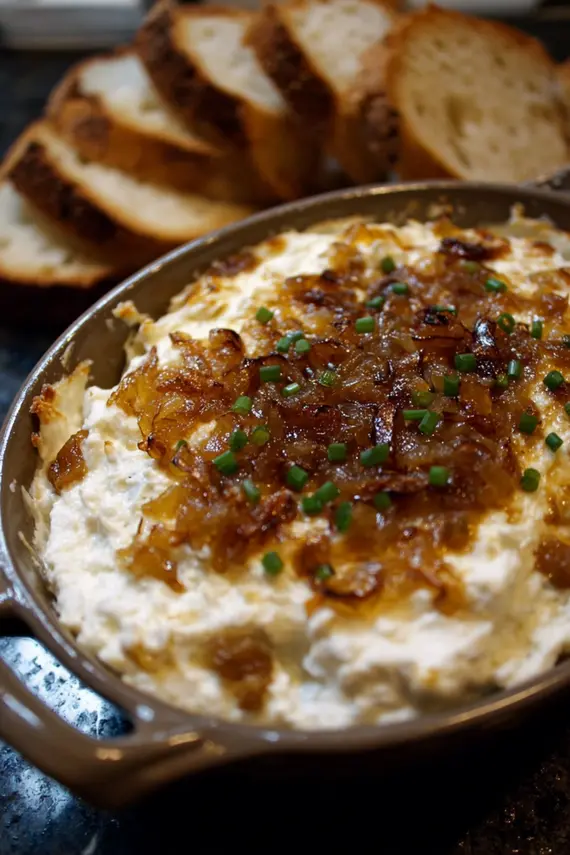
Caramelized onion dip transforms the humble onion into something magical through a simple yet transformative cooking process. This homemade version delivers deep, complex sweetness with savory undertones that no store-bought version can match. The contrast between the silky-smooth cream cheese base and the tender, jammy caramelized onions creates a textural experience that keeps you coming back for another scoop. “The honey mustard cocktail meatballs technique offers similar staged-cooking approaches to prevent burning while developing maximum flavor.”
This versatile dip shines at casual gatherings, game day celebrations, or quiet nights in. Serve it with ridged potato chips for the perfect crunch-to-dip ratio, or offer an assortment of fresh vegetables for a lighter option. The dip also makes an unexpected but delicious sandwich spread or baked potato topping when you’re looking to elevate everyday meals.
Perfect Ingredients for a Crowd-Pleasing Onion Dip
Core Ingredients That Create The Perfect Balance
The magic of this caramelized onion dip recipe lies in its thoughtful balance of ingredients. Each component plays an essential role in creating that perfect blend of sweetness, tanginess, and richness.
| Ingredient | Amount | Notes |
|---|---|---|
| Sweet onions (Vidalia or Walla Walla) | 2 large | Thinly sliced; these varieties caramelize beautifully |
| Butter | 2 tablespoons | Unsalted preferred for better flavor control |
| Brown sugar | 1 tablespoon | Enhances caramelization process |
| Cream cheese | 8 ounces | Softened to room temperature |
| Sour cream | 1/2 cup | Adds tanginess and lightens texture |
| Fresh chives | 2 tablespoons | Finely chopped; adds fresh flavor contrast |
| Kosher salt | 1/2 teaspoon | Adjust to taste |
| Black pepper | 1/4 teaspoon | Freshly ground preferred |
Optional Flavor Enhancers
Take your caramelized onion dip to the next level with these optional additions:
| Ingredient | Amount | Effect on Final Dip |
|---|---|---|
| Worcestershire sauce | 1-2 teaspoons | Adds umami depth and complexity |
| Garlic powder | 1/2 teaspoon | Provides subtle savory notes without overwhelming |
| Caramelized garlic | 2-3 cloves | For intense garlic lovers; must be properly caramelized |
| Smoked paprika | 1/4 teaspoon | Adds subtle smoky complexity |
| Thyme leaves | 1 teaspoon | Fresh or dried; adds herbal notes |
| Greek yogurt | 1/4 cup | Can substitute for some sour cream for tangier, lighter result |
| Grated Gruyère cheese | 1/4 cup | Adds nutty flavor and richness |
“For a similarly creamy base that works beautifully with mix-ins, my potato leek soup uses the same technique of building layers of flavor through slow cooking.”
Foolproof Method for Perfect Caramelized Onions Every Time
The Secret to Deeply Flavorful Onions
Creating truly exceptional caramelized onion dip requires patience and attention to detail. Follow these steps for onions that transform from sharp and pungent to deeply sweet and complex:
1. **Prepare the onions properly.** Slice your sweet onions thinly and uniformly (about 1/8-inch thick) to ensure even cooking. Slicing pole-to-pole (from root to stem) rather than across the equator helps the onions hold their structure during the long cooking process.
2. **Start with the right pan.** Melt 2 tablespoons of butter in a large, heavy-bottomed skillet (preferably cast iron or stainless steel) over medium heat. The wider surface area allows moisture to evaporate more efficiently.
3. **Add onions with patience.** Once the butter is melted and slightly bubbling, add all your thinly sliced onions to the pan. Stir to coat evenly with the butter. Don’t worry if the pan seems overfull – the onions will cook down significantly.
4. **Control the heat carefully.** Maintain medium heat for the first 5 minutes, stirring occasionally to prevent sticking. Then reduce to medium-low. The onions should be gently sizzling, not aggressively frying.
5. **Practice patience during caramelization.** This is the most crucial step – cook the onions for 15-20 minutes, stirring every 3-4 minutes. Look for them to gradually soften and turn translucent before they begin browning. You’ll notice them shrinking considerably as moisture evaporates.
6. **Watch for color changes.** The onions will progress from white to translucent to golden to a rich amber brown. If they’re browning too quickly or unevenly, reduce your heat slightly.
7. **Add the sweet element.** Once the onions have reached a light golden color (about 15 minutes in), sprinkle in 1 tablespoon of brown sugar. Stir well to incorporate.
8. **Finish the caramelization.** Continue cooking for an additional 2-3 minutes until the onions reach a deep golden brown color and have a jam-like consistency. They should be significantly reduced in volume – about 1/4 of their original amount.
9. **Cool before mixing.** Transfer the caramelized onions to a bowl and allow them to cool for at least 15 minutes. This prevents them from melting the cream cheese base when combined.
10. **Create the creamy base.** In a medium mixing bowl, combine the softened cream cheese, sour cream, and chopped chives. Mix until completely smooth and well incorporated, ensuring no lumps of cream cheese remain.
11. **Incorporate the onions.** Gently fold the cooled caramelized onions into the cream cheese mixture. Don’t overmix – you want visible ribbons of the caramelized onions throughout the dip.
12. **Season to perfection.** Add salt and freshly ground pepper to taste, starting with 1/2 teaspoon salt and 1/4 teaspoon pepper. The flavor will develop further as it chills.
13. **Rest and chill.** Transfer the finished dip to a serving bowl, cover with plastic wrap, and refrigerate for at least 30 minutes (though 2 hours is ideal) to allow the flavors to meld together.
14. **Serve at the right temperature.** Remove the dip from the refrigerator about 15 minutes before serving to take the chill off. This brings out the complex flavors of the caramelized onions.
Expert Tips for Caramelized Onion Dip Success
Small Details That Make a Big Difference
Creating truly exceptional caramelized onion dip requires more than just following a recipe. These professional tips will elevate your dip from good to unforgettable:
* **Choose the right onions**: Sweet varieties like Vidalia, Walla Walla, or Maui onions caramelize more beautifully than regular yellow onions. Their higher sugar content develops into deeper flavor during cooking.
* **Don’t rush the caramelization**: True caramelization takes time – resist the urge to increase the heat to speed up the process. High heat will give you burned rather than caramelized onions. The slow transformation is what creates those complex flavors.
* **Deglaze for maximum flavor**: If brown bits form on the bottom of your pan, deglaze with a tablespoon of water, scraping up those flavorful fond pieces back into your onions. This prevents burning while concentrating flavor.
* **Temperature matters for serving**: For the best texture and flavor profile, let the refrigerated dip sit at room temperature for 15-20 minutes before serving. Cold temperatures mute the subtle flavors you’ve worked so hard to develop.
* **Make it ahead for best results**: While delicious immediately, this dip tastes even better after 24 hours in the refrigerator as the flavors have time to fully meld together. This makes it perfect for preparing a day before your gathering.
* **For a lighter version**: Substitute half the cream cheese with Greek yogurt for a tangier, lighter variation that still maintains creaminess. This reduces calories while adding a pleasant acidic note.
* **Create depth with a pinch of thyme**: Fresh or dried thyme (about 1/2 teaspoon) added to the onions in the last minute of caramelizing adds an aromatic herb note that complements the sweetness perfectly.
“If you enjoy this depth of flavor from slow cooking, my seaweed salad recipe showcases how simple ingredients can transform through careful preparation techniques.”
Smart Storage Solutions to Keep Your Dip Fresh
Maximizing Freshness and Flavor Over Time
Proper storage is key to maintaining the creamy texture and complex flavors of your caramelized onion dip. Follow these guidelines to enjoy your creation for days after making it:
For refrigerator storage, transfer any leftover dip to an airtight container with a tight-fitting lid. The dip will stay fresh for up to 5 days when properly stored. The flavor actually improves after the first 24 hours as the ingredients have more time to meld together, making this an excellent make-ahead option.
If you notice slight separation after refrigeration, simply give the dip a gentle stir before serving to restore its creamy consistency. This is perfectly normal, especially if your dip contains Greek yogurt or extra sour cream.
For the freshest flavor, always use clean utensils when scooping from the storage container to prevent introducing bacteria that could shorten shelf life. Avoid double-dipping when serving to guests for the same reason.
Freezing Considerations
While cream cheese-based dips can technically be frozen, freezing isn’t ideal for caramelized onion dip. The dairy components tend to separate slightly upon thawing, affecting the smooth texture. If you must freeze it, place in a freezer-safe container with minimal air space, and consume within 1 month.
When thawing frozen dip, do so gradually in the refrigerator overnight rather than at room temperature or in the microwave. Once thawed, whip vigorously with a fork or small whisk to reincorporate any separated components before serving.
For best results with make-ahead plans, consider preparing the caramelized onions up to 3 days in advance and storing them separately in the refrigerator. Then mix them with the fresh cream cheese base the day before or the day of serving. This gives you the convenience of advance prep without compromising texture.
Creative Variations on the Classic Caramelized Onion Dip
Exciting Flavor Twists to Try
The beauty of caramelized onion dip lies in its versatility as a base for creative variations. Here are some delicious ways to customize this classic:
**Balsamic Glazed Onion Dip**: During the final minute of caramelizing your onions, add 1 tablespoon of balsamic vinegar and allow it to reduce to a glaze. This adds a sophisticated tanginess that balances the sweetness of the caramelized onions. Finish with a sprinkle of fresh thyme leaves for an elegant twist.
**Roasted Garlic & Herb Version**: Add 1 head of roasted garlic (cloves removed and mashed) to the cream cheese base along with 1 tablespoon each of finely chopped fresh rosemary and sage. The roasted garlic adds mellowed sweetness while the herbs introduce aromatic complexity that pairs beautifully with the onions.
**Smoky Bacon Onion Dip**: Cook 4 slices of bacon until crispy, then remove from the pan. Use 1 tablespoon of the rendered bacon fat to caramelize your onions instead of some of the butter. Crumble the crispy bacon and fold half into the dip, reserving the rest for garnish. This adds a smoky, savory dimension that meat lovers will appreciate.
**French Onion Soup Dip**: After caramelizing the onions, deglaze the pan with 2 tablespoons of beef broth (reduced to a glaze). Incorporate 1/4 cup of finely grated Gruyère cheese into the cream cheese base, then fold in the onions. Top with additional Gruyère and broil briefly until bubbly for a dip that captures the essence of French onion soup.
**Spicy Caramelized Onion Dip**: Add 1-2 finely diced jalapeños (seeds removed for milder heat) to your onions during the last 5 minutes of caramelizing. Incorporate 1/4 teaspoon of cayenne pepper and 1/2 teaspoon of smoked paprika to the cream cheese base. This creates a version with gentle heat that builds pleasantly with each bite.
**Mediterranean Onion Dip**: Mix 1/4 cup crumbled feta cheese, 2 tablespoons chopped kalamata olives, and 1 teaspoon dried oregano into your completed dip. Garnish with a drizzle of quality olive oil and a sprinkle of lemon zest before serving. This variation adds bright, briny notes that contrast beautifully with the sweet onions.
Perfect Pairings: Serving Your Caramelized Onion Dip
Elevating the Dipping Experience
The right accompaniments can transform your caramelized onion dip from a simple appetizer into a memorable tasting experience. Here are some thoughtful serving suggestions:
For casual gatherings, thick-cut potato chips with ridges offer the ideal sturdy base for scooping this substantial dip. The ridges hold more dip per chip, and their salty crunch creates a perfect contrast to the creamy, sweet dip. For a slightly healthier option, baked pita chips or pretzel crisps provide similar structural integrity with less oil.
Fresh vegetables create a beautiful color contrast and lighter alternative. Try endive leaves, cucumber rounds, bell pepper strips, or cherry tomatoes for different textures and flavors that complement the richness of the dip. Easy lettuce salad recipes can provide inspiration for vegetable combinations that work well with this dip.
For an elegant presentation, arrange toasted baguette slices around a decorative bowl of dip. You can further elevate the experience by lightly rubbing the toasted bread with a cut garlic clove before serving.
Creative Serving Applications
Think beyond the dipping bowl! This versatile caramelized onion dip can transform everyday dishes:
Spread a thin layer on a turkey or roast beef sandwich instead of mayonnaise for an instant flavor upgrade. The sweetness of the caramelized onions pairs particularly well with savory meats.
Dollop a spoonful onto a hot baked potato for a luxurious finish that melts beautifully into the fluffy interior. Add chopped chives and crumbled bacon for a loaded potato experience.
Use as a filling for twice-baked potatoes by mixing with the scooped potato flesh before returning to the shells and baking until golden.
Create an elegant appetizer by piping small amounts onto cucumber rounds and garnishing with fresh dill and a sprinkle of paprika for dinner parties.
For portion control at large gatherings, consider serving individual portions in small cups with a few dippers, allowing guests to mingle without hovering around the dip bowl.
Common Questions About Creating Perfect Caramelized Onion Dip
Troubleshooting Your Recipe
Why are my onions burning instead of caramelizing?
The most common culprit is heat that’s too high. True caramelization requires medium-low to low heat and patience. If you’re seeing blackening rather than even browning, your heat is too high. Additionally, make sure you’re stirring occasionally but not constantly—onions need some contact time with the pan to develop color. If they start to stick, add a teaspoon of water to deglaze rather than more oil or butter.
Can I make caramelized onion dip ahead for a party?
Absolutely! In fact, this dip improves with time as the flavors meld together. For best results, make it 24 hours ahead and store covered in the refrigerator. Remove from the refrigerator about 30 minutes before serving to take the chill off, which allows the flavors to fully express themselves. If the dip seems too firm after refrigeration, stir in 1-2 tablespoons of warm water or additional sour cream to restore its creamy consistency.
What’s the difference between caramelizing and sautéing onions?
Sautéing onions is a quick cooking method that softens and lightly browns them in about 5-7 minutes. Caramelizing is a longer process (15-30 minutes) that breaks down the natural sugars in onions, creating complex flavors and a deep golden-brown color. The caramelization process transforms harsh, raw onion flavors into sweet, nutty notes that are the foundation of this dip. The time investment is what creates that distinctive flavor that cannot be rushed or replicated with shortcuts.
“If you enjoy making appetizers that transform humble ingredients, my mango panna cotta recipe follows a similar principle of simple ingredients yielding impressive results.”
Why You’ll Never Go Back to Store-Bought Onion Dip
The Rewards of Homemade Caramelized Onion Dip
Caramelized onion dip represents the perfect balance of effort and reward in home cooking. The transformation of simple ingredients into something extraordinary through nothing more than time and attention exemplifies what makes cooking so satisfying. While it takes patience to properly caramelize onions, the resulting depth of flavor creates a dip that’s impossible to replicate with powdered mixes or preservative-laden store versions.
Beyond the superior taste, making your own caramelized onion dip gives you complete control over ingredients. You can adjust sweetness, tanginess, and texture to your exact preferences. This adaptability makes the recipe endlessly customizable for different occasions or dietary needs without sacrificing flavor.
Perhaps most importantly, homemade caramelized onion dip connects us to the joy of cooking from scratch. There’s something deeply satisfying about transforming raw ingredients into something that delights friends and family. The compliments you’ll receive when serving this dip make the effort entirely worthwhile.
“For another impressive yet achievable recipe that celebrates simple ingredients, try my Italian pear cake which follows the same philosophy of letting quality ingredients shine through thoughtful preparation.”
We hope this caramelized onion dip becomes a staple in your recipe collection. Each time you make it, you might discover new ways to customize it for different occasions. Whether you’re hosting a game day gathering, contributing to a potluck, or simply elevating a quiet evening at home, this dip is sure to create memorable moments around the table.
Caramelized Onion Dip
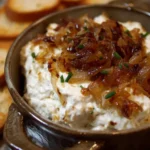
- A rich, creamy dip featuring sweet caramelized onions that develop deep flavor through slow cooking.
- Perfect for parties, game day, or anytime snacking with chips or vegetables.
- Easily customizable with additions like herbs, cheese, or bacon for endless variations.
- Prep Time: 15
- Cook Time: 25
- Total Time: 40 minutes
- Yield: 2 cups (8 servings) 1x
- Category: Dinner
- Method: Stovetop
- Cuisine: American
Ingredients
- 2 large sweet onions, thinly sliced
- 2 tbsp unsalted butter
- 1 tbsp brown sugar
- 8 oz cream cheese, softened
- 1/2 cup sour cream
- 2 tbsp chopped fresh chives
- 1/2 tsp kosher salt
- 1/4 tsp freshly ground black pepper
- 1 tsp Worcestershire sauce (optional)
- 1/2 tsp garlic powder (optional)
Instructions
- Melt butter in a large skillet over medium heat.
- Add the thinly sliced onions and stir to coat with butter.
- Reduce heat to medium-low and cook onions for 15-20 minutes, stirring occasionally, until they turn deep golden brown.
- Stir in brown sugar and continue cooking for 2 minutes until fully caramelized.
- Transfer the onion mixture to a bowl and let cool for 15 minutes.
- In a medium bowl, mix softened cream cheese, sour cream, and chopped chives until smooth.
- Fold in the cooled caramelized onions, mixing gently to maintain texture.
- Season with salt, pepper, and optional Worcestershire sauce or garlic powder to taste.
- Refrigerate for at least 30 minutes (2 hours preferred) to allow flavors to meld.
- Remove from refrigerator 15 minutes before serving for best flavor.
Notes
- For deeper flavor, caramelize the onions longer at a lower temperature.
- This dip tastes even better the day after making it, as the flavors continue to develop overnight.
- Nutrition facts are estimates and may vary based on ingredients used, portion sizes, and preparation methods.
Nutrition
- Serving Size: 1/4 cup
- Calories: 180
- Sugar: 4
- Sodium: 220
- Fat: 16
- Saturated Fat: 10
- Unsaturated Fat: 5
- Carbohydrates: 6
- Fiber: 1
- Protein: 3
- Cholesterol: 45
Keywords: caramelized onion dip, onion dip recipe, party dip ideas, quick dip, appetizer, game day snack
Let’s connect! Follow me for more Joylicious Recipes: Facebook, Instagram, Pinterest