Decadent Delight: Cookies Cream Red Velvet Molten Lava Cakes
A Divine Dessert Experience
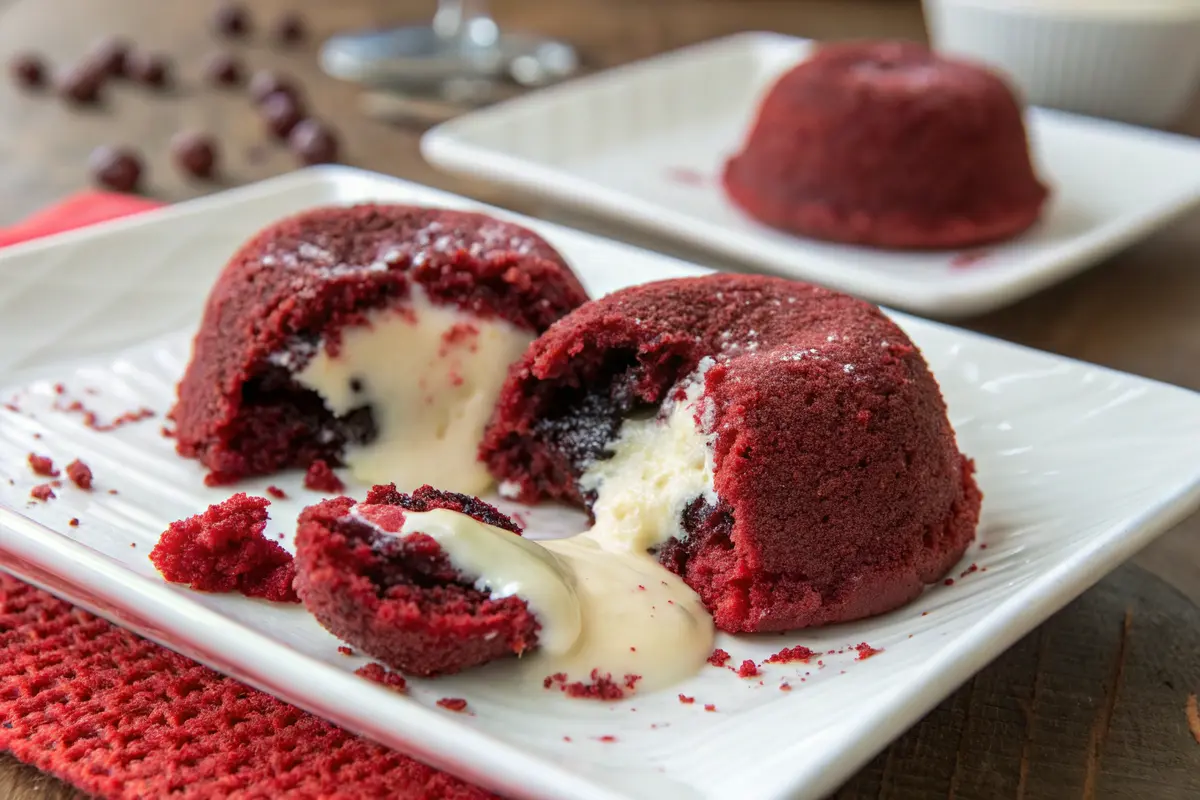
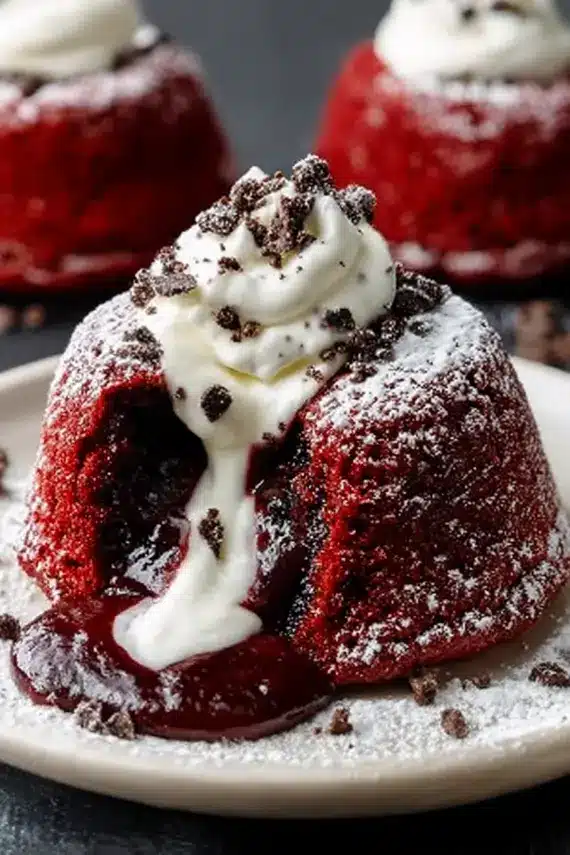
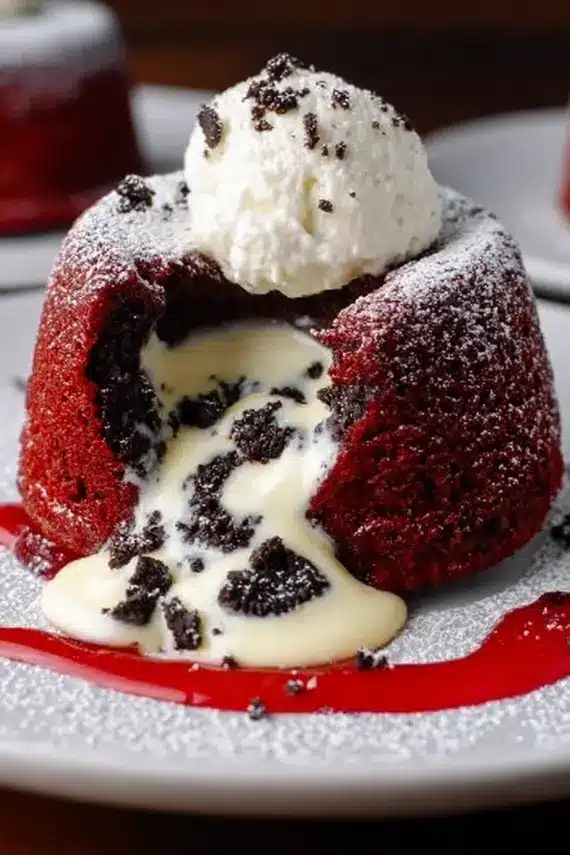
Cookies cream red velvet molten lava cakes combine the nostalgic flavors of cookies and cream with the striking visual appeal of red velvet, all wrapped up in a warm, gooey dessert that oozes deliciousness with every bite. These individual cakes feature a perfectly baked exterior that gives way to a luscious, molten center that flows like sweet lava when you break into it. The contrast of textures and the interplay of chocolate, vanilla, and cream create a dessert experience that’s simply unforgettable. “The Christmas Tree Brownies use a similar technique of creating visual appeal paired with rich chocolate flavor that makes dessert time extra special.”
These spectacular little cakes are perfect for date nights, dinner parties, or anytime you want to elevate your dessert game without spending hours in the kitchen. Despite their impressive appearance, they’re surprisingly easy to prepare and can be made ahead of time, making them ideal for entertaining or satisfying those urgent sweet cravings when they strike.
Essential Elements for Lava Cake Perfection
Foundation Ingredients
Creating the perfect cookies cream red velvet molten lava cakes requires high-quality ingredients that work together harmoniously. The following table outlines everything you’ll need to create this showstopping dessert:
| Ingredient | Amount | Notes |
|---|---|---|
| All-purpose flour | 1 cup | Provides structure to the cakes |
| Cocoa powder | 1/2 cup | Use Dutch-processed for richer color and flavor |
| Cookies and cream filling | 1/2 cup | Crushed sandwich cookies with cream center |
| Large eggs | 2 | Room temperature for better incorporation |
| Butter, melted | 1/2 cup | Unsalted preferred |
| Granulated sugar | 1/2 cup | Provides sweetness and helps create structure |
| Red food coloring | 1 tsp | Gel food coloring gives the best color with less liquid |
| Baking powder | 1 tsp | Leavening agent for cake texture |
| Heavy cream (for molten center) | 1/4 cup | Creates the flowing lava effect |
| Vanilla extract | 1 tsp | Enhances the cookies and cream flavor |
| Salt | 1/4 tsp | Balances the sweetness |
| White chocolate chips (optional) | 1/4 cup | For extra creamy centers |
| Cream cheese (optional) | 2 oz | For a tangy red velvet flavor enhancement |
| Powdered sugar (for dusting) | 2 tbsp | For presentation |
| Additional cookies for garnish | 4-6 cookies | Crushed or whole for topping |
“The Pistachio Salad Recipe combines creamy textures with contrasting elements, similar to how these lava cakes balance fluffy cake exterior with creamy molten centers.”
Equipment Necessities
Having the right tools on hand will make preparing these cookies cream red velvet molten lava cakes much easier:
- 6-cup muffin tin or 4 ramekins (6-8 oz each)
- Mixing bowls (medium and large)
- Whisk
- Rubber spatula
- Measuring cups and spoons
- Cooking spray or butter for greasing
- Sifter or fine-mesh strainer (for dry ingredients)
- Cookie crumbler or food processor (for cookies)
Crafting Your Molten Masterpieces: Step-by-Step Guide
Preparation Phase
Follow these detailed instructions to create perfect cookies cream red velvet molten lava cakes every time:
- Prepare the oven and molds: Preheat the oven to 350°F (175°C). Thoroughly grease a 6-cup muffin tin or four 6-8 oz ramekins with butter or cooking spray. For extra insurance against sticking, dust with a light coating of cocoa powder.
- Prepare the dry ingredients: Whisk together 1 cup all-purpose flour, 1/2 cup cocoa powder, 1 tsp baking powder, 1/4 tsp salt, and 1/2 cup sugar in a large bowl until well combined and free of lumps. Sifting these ingredients can help achieve a lighter texture.
- Mix the wet ingredients: In a separate medium bowl, combine 1/2 cup melted butter (cooled slightly), 2 large eggs at room temperature, 1 tsp vanilla extract, and 1 tsp red food coloring. Whisk until smooth and the color is evenly distributed throughout the mixture.
- Combine wet and dry mixtures: Pour the wet ingredients into the dry ingredients and gently fold together using a rubber spatula. Mix just until combined—a few small lumps are fine, but overmixing can lead to tough cakes.
- Add cookies and cream element: Gently fold in the 1/2 cup cookies and cream filling, being careful not to overmix. You want visible streaks of cookies throughout the batter for visual appeal and texture contrast.
- Fill the molds: Spoon the batter into the prepared muffin tin or ramekins, filling each about 2/3 full. Use the back of a spoon to create a small well in the center of each cake.
- Create the molten center: Pour about 1 tablespoon of heavy cream into each well. If using white chocolate chips for extra richness, place a few chips in each well before adding the cream.
- Bake with precision: Bake for 12-15 minutes until the tops are set but the centers remain soft and slightly jiggly. The edges should be firm to the touch, but the center should still have some give—this ensures the molten effect.
- Rest briefly: Allow the cakes to cool in the pan for 2 minutes—any longer and the centers might set too much, any shorter and they may collapse when removed.
- Unmold carefully: Run a thin knife around the edges of each cake, then invert onto serving plates. If using ramekins, you can serve directly in them for a more casual presentation.
- Garnish and serve: Dust with powdered sugar, add a dollop of whipped cream if desired, and garnish with crushed cookies. Serve immediately while the centers are still warm and flowing.
“The Zucchini Feta Pie demonstrates how layering ingredients creates a spectacular final result, much like the way these lava cakes build layers of flavor and texture.”
Insider Secrets for Lava Cake Success
Professional Baker’s Techniques
Elevate your cookies cream red velvet molten lava cakes with these expert tips:
- Temperature matters: Room temperature eggs incorporate much better into the batter, creating a smoother texture. If you’re short on time, place cold eggs in warm (not hot) water for 5 minutes.
- Don’t skip the wells: Creating wells in the batter before adding the cream is crucial for achieving that perfect molten center. The cream creates a pocket that doesn’t fully cook during baking.
- Watch for visual cues: The perfect lava cake should have a set exterior that springs back slightly when touched, but still has a slight jiggle in the center. Overbaking is the most common mistake.
- Add cream cheese: For an authentic red velvet flavor, mix 2 oz of softened cream cheese into the batter. This adds the signature tangy note that makes red velvet so distinctive.
- Ramekin alternative: No ramekins or muffin tin? Use oven-safe coffee mugs in a pinch—just increase the baking time by about 2 minutes.
- Cookie selection: While classic black and white sandwich cookies work wonderfully, try golden vanilla sandwich cookies for a different twist that complements the red velvet beautifully.
- Cold center hack: For a guaranteed molten center, freeze small balls of cookies and cream filling or white chocolate ganache and place them in the center of the batter before baking.
Troubleshooting Common Issues
Even experienced bakers encounter challenges. Here’s how to address common lava cake problems:
- Cakes without “lava”: If your centers aren’t flowing, you likely overbaked them. Reduce baking time by 1-2 minutes next round, and remember that cakes continue cooking slightly after removal from the oven.
- Cakes collapse when plated: This usually means they’re underbaked. Add 1-2 minutes to your baking time, or let them rest longer in the pan before unmolding.
- Pale red color: Red food coloring can lose intensity when baked. Use gel food coloring instead of liquid for more vibrant results, or add a touch more than the recipe calls for.
- Cakes stick to the pan: Be extremely thorough with greasing. Consider using parchment paper circles in the bottom of your molds for fool-proof release.
Keeping Your Decadent Dessert Fresh
Optimal Storage Methods
While cookies cream red velvet molten lava cakes are best enjoyed fresh from the oven, there are ways to prepare them ahead of time:
- Batter storage: Prepare the batter up to 24 hours in advance and store it covered in the refrigerator. Bring to room temperature for about 30 minutes before filling your molds and baking.
- Pre-baked storage: These cakes are designed to have flowing centers, which solidify when cooled. Fully baked cakes can be stored in an airtight container at room temperature for up to 2 days but will lose their molten centers.
- Freezing unbaked cakes: Fill your greased molds with batter, cover tightly with plastic wrap, and freeze for up to 1 month. When ready to serve, bake directly from frozen, adding 3-4 minutes to the baking time.
- Reheating option: Already baked cakes can be reheated in a microwave for 15-20 seconds. While they won’t have the same flowing center as fresh-baked, they’ll still be deliciously warm and soft in the middle.
Freshness Preservation Tips
To maintain the best quality if you must store your lava cakes:
- Keep components separate: If making ahead, store any garnishes like whipped cream or cookie crumbles separately and add just before serving.
- Avoid refrigeration after baking: Once baked, refrigeration can dry out the cakes. If you must refrigerate them, cover tightly with plastic wrap to prevent moisture loss.
- Proper cooling before storage: If storing baked cakes, allow them to cool completely before placing in an airtight container to prevent condensation from making them soggy.
“The Butternut Squash Pot Pie demonstrates effective techniques for maintaining texture integrity during storage, which can be applied to these delicate lava cakes as well.”
Creative Twists on the Classic Recipe
Flavor Transformations
While the classic cookies cream red velvet molten lava cakes are already incredible, consider these exciting variations to keep things interesting:
- Mint Chocolate Explosion: Add 1/4 teaspoon of mint extract to the batter and use mint-flavored cream cookies instead of regular sandwich cookies. The mint provides a refreshing contrast to the rich chocolate, creating a sophisticated flavor profile similar to an after-dinner mint.
- Double Chocolate Indulgence: Replace the cookies and cream filling with chocolate hazelnut spread and add mini chocolate chips to the batter. This intensifies the chocolate experience, creating an ultra-decadent dessert perfect for serious chocolate lovers.
- Citrus Surprise: Add 1 tablespoon of orange zest to the batter and replace the vanilla extract with orange extract. The bright citrus notes cut through the richness of the chocolate and complement the red velvet flavor beautifully.
- Peanut Butter Dream: Create a molten center using 1 teaspoon of peanut butter in each well instead of heavy cream. The combination of red velvet cake with a peanut butter molten center is an unexpected but delicious twist on the classic recipe.
- Berry Bliss: Add 1/4 cup of freeze-dried raspberry powder to the dry ingredients and use white chocolate for the molten center. The tartness of the berries works wonderfully with the sweet white chocolate and red velvet base.
- Coffee Infusion: Dissolve 1 tablespoon of instant espresso powder in the melted butter before adding it to the wet ingredients. This coffee-enhanced version adds depth to the chocolate flavor without overpowering the signature red velvet taste.
Dietary Adaptations
Make these cookies cream red velvet molten lava cakes accessible to everyone with these dietary modifications:
- Gluten-Free Version: Substitute the all-purpose flour with a 1:1 gluten-free baking blend. Be sure to check that your cookies and cream elements are also gluten-free by using appropriate sandwich cookies.
- Dairy-Free Option: Replace butter with coconut oil, use coconut cream instead of heavy cream, and select dairy-free sandwich cookies for the cookies and cream element. The coconut adds a subtle tropical note that works beautifully with the chocolate.
- Reduced Sugar Approach: Cut the sugar to 1/3 cup and use dark chocolate cocoa powder, which requires less sweetening. You can also use sugar-free sandwich cookies for the cookies and cream component.
- Egg-Free Alternative: Replace each egg with 1/4 cup of unsweetened applesauce or a commercial egg replacer. This may slightly alter the texture but will still create a delicious dessert.
Presenting Your Molten Masterpieces
Elegant Plating Suggestions
Transform your cookies cream red velvet molten lava cakes into restaurant-worthy desserts with these serving ideas:
- Classic Presentation: Place each cake in the center of a white plate, dust with powdered sugar, add a small dollop of lightly sweetened whipped cream, and garnish with cookie crumbles. The white plate creates a stunning contrast with the red cake and dark flowing center.
- Dessert Bowl Style: Serve in a shallow dessert bowl with a small scoop of vanilla ice cream alongside. As the ice cream melts, it creates a beautiful sauce that mingles with the molten cake center.
- Deconstructed Approach: Plate the cake with artistic drizzles of white chocolate sauce, a few whole cookie pieces arranged around the plate, and edible flower petals for an upscale presentation.
- Brunch Setting: For a decadent brunch option, serve smaller portions with fresh berries and a light dusting of powdered sugar for a less intense sweet treat that pairs beautifully with coffee.
- Family Style: For casual gatherings, create a build-your-own dessert station with the warm lava cakes as the centerpiece, surrounded by various toppings like whipped cream, cookie pieces, chocolate sauce, and fresh berries.
- Holiday Presentation: For special occasions, stencil seasonal shapes (hearts, stars, snowflakes) onto the cakes using powdered sugar, or add themed garnishes like mint leaves for Christmas or edible gold dust for New Year’s celebrations.
Perfect Pairings
Complete your dessert experience with these complementary accompaniments:
- Vanilla Bean Ice Cream: The cool, creamy vanilla is the perfect counterpoint to the warm, rich cake. As it melts against the hot cake, it creates an additional sauce element.
- Fresh Berries: Raspberries, strawberries, or blackberries add a welcome tartness and freshness that balances the rich chocolate flavors. This vibrant carrot raisin salad uses similar principles of balancing rich flavors with fresh elements.
- Coffee or Espresso: A small cup of strong coffee or espresso served alongside enhances the chocolate flavors in the cake and cleanses the palate between bites.
- Mascarpone Cream: A dollop of lightly sweetened mascarpone provides a sophisticated alternative to whipped cream, with its slight tanginess complementing the sweet cake.
- Chocolate Covered Strawberries: For a truly indulgent presentation, pair each cake with a chocolate-dipped strawberry for an elegant dessert worthy of special occasions.
Commonly Asked Questions About Lava Cakes
Expert Solutions to Baking Challenges
Can I make these cookies cream red velvet molten lava cakes without red food coloring?
Absolutely! The red food coloring is purely aesthetic and doesn’t affect the flavor. For a natural alternative, you can use 2 tablespoons of beet powder, which will give a more subtle red hue. Or simply omit the coloring entirely for a chocolate cookies and cream lava cake that tastes just as delicious.
Why did my lava cakes collapse when I removed them from the oven?
Lava cakes naturally sink a bit in the center as they cool because of their molten interior. However, if they collapse completely, they were likely underbaked. Try increasing your baking time by 1-2 minutes. Remember that different ovens can vary in temperature, so watch for visual cues: the edges should be set while the center remains slightly jiggly.
Can I prepare these in advance for a dinner party?
Yes! The best make-ahead approach is to prepare the batter, fill the greased molds, and refrigerate them covered for up to 24 hours. Allow them to come to room temperature for about 30 minutes before baking. Alternatively, you can freeze the unbaked cakes in their molds for up to a month and bake directly from frozen, adding 3-4 minutes to the baking time.
Sweet Ending to a Decadent Journey
Your Gateway to Dessert Bliss
Cookies cream red velvet molten lava cakes represent the perfect balance of simplicity and indulgence—a dessert that looks complex but is actually quite approachable for home bakers of all skill levels. The striking visual contrast of the deep red cake exterior with the flowing, creamy center makes for an impressive presentation that belies the recipe’s straightforward preparation. “The Watermelon Cake offers another visually stunning dessert option that pairs beautifully with these lava cakes for a themed dessert table.”
Whether you’re serving these for a romantic dinner, a family celebration, or simply treating yourself after a long week, these molten lava cakes deliver a moment of pure dessert bliss. The cookies and cream elements add a nostalgic touch that appeals to both children and adults, while the sophisticated presentation makes them special enough for any occasion. Don’t be afraid to experiment with the variations to find your perfect version, and remember—a slightly underbaked cake is the secret to that perfect molten center. Happy baking and even happier eating!
“The Garlic Butter Grilled Shrimp makes an excellent main course before serving these decadent lava cakes, creating a memorable meal from start to finish.”
Cookies Cream Red Velvet Molten Lava Cakes
- Indulgent red velvet cakes with a cookies and cream twist and molten flowing centers.
- These individual desserts combine the nostalgic flavor of sandwich cookies with elegant presentation.
- Perfect for special occasions or whenever you crave a decadent treat.
- Prep Time: 15
- Cook Time: 15
- Total Time: 30 minutes
- Yield: 6 individual cakes 1x
- Category: Dessert
- Method: Baking
- Cuisine: American
Ingredients
- 1 cup all‑purpose flour
- 1/2 cup cocoa powder (Dutch-processed preferred)
- 1/2 cup cookies and cream filling (crushed sandwich cookies with cream)
- 2 large eggs, room temperature
- 1/2 cup unsalted butter, melted
- 1/2 cup granulated sugar
- 1 tsp red food coloring (gel preferred)
- 1 tsp baking powder
- 1/4 cup heavy cream (for molten center)
- 1 tsp vanilla extract
- 1/4 tsp salt
- 2 tbsp powdered sugar (for dusting)
- 4–6 sandwich cookies, crushed (for garnish)
- Optional: 1/4 cup white chocolate chips
- Optional: 2 oz cream cheese, softened
Instructions
- Preheat the oven to 350°F (175°C) and thoroughly grease a 6-cup muffin tin or four 6-8 oz ramekins.
- Whisk together flour, cocoa powder, baking powder, salt, and sugar in a large bowl until well combined.
- In a separate bowl, combine melted butter, eggs, vanilla extract, and red food coloring until smooth.
- Pour the wet ingredients into the dry ingredients and gently fold together until just combined.
- Gently fold in the cookies and cream filling, being careful not to overmix.
- Spoon the batter into the prepared molds, filling each about 2/3 full.
- Use the back of a spoon to create a small well in the center of each cake.
- Pour about 1 tablespoon of heavy cream into each well (add white chocolate chips if using).
- Bake for 12-15 minutes until the edges are set but the centers remain soft and slightly jiggly.
- Allow to cool in the pan for 2 minutes before carefully unmolding.
- Dust with powdered sugar, add crushed cookies for garnish, and serve immediately while centers are still warm and flowing.
Notes
- For guaranteed molten centers, slightly underbake the cakes – they should be set around the edges but still jiggly in the middle.
- These cakes are best served immediately after baking but can be prepared ahead and baked just before serving.
- For a stronger red velvet flavor, add 2 oz of softened cream cheese to the batter.
- Nutrition facts are estimates and may vary based on ingredients used, portion sizes, and preparation methods.
Nutrition
- Serving Size: 1 lava cake
- Calories: 385
- Sugar: 28
- Sodium: 220
- Fat: 22
- Saturated Fat: 13
- Unsaturated Fat: 8
- Carbohydrates: 42
- Fiber: 2
- Protein: 5
- Cholesterol: 95
Keywords: cookies cream red velvet molten lava cakes, red velvet lava cake, cookies cream dessert, molten lava cake, easy dessert
Let’s connect! Follow me for more Joylicious Recipes: Facebook, Instagram, Pinterest