Unlock the Secrets of Perfect Crispy Chicken Kyiv at Home
A Classic Ukrainian Delicacy Made Simple
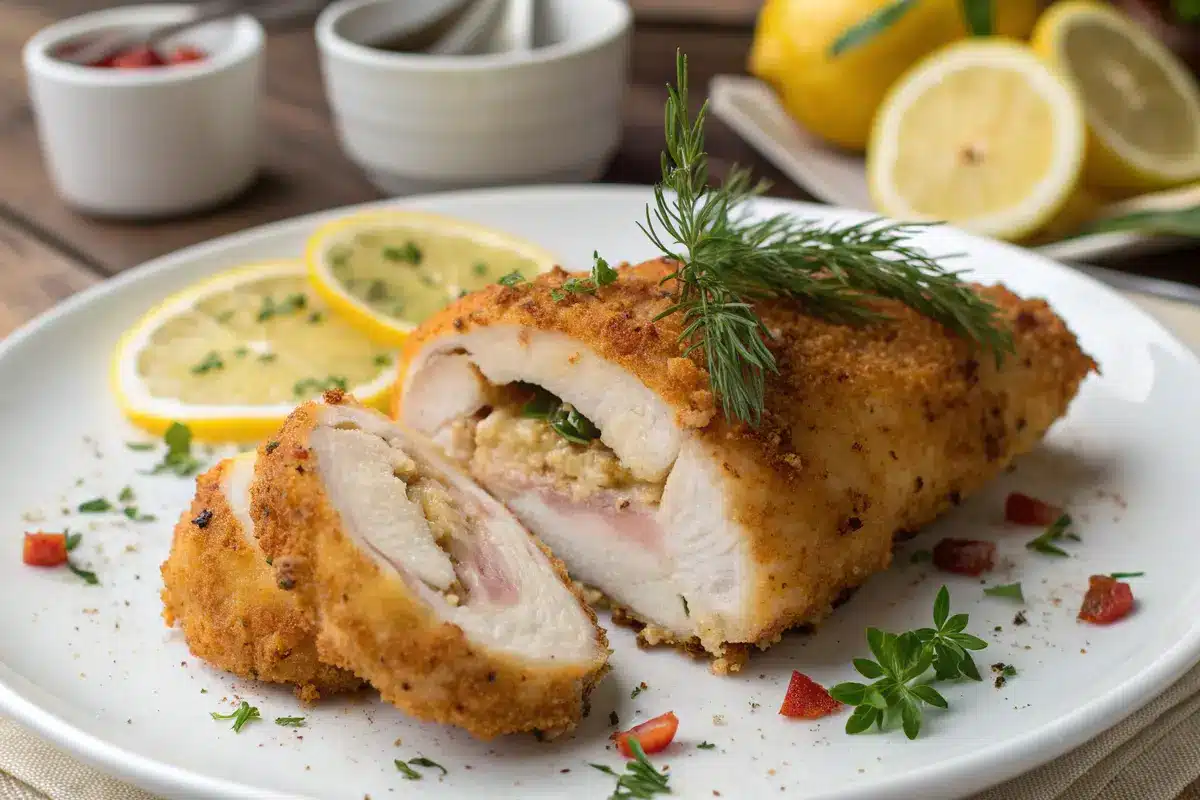
Crispy Chicken Kyiv transforms ordinary chicken breasts into an extraordinary culinary experience that delivers a satisfying crunch followed by an explosion of herb-infused garlic butter. This beloved Ukrainian dish has conquered dinner tables worldwide with its irresistible combination of golden-brown exterior and rich, flavorful filling. “The Garlic Butter Chicken Bites offers similar garlic-infused flavors in a quick-cooking format, but our Chicken Kyiv delivers a more dramatic presentation.” While it looks impressive enough for special occasions, my foolproof method makes it accessible for weeknight dinners when you want to elevate your meal without spending hours in the kitchen.
Perfect for serving to guests or treating your family to something special, this classic dish pairs beautifully with simple sides that allow its distinctive flavor profile to shine. The contrast between the crunchy coating and the melty butter center creates a sensory experience that keeps people coming back for more.
Essential Ingredients for the Ultimate Chicken Kyiv Experience
The Building Blocks of Perfect Flavor
Creating restaurant-quality Crispy Chicken Kyiv starts with selecting the right ingredients. Each component plays a crucial role in developing the distinctive texture and flavor that makes this dish so memorable.
| Ingredient | Quantity | Notes |
|---|---|---|
| Boneless, skinless chicken breasts | 4 large (about 6-8 oz each) | Choose even-sized breasts for consistent cooking |
| Unsalted butter, softened | 4 tablespoons | European-style butter adds extra richness |
| Garlic, minced | 2-3 cloves | Fresh is best for maximum aroma |
| Fresh parsley, finely chopped | 2 tablespoons | Provides vibrant color and herbaceous notes |
| Fresh dill, chopped (optional) | 1 tablespoon | Adds authentic Ukrainian flavor |
| Lemon zest | 1 teaspoon | Brightens the butter filling |
| All-purpose flour | 1 cup | Creates the first layer of coating |
| Large eggs | 2, beaten | Acts as the glue for breadcrumbs |
| Panko breadcrumbs | 1 cup | Delivers superior crispiness compared to regular breadcrumbs |
| Regular breadcrumbs | ½ cup | Combines with panko for ideal texture |
| Salt | 1 teaspoon | Season each layer for best results |
| Black pepper | ½ teaspoon | Freshly ground adds more flavor |
| Paprika | ½ teaspoon | Adds color and mild smoky flavor to coating |
| Neutral cooking oil or cooking spray | As needed | Helps achieve golden crust when baking |
“The Garlic Parmesan Stuffed Mushrooms utilize a similar garlic butter base that creates an irresistible flavor profile like the filling in our Chicken Kyiv.”
Flavor-Boosting Optional Add-Ins
For those looking to customize their Chicken Kyiv, consider these flavor enhancers:
- 2 tablespoons grated Parmesan cheese in the butter mixture
- ¼ teaspoon cayenne pepper for gentle heat
- ½ teaspoon Dijon mustard for subtle tanginess
- 1 tablespoon finely chopped chives for onion notes
Master the Art of Creating Perfect Chicken Kyiv
Preparing the Garlic Butter Filling
Follow these detailed steps to create the ultimate Crispy Chicken Kyiv that balances a crunchy exterior with a luxurious garlic butter center.
- Make the herb butter: In a small bowl, combine softened butter, minced garlic, chopped parsley, dill (if using), lemon zest, ¼ teaspoon salt, and ¼ teaspoon black pepper. Mix thoroughly until all ingredients are evenly incorporated. Shape the mixture into a small rectangle on a piece of plastic wrap, fold the wrap over to cover, and refrigerate for 20-30 minutes until firm.
- Prepare the chicken breasts: Place each chicken breast between two sheets of plastic wrap or parchment paper. Using a meat mallet or heavy pan, carefully pound the chicken to an even thickness of approximately ¼ inch, working from the center outward. Take care not to tear the meat. Season both sides lightly with salt and pepper.
- Fill and roll the chicken: Remove the chilled butter mixture from the refrigerator and cut into 4 equal portions. Place one portion of butter in the center of each flattened chicken breast. Fold in the sides of the chicken, then roll tightly from one end to the other, completely enclosing the butter. Secure with toothpicks if necessary.
- Set up your breading station: Prepare three shallow dishes: one with flour seasoned with ¼ teaspoon salt and ¼ teaspoon pepper; one with beaten eggs; and one with a mixture of panko and regular breadcrumbs combined with paprika and remaining salt and pepper.
- Coat the chicken rolls: Working with one chicken roll at a time, dredge in flour, shaking off excess. Dip into beaten eggs, allowing excess to drip off. Finally, roll in breadcrumb mixture, pressing gently to adhere. For an extra-crispy coating, repeat the egg and breadcrumb steps. Place prepared rolls on a plate and refrigerate for at least 30 minutes (or up to 4 hours) to help set the coating.
- Preheat oven and prepare baking sheet: Preheat your oven to 400°F (200°C). Line a baking sheet with parchment paper and lightly brush or spray with oil.
- Bake to golden perfection: Place the chilled chicken rolls on the prepared baking sheet, seam side down. Lightly spray or brush the tops with oil for better browning. Bake for 25-30 minutes until golden brown and crispy. The internal temperature should reach 165°F (74°C) when tested with a meat thermometer.
- Rest before serving: Allow the Chicken Kyiv to rest for 5 minutes before serving. This helps the juices redistribute and prevents the butter from rushing out when cut. Carefully remove any toothpicks before serving.
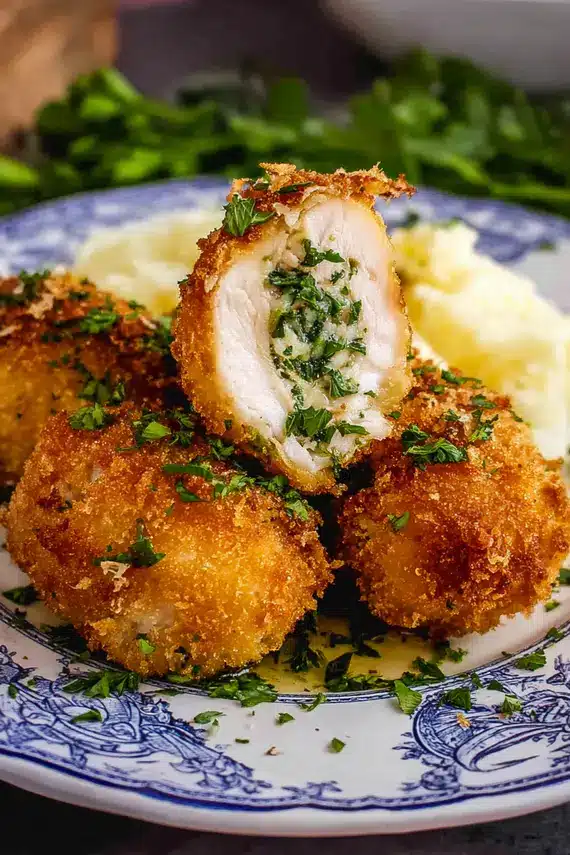
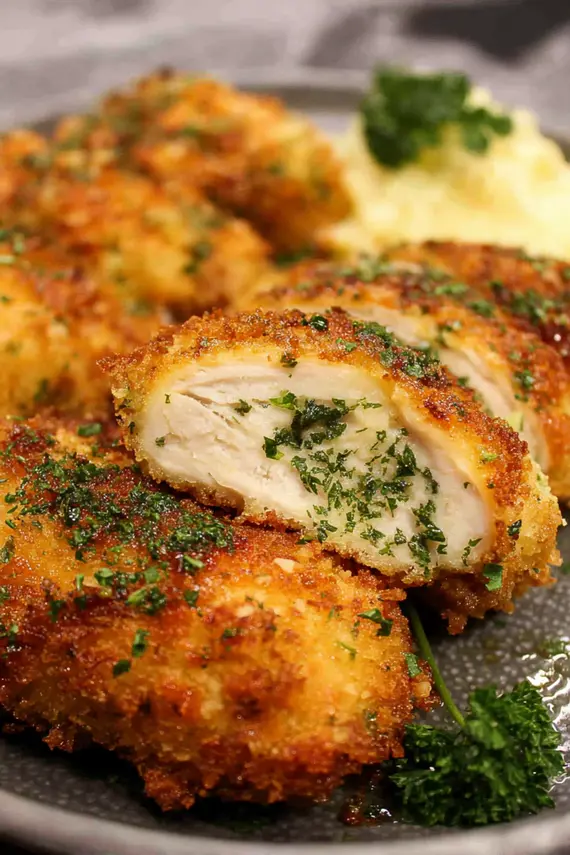
- Serve and enjoy: Transfer to serving plates, garnish with fresh herb sprigs and lemon wedges. Cut into the Chicken Kyiv at the table to reveal the delicious garlic butter filling flowing from inside.
Insider Tips for Chicken Kyiv Success Every Time
Professional Techniques for Home Cooks
Mastering Crispy Chicken Kyiv becomes foolproof with these expert tips that address common challenges and elevate your results.
- Prevent butter leakage: Freeze the herbed butter for at least 30 minutes before using. This keeps it solid longer during the cooking process, reducing the chance of premature melting.
- Double-coating technique: For an extra-crunchy exterior that seals in the butter effectively, double-coat the chicken by dipping in egg and breadcrumbs twice.
- Rest time matters: Don’t skip the 30-minute refrigeration after breading. This sets the coating and helps prevent it from falling off during baking.
- Even thickness is crucial: Take your time when pounding the chicken breasts to ensure uniform thickness. Uneven chicken will cook inconsistently and may tear when rolling.
- Temperature indicators: Use a meat thermometer to verify doneness (165°F/74°C). If the chicken is browning too quickly, tent loosely with foil to prevent burning while allowing it to cook through.
- Make-ahead strategy: Prepare the entire dish up to the point of baking, then refrigerate for up to 24 hours. Allow an extra 5-10 minutes of baking time if cooking directly from the refrigerator.
- Air fryer alternative: “The Spicy Chicken Breakfast Bowls use a similar high-heat cooking method that creates crispy exteriors while maintaining juicy interiors.” For Chicken Kyiv in an air fryer, cook at 380°F for 18-20 minutes, lightly spraying with oil halfway through.
Keeping Your Crispy Chicken Kyiv Fresh and Delicious
Storage Strategies for Optimal Texture
Proper storage techniques help maintain the distinctive contrasting textures that make Crispy Chicken Kyiv so special, even when enjoyed as leftovers.
Refrigerating cooked Chicken Kyiv requires careful handling to preserve its quality. Place completely cooled pieces in an airtight container lined with paper towels to absorb excess moisture. Store in the refrigerator for up to 3 days. The crispy coating will inevitably soften somewhat, but proper reheating can restore much of the original texture.
For the best results when reheating, place refrigerated Chicken Kyiv on a wire rack over a baking sheet and warm in a preheated 350°F (175°C) oven for 15-20 minutes. This method helps recrisp the exterior while gently warming the center without causing the butter to completely leak out. Avoid microwave reheating, which will result in a soggy exterior and potentially overheated butter filling.
“The Chicken Quinoa Soup offers another delicious way to use chicken breasts in a completely different preparation method than our crispy Chicken Kyiv.”
If you’re planning ahead, you can freeze assembled but unbaked Chicken Kyiv for up to 1 month. Wrap each prepared roll individually in plastic wrap, then foil, and store in a freezer-safe container. When ready to cook, thaw overnight in the refrigerator before baking as directed, adding 5-7 minutes to the cooking time. Alternatively, bake from frozen at 375°F (190°C) for 35-40 minutes until golden and cooked through.
Exciting Twists on Traditional Chicken Kyiv
Creative Variations to Expand Your Recipe Repertoire
While the classic Ukrainian Chicken Recipe is undeniably delicious, these inventive variations offer fresh takes on the traditional dish while maintaining its essence.
Mediterranean Chicken Kyiv: Replace the traditional herb butter with a filling of softened butter mixed with sun-dried tomatoes, feta cheese, fresh basil, and a touch of oregano. The tangy-savory combination creates a delightful Mediterranean-inspired version that pairs beautifully with roasted vegetables or a simple Greek salad.
Spinach and Parmesan Stuffed Kyiv: Enhance the classic garlic butter by adding 2 tablespoons of finely chopped sautéed spinach and ¼ cup grated Parmesan cheese to the filling. This variation adds a subtle earthiness and extra umami that complements the rich butter while introducing additional nutrients.
Spicy Buffalo Kyiv: For heat-loving palates, create a butter filling infused with 1-2 tablespoons of buffalo sauce, a dash of cayenne pepper, and some crumbled blue cheese. This American fusion variation delivers the beloved buffalo chicken flavor profile in an elegant presentation that will surprise and delight guests.
Herb-Crusted Kyiv: Elevate the breadcrumb coating by adding 2 tablespoons of finely chopped fresh herbs like thyme, rosemary, and sage to the breadcrumb mixture. These aromatic herbs create a fragrant crust that enhances the garlic butter filling with complementary flavors.
Mini Chicken Kyiv Appetizers: For entertaining, create bite-sized versions using chicken tenders instead of full breasts. The smaller portions cook more quickly and make perfect finger food for parties. Serve with a light dipping sauce like lemon aioli or herb-infused sour cream.
Pan-Fried Kyiv: While baking is the healthier option, traditional Chicken Kyiv was often pan-fried for maximum crispiness. To try this method, heat ½ inch of oil in a heavy skillet and fry the prepared chicken rolls for about 3-4 minutes per side until golden brown, then finish in a 350°F oven for 15-20 minutes until cooked through.
Delightful Serving Ideas for Your Golden Crusted Chicken
Creating Complete Meals Around Your Chicken Kyiv
Transform your Crispy Chicken Kyiv from a standalone dish into a complete dining experience with these thoughtful serving suggestions that complement its rich flavors and textures.
Classic Pairing: For a traditional serving style, plate your golden-crusted chicken alongside creamy mashed potatoes and steamed green vegetables like asparagus or green beans. The potatoes soak up any escaped garlic butter, creating a delicious combination on each forkful.
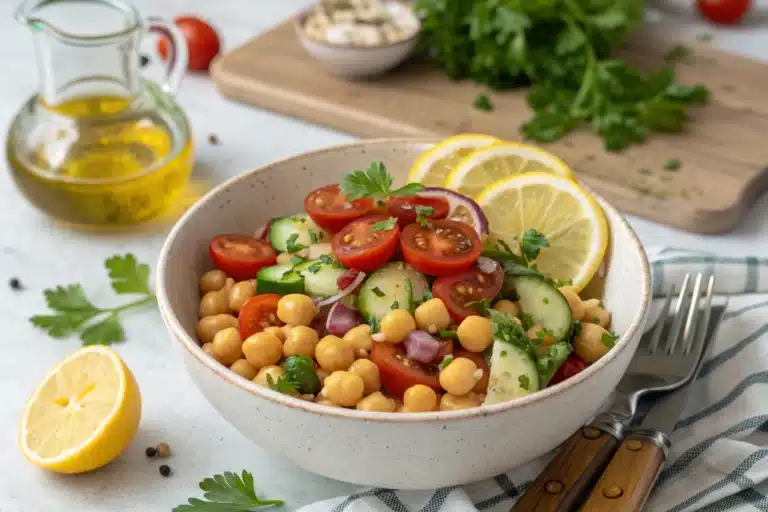
Light Summer Meal: During warmer months, serve Chicken Kyiv with a bright, acidic side like a tomato and cucumber salad dressed with lemon vinaigrette. This cranberry chicken salad offers complementary flavors that would work well alongside your Chicken Kyiv for a fuller meal with contrasting textures.
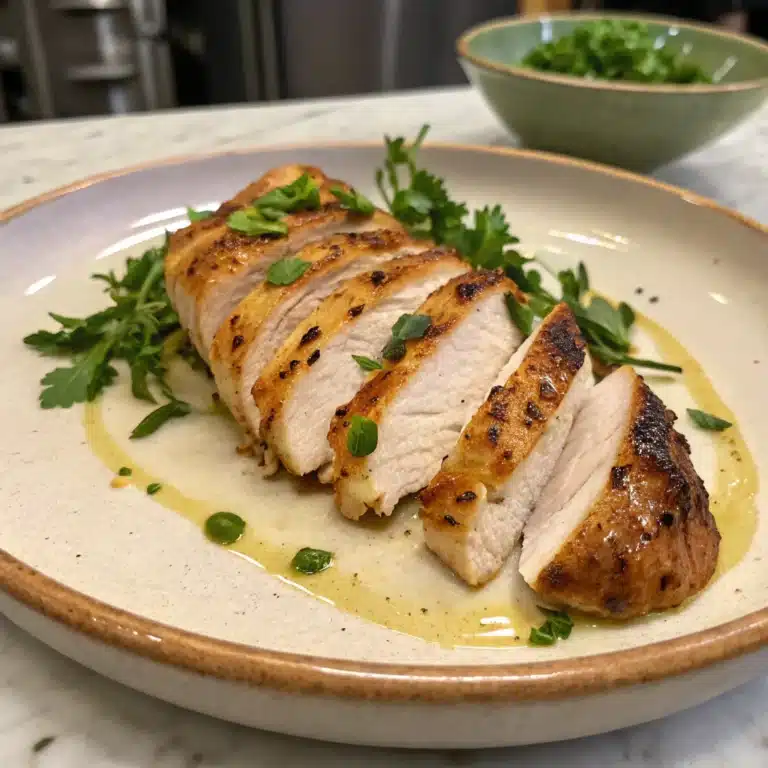
Elegant Dinner Party: Impress guests by serving sliced Chicken Kyiv atop a small pool of light sauce, such as a simple white wine and herb reduction (alcohol-free version available by using chicken stock and a splash of white grape juice). Add roasted fingerling potatoes and glazed baby carrots for a restaurant-quality presentation.
Family-Style Meal: Place the whole Chicken Kyiv on a serving platter surrounded by roasted root vegetables like carrots, parsnips, and Brussels sprouts. The vegetables can roast on the same sheet pan during the last 15-20 minutes of cooking the chicken, making cleanup easier.
Lunch Leftovers: Repurpose leftover Chicken Kyiv by slicing it cold and fanning it over a bed of mixed greens with cherry tomatoes, cucumber, and a light vinaigrette. The contrast between the rich chicken and fresh vegetables creates a satisfying midday meal.
Portioning Guidance: One full Chicken Kyiv breast typically serves one adult as a main course. For lighter appetites or when serving multiple sides, you can slice each rolled chicken breast into 4-5 medallions after resting, creating an elegant presentation that stretches the dish further.
Common Questions About Mastering Chicken Kyiv
Expert Answers to Your Crispy Chicken Concerns
Why does the butter leak out of my Chicken Kyiv during cooking?
There are several potential causes for butter leakage. First, ensure your chicken is pounded to an even thickness and rolled tightly around properly chilled or frozen butter. Second, secure the rolls with toothpicks if necessary. Finally, the double-breading technique (dipping in egg and breadcrumbs twice) creates a more effective seal. Refrigerating the prepared rolls for at least 30 minutes before baking also helps set the coating and prevent leaks.
Can I prepare Chicken Kyiv in advance for a dinner party?
Yes, this dish is perfect for advance preparation. You can prepare the rolls up to the point of baking and refrigerate them, covered, for up to 24 hours. When ready to serve, simply bake as directed, adding about 5 extra minutes to the cooking time since they’ll be starting from cold. Alternatively, you can freeze the prepared, uncooked rolls for up to a month and bake directly from frozen (at 375°F for 35-40 minutes).
Is there a way to make Chicken Kyiv without using toothpicks?
The key to toothpick-free Chicken Kyiv is proper rolling technique and adequate chilling time. Start with well-pounded chicken (about ¼-inch thick), place the frozen butter log toward one end, fold in the sides, then roll tightly. Wrap each roll in plastic wrap, twisting the ends to create a tight cylinder, and refrigerate for at least 2 hours or overnight. This extended chilling time helps the chicken hold its shape during the breading and cooking process.
How do I know when my Chicken Kyiv is cooked perfectly?
The most reliable method is using an instant-read thermometer inserted into the chicken portion (not the butter) to verify it has reached 165°F (74°C). Visually, the breadcrumb coating should be golden brown and crisp. If your chicken is browning too quickly before reaching the safe internal temperature, lower the oven temperature to 375°F and cover loosely with foil for the remaining cooking time.
Can I make a dairy-free version of Chicken Kyiv?
Absolutely! You can create a delicious dairy-free version using plant-based butter alternatives. Choose a high-quality vegan butter that has similar fat content to regular butter for best results. The flavor profile will be slightly different, but still delicious. Enhance the filling with extra herbs and a touch of nutritional yeast to add richness and compensate for any flavor differences in the plant-based butter.
Final Thoughts on Creating Restaurant-Quality Chicken Kyiv at Home
Embracing Traditional Flavors with Modern Techniques
Crispy Chicken Kyiv represents the perfect marriage of simple ingredients transformed through thoughtful technique into something truly special. The contrast between the golden crispy exterior and the luscious herb-infused garlic butter creates a memorable dining experience that feels indulgent while remaining accessible to home cooks. “The Chicken and Stuffing Casserole offers another comforting chicken dinner option when you’re looking for something different from our Chicken Kyiv recipe.”
What makes this Ukrainian Chicken Recipe particularly wonderful is its versatility across dining occasions. Whether you’re preparing a cozy family dinner or hosting a sophisticated gathering, Chicken Kyiv delivers impressive results without requiring professional culinary skills. The step-by-step approach outlined in this guide ensures success even for those attempting this classic dish for the first time.
I encourage you to embrace the joy of creating this golden-crusted chicken masterpiece in your own kitchen. The moment when you cut into the perfectly cooked roll and watch the aromatic garlic butter spill onto your plate is truly one of cooking’s small but significant pleasures. As you become comfortable with the basic technique, don’t hesitate to experiment with the variations to match your family’s preferences or the seasons. “For a different approach to herb-infused chicken, the Lemon Chicken Lentil Soup offers bright flavors in a comforting format that’s perfect for cooler months.”
Remember that the best cooking comes from practice and enjoyment of the process. With each Chicken Kyiv you prepare, you’ll refine your technique and develop your own signature version of this timeless classic.
PrintCrispy Chicken Kyiv
- Classic Ukrainian Chicken Kyiv with a crunchy golden exterior and herb-infused garlic butter center.
- This impressive yet accessible recipe delivers restaurant-quality results with simple ingredients.
- Perfect for special occasions or elevating your weeknight dinner rotation.
- Prep Time: 45
- Cook Time: 30
- Total Time: 1 hour 15 minutes
- Yield: 4 servings 1x
- Category: Dinner
- Method: Baking
- Cuisine: Ukrainian
Ingredients
- 4 large boneless, skinless chicken breasts (6–8 oz each)
- 4 tbsp unsalted butter, softened
- 2–3 cloves garlic, minced
- 2 tbsp fresh parsley, finely chopped
- 1 tbsp fresh dill, chopped (optional)
- 1 tsp lemon zest
- 1 cup all-purpose flour
- 2 large eggs, beaten
- 1 cup panko breadcrumbs
- 1/2 cup regular breadcrumbs
- 1 tsp salt, divided
- 1/2 tsp black pepper, divided
- 1/2 tsp paprika
- Neutral cooking oil or cooking spray, as needed
Instructions
- In a small bowl, combine softened butter, minced garlic, chopped parsley, dill (if using), lemon zest, 1/4 tsp salt and 1/4 tsp pepper. Mix thoroughly.
- Shape the butter mixture into a small rectangle on plastic wrap, cover, and refrigerate for 30 minutes until firm.
- Place each chicken breast between plastic wrap and pound to an even 1/4-inch thickness. Season lightly with salt and pepper.
- Remove chilled butter from refrigerator and cut into 4 portions. Place one portion in the center of each flattened chicken breast.
- Fold in the sides of the chicken, then roll tightly to enclose the butter. Secure with toothpicks if necessary.
- Prepare three shallow dishes: one with seasoned flour, one with beaten eggs, and one with combined breadcrumbs, paprika, and remaining seasonings.
- Dredge each chicken roll in flour, dip in egg, then coat in breadcrumb mixture, pressing gently to adhere.
- For extra-crispy coating, repeat the egg and breadcrumb steps. Refrigerate prepared rolls for at least 30 minutes.
- Preheat oven to 400°F (200°C). Line a baking sheet with parchment paper and lightly oil.
- Place chicken rolls seam-side down on prepared sheet. Lightly spray or brush with oil.
- Bake for 25-30 minutes until golden brown and internal temperature reaches 165°F (74°C).
- Let rest 5 minutes before serving. Remove toothpicks and garnish with fresh herbs and lemon wedges.
Notes
- For best results, double-coat the chicken by repeating the egg and breadcrumb steps.
- Freezing the butter for 15 minutes before rolling helps prevent leakage during cooking.
- Make ahead: prepare up to the point of baking, then refrigerate for up to 24 hours or freeze for up to a month.
- Nutrition facts are estimates and may vary based on ingredients used, portion sizes, and preparation methods.
Nutrition
- Serving Size: 1 chicken roll
- Calories: 485
- Sugar: 2
- Sodium: 780
- Fat: 24
- Saturated Fat: 9
- Unsaturated Fat: 13
- Carbohydrates: 28
- Fiber: 2
- Protein: 38
- Cholesterol: 210
Keywords: Crispy Chicken Kyiv, Chicken Kiev, Garlic Butter Filling, Ukrainian Chicken Recipe, Golden Crusted Chicken
Let’s connect! Follow me for more Joylicious Recipes: Facebook, Instagram, Pinterest