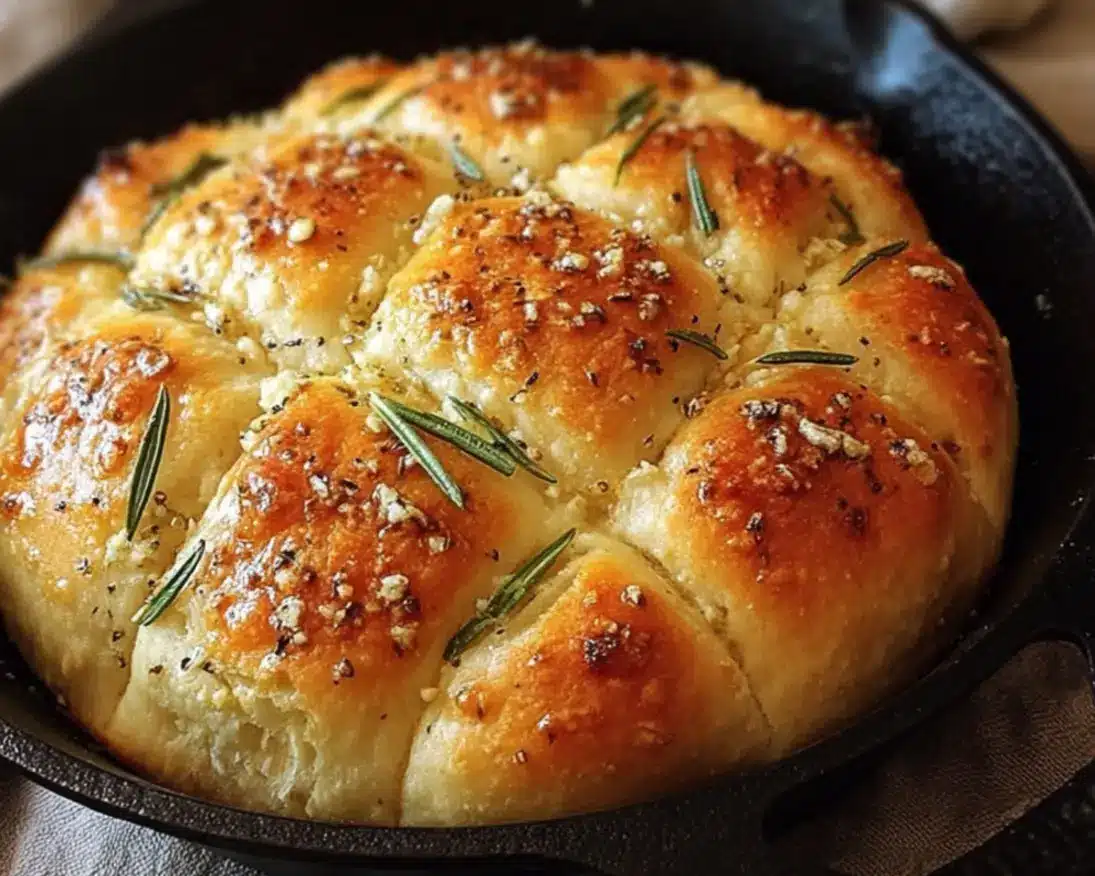
Easy Garlic Rosemary Skillet Bread Recipe – Ready in Under an Hour
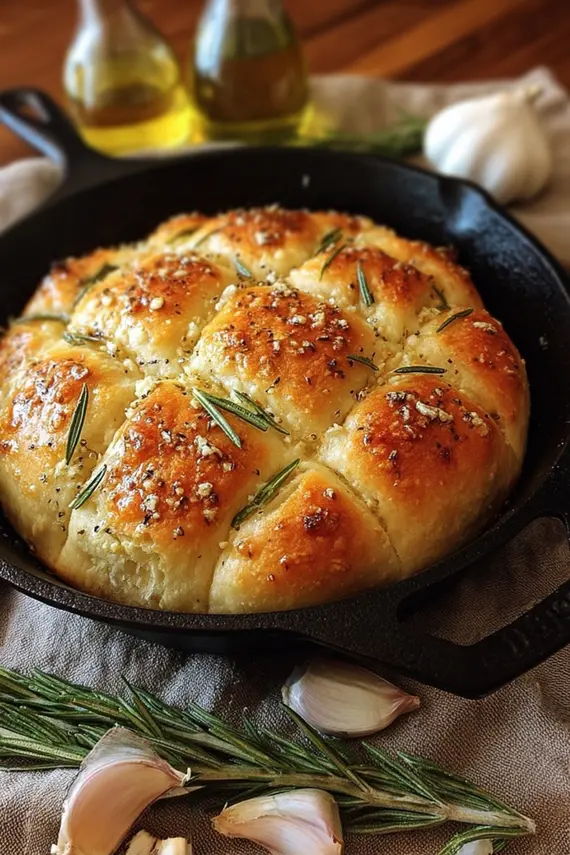
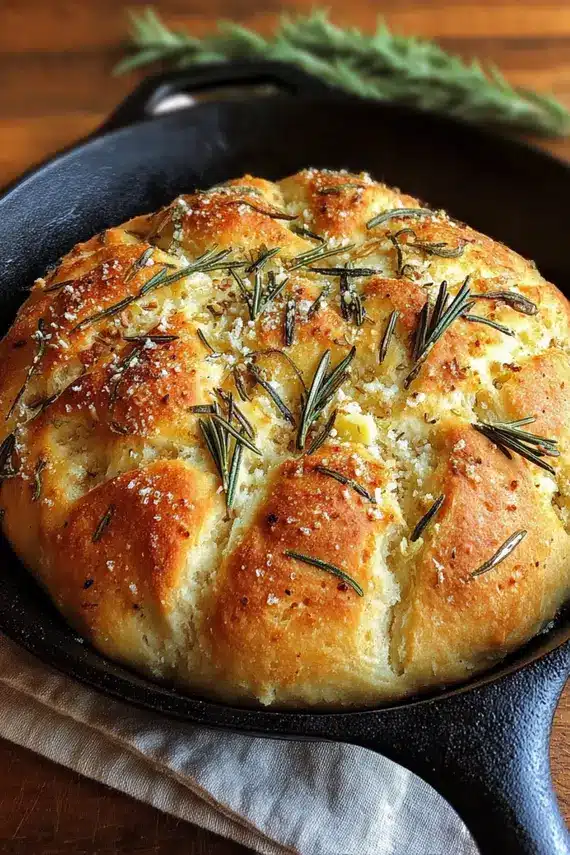
Garlic rosemary skillet bread brings the rustic charm of artisan bakery right to your home kitchen—no fancy equipment needed. This golden, herb-infused flatbread develops a perfectly crispy exterior and soft, aromatic interior in just minutes on your stovetop. It’s the perfect solution when you’re craving freshly baked bread without the lengthy process of traditional oven baking.
What makes this skillet bread special is the fragrant combination of fresh rosemary and minced garlic that infuses every bite. The cast-iron cooking method creates distinctive crispy edges while maintaining a tender center. Whether served alongside your favorite soup or as an impressive dinner accompaniment, this quick bread will become a regular in your cooking rotation.
Essential Ingredients for Flavor-Packed Skillet Bread
Understanding the Key Components
Creating perfect garlic rosemary skillet bread starts with quality ingredients that work together to develop that irresistible aroma and texture. Each component plays a specific role in the final result.
| Ingredient | Amount | Notes |
|---|---|---|
| All-purpose flour | 2 cups | Creates the bread structure; unbleached preferred but not required |
| Active dry yeast | 1 tablespoon | Provides leavening; instant yeast can be substituted |
| Warm water | 1 cup | Should be 105-115°F to activate yeast without killing it |
| Minced garlic | 2 teaspoons | Fresh is best, but jarred works in a pinch |
| Fresh rosemary | 1 tablespoon, chopped | Stems removed, finely chopped for even distribution |
| Salt | 1 teaspoon | Enhances flavor and controls yeast activity |
| Olive oil | 1 tablespoon | Adds moisture and helps create a tender crumb |
| Melted butter (optional) | 1 tablespoon | For brushing the finished bread for extra richness |
“The chili garlic mozzarella bread technique offers similar staged-cooking approaches to prevent burning while developing maximum flavor.”
Crafting Your Garlic Herb Masterpiece: Step-by-Step Guide
Mixing and Rising Process
Creating this flavorful bread is simpler than you might think. The process combines quick preparation with short rest periods for a bread that’s ready in under an hour.
- Combine dry ingredients: In a medium-sized bowl, thoroughly mix the 2 cups all-purpose flour, 1 tablespoon active dry yeast, 1 teaspoon salt, 2 teaspoons minced garlic, and 1 tablespoon chopped fresh rosemary until evenly distributed.
- Add wet ingredients: Pour in 1 cup of warm water (105-115°F) and 1 tablespoon olive oil. Stir with a wooden spoon until a sticky, shaggy dough forms. The dough will look rough at this stage—that’s perfect!
- First rise: Cover the bowl with a clean kitchen towel or plastic wrap and place it in a warm, draft-free area of your kitchen. Allow the dough to rise for 45 minutes, during which time it should nearly double in size.
- Prepare your skillet: About 5 minutes before the dough is finished rising, place a 10-12 inch cast-iron skillet over medium heat. Once hot, lightly oil the surface with a paper towel dipped in olive oil.
- Transfer dough: Gently deflate the risen dough with floured hands, then transfer it to the hot skillet. Using your fingertips, carefully press the dough to flatten it to approximately ½-inch thickness, spreading it evenly across the skillet.
- First side cooking: Cook the dough for 5-7 minutes until the bottom develops a golden-brown crust. You can lift an edge with a spatula to check for doneness.
- Flip and finish: Carefully flip the bread using a large spatula and cook the second side for another 5-7 minutes until golden brown and cooked through.
- Final touch: Transfer the bread to a cooling rack and brush the top with melted butter if desired. This adds a beautiful sheen and extra flavor to your finished bread.
“The homemade naan fluffy flatbread technique offers similar staged-cooking approaches to prevent burning while developing maximum flavor.”
Pro Tips for Perfect Garlic Rosemary Skillet Bread
Mastering Texture and Flavor
These expert tips will help you achieve artisan-quality results every time you make this versatile skillet bread.
- Temperature matters: For the yeast to activate properly, your water should be warm but not hot—aim for 105-115°F. Too cold and the yeast won’t activate; too hot and you’ll kill the yeast.
- Don’t overwork the dough: Mix just until ingredients are combined. Overmixing develops gluten, which can make your bread tough rather than tender.
- Preheat your skillet thoroughly: A properly heated skillet creates that perfect initial sear that prevents sticking and develops excellent crust formation.
- Adjust heat as needed: If your bread is browning too quickly, lower the heat. Every stove and skillet combination heats slightly differently.
- Rest after cooking: Allow the bread to rest for 5 minutes after cooking to let the interior steam settle, making it easier to slice cleanly.
- Use fresh herbs when possible: While dried rosemary can work in a pinch (use 1 teaspoon instead of 1 tablespoon), fresh rosemary provides superior aroma and flavor.
- Don’t skip the salt: Besides enhancing flavor, salt also controls yeast activity and strengthens gluten structure.
“The garlic butter halibut technique offers similar staged-cooking approaches to prevent burning while developing maximum flavor.”
Keeping Your Skillet Bread Fresh and Delicious
Storage Solutions for Different Timeframes
This bread is best enjoyed fresh from the skillet, but proper storage can extend its life while maintaining quality. Here’s how to keep your garlic rosemary skillet bread at its best.
For short-term storage (1-2 days), wrap the completely cooled bread in a clean kitchen towel, then place it in a bread bag or airtight container at room temperature. This method preserves the bread’s texture while preventing it from drying out too quickly.
For longer storage (3-5 days), wrap the cooled bread in plastic wrap, then aluminum foil, and store in the refrigerator. When ready to enjoy, unwrap and warm in a 300°F oven for 5-7 minutes to restore some of the original texture and flavor.
Freezing is also an excellent option for preserving your skillet bread for up to 2 months. Slice the bread before freezing, then wrap individual portions in plastic wrap followed by a layer of aluminum foil. Thaw at room temperature and reheat in a warm oven or toaster for best results.
“The banana bread with mayo technique offers similar staged-cooking approaches to prevent burning while developing maximum flavor.”
Creative Variations on Classic Skillet Bread
Exciting Flavor Combinations to Try
Once you’ve mastered the basic garlic rosemary skillet bread, experiment with these delicious variations to keep your bread basket exciting and new.
Mediterranean Olive: Fold in ⅓ cup of finely chopped kalamata olives and 2 tablespoons of crumbled feta cheese to the dough for a Mediterranean-inspired version. Top with a sprinkle of dried oregano before cooking.
Sundried Tomato Basil: Replace the rosemary with 2 tablespoons of fresh chopped basil and add ¼ cup diced sundried tomatoes to the dough for a flavor-packed Italian variation.
Caramelized Onion: Fold ⅓ cup of cooled caramelized onions into the dough along with a tablespoon of fresh thyme leaves for a sweet and savory twist.
Cheese Lover’s: Add ½ cup of shredded sharp cheddar, parmesan, or your favorite hard cheese to the dough. Sprinkle an additional 2 tablespoons on top during the last two minutes of cooking for a cheesy crust.
Everything Bagel Style: Brush the top of the bread with egg wash before cooking and sprinkle with everything bagel seasoning for a delicious savory option.
Herb Garden Blend: Create a mixed herb version by using a combination of fresh herbs like thyme, oregano, chives, and parsley in place of just rosemary.
“The apple cake with caramel frosting technique offers similar staged-cooking approaches to prevent burning while developing maximum flavor.”
Perfect Pairings for Your Homemade Skillet Bread
Elevate Your Meal with Complementary Dishes
This versatile garlic rosemary skillet bread shines as both a supporting player and star of the meal. Here’s how to showcase it perfectly.
Alongside Soups and Stews: The bread’s sturdy texture makes it perfect for dipping into hearty soups like tomato bisque, minestrone, or beef stew. The garlic and rosemary flavors complement rather than compete with complex broths.
With Salads: Transform a simple salad into a complete meal by serving it with warm skillet bread. Try pairing with this vibrant spinach salad recipe for a balanced and satisfying lunch.
As an Appetizer Board: Serve slices with a selection of soft cheeses like ricotta or goat cheese, roasted garlic, olive oil for dipping, and marinated vegetables for an impressive starter.
Sandwich Base: Split larger pieces horizontally to create rustic sandwiches filled with roasted vegetables, hummus, or Mediterranean-inspired fillings.
Alongside Pasta: Skip the traditional garlic bread and serve this flavorful skillet bread with your favorite pasta dishes for soaking up those delicious sauces.
“The garlic shrimp pasta technique offers similar staged-cooking approaches to prevent burning while developing maximum flavor.”
FAQ
Can I use dried rosemary instead of fresh?
Yes, you can substitute dried rosemary for fresh, but you’ll need to adjust the amount. Use 1 teaspoon of dried rosemary in place of the 1 tablespoon of fresh rosemary called for in this recipe. Dried herbs are more concentrated in flavor than fresh ones. For best results, crush the dried rosemary slightly between your fingers before adding it to the dough to release its essential oils.
Why did my bread stick to the skillet?
Sticking typically happens when either the skillet wasn’t hot enough before adding the dough or it wasn’t properly oiled. Make sure your skillet is thoroughly heated (about 2-3 minutes over medium heat) and then lightly but completely coated with oil before adding the dough. Also, resist the urge to move or flip the bread too early—it naturally releases from the pan when a proper crust has formed.
Can I make this bread without yeast?
While traditional skillet bread relies on yeast for its texture and flavor, you can make a quick version using 1½ teaspoons of baking powder and ½ teaspoon of baking soda instead of yeast. The texture will be denser and more like a flatbread, and you won’t need to let it rise—just mix and cook immediately. The flavor profile will be different but still delicious.
Is a cast-iron skillet necessary for this recipe?
Cast iron is ideal because it retains heat evenly and creates the best crust, but you can use other heavy-bottomed skillets if needed. Avoid non-stick pans with plastic handles as they often can’t withstand the sustained heat needed for proper bread cooking. If using stainless steel, you may need additional oil to prevent sticking.
My bread turned out dense—what went wrong?
Dense bread usually results from under-proofing (not allowing enough rise time) or inactive yeast. Make sure your yeast is fresh and that your water is warm (105-115°F) to activate it properly. Also, check that your rising environment is warm enough—cool kitchens can significantly slow yeast activity. Give the dough extra time to rise if your kitchen is on the cooler side.
Final Thoughts on Your Homemade Bread Journey
Embracing the Joy of Skillet Baking
Creating garlic rosemary skillet bread at home connects you to one of humanity’s oldest culinary traditions while providing immediate gratification. There’s something deeply satisfying about watching simple ingredients transform into a fragrant, crusty bread right before your eyes—without waiting hours for a traditional loaf to rise and bake.
This approachable recipe proves that artisan-quality bread doesn’t require special equipment or professional training. With just a skillet and a few pantry staples, you can create a bread that rivals anything from a specialty bakery. As you become more comfortable with the basic technique, the variations are endless—allowing you to customize based on what’s in season or what complements your meal.
Whether you’re an experienced baker looking for a quick bread solution or a novice eager to experience the joy of homemade bread without intimidation, this garlic rosemary skillet bread offers the perfect entry point to build your confidence and expand your culinary repertoire.
Garlic Rosemary Skillet Bread
Garlic rosemary skillet bread brings the rustic charm of artisan bakery right to your home kitchen—no fancy equipment needed. This golden, herb-infused flatbread develops a perfectly crispy exterior and soft, aromatic interior in just minutes on your stovetop. It’s the perfect solution when you’re craving freshly baked bread without the lengthy process of traditional oven baking.
Category: Dinner
Cuisine: Mediterranean
Calories: 120 kcal
Ingredients
- 2 cups all-purpose flour, 1 tablespoon active dry yeast, 1 cup warm water (105-115°F), 2 teaspoons minced garlic, 1 tablespoon chopped fresh rosemary, 1 teaspoon salt, 1 tablespoon olive oil, 1 tablespoon melted butter for brushing (optional)
Equipment
- Skillet
Instructions
- In a medium bowl, combine flour, yeast, salt, garlic, and rosemary. 2. Add warm water and olive oil, stir until a sticky dough forms. 3. Cover and let rise for 45 minutes in a warm place. 4. Heat a cast-iron skillet over medium heat and lightly oil the surface. 5. Transfer the risen dough to the skillet and flatten to 1/2-inch thickness. 6. Cook for 5-7 minutes on each side until golden brown. 7. Brush with melted butter if desired and serve warm.
Notes
- For best results, use fresh rosemary rather than dried. Ensure your skillet is properly heated before adding the dough to prevent sticking. The bread is best enjoyed fresh but can be stored in an airtight container for up to 3 days.
Let’s connect! Follow me for more Joylicious Recipes: Facebook, Instagram, Pinterest