Delightful Mini Fruit Tarts for Every Occasion
A Perfect Bite-Sized Dessert Experience
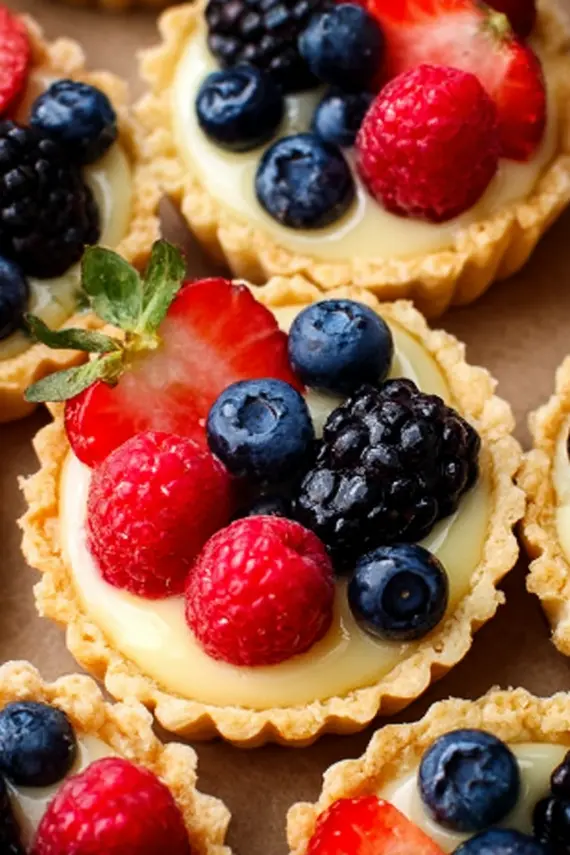
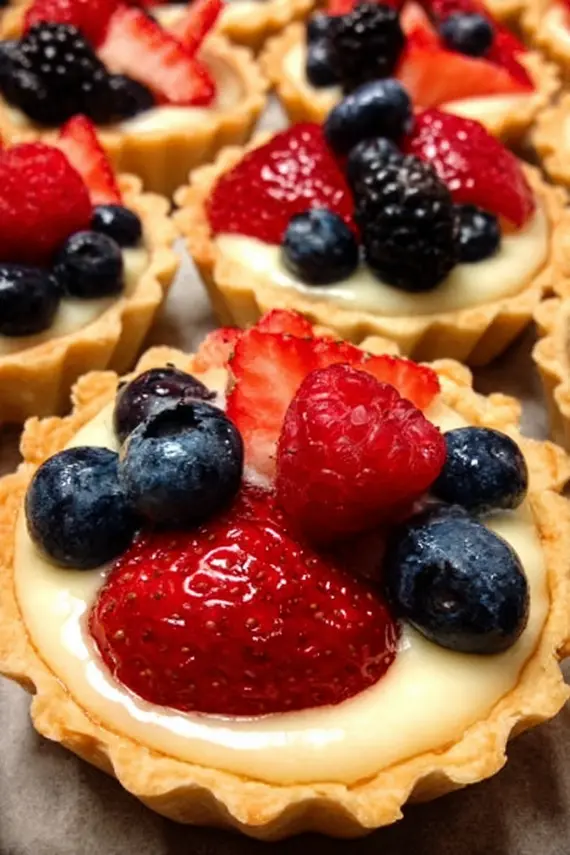
Mini fruit tarts are the epitome of elegant simplicity, combining buttery shortcrust pastry with vibrant fresh fruits to create a dessert that’s as beautiful as it is delicious. These petite treats feature crisp, golden pastry shells filled with luscious cream and topped with an array of colorful seasonal fruits, creating a perfect balance of textures and flavors in every bite. “For those who enjoy precise, delicate pastries, these mini ice cream cones offer a similar bite-sized dessert experience that’s perfect for gatherings.” These charming mini tarts are versatile enough for any occasion, from casual weekend brunches to sophisticated dinner parties.
Whether you’re hosting an afternoon tea, preparing for a holiday celebration, or simply treating yourself to something special, these mini fruit tarts are sure to impress. Their individual serving size makes them perfect for gatherings where guests can easily enjoy a complete dessert without the need for slicing or sharing. The bright, jewel-toned fruits atop each tart create an eye-catching display that elevates any dessert table instantly.
Essential Components for Perfect Mini Fruit Tarts
Building Blocks of Flavor and Texture
Creating delicious mini fruit tarts requires quality ingredients that work together harmoniously. The foundation begins with a buttery crust, followed by a smooth filling, and crowned with fresh fruits. Each component plays a vital role in the overall dessert experience. “If you enjoy working with versatile dough bases, the best pumpkin roll recipe demonstrates another excellent technique for creating a flexible foundation that supports rich fillings.”
| Component | Ingredients | Purpose |
|---|---|---|
| Tart Shell | – 1 1/2 cups all-purpose flour – 1/4 cup granulated sugar – 1/2 teaspoon salt – 1/2 cup unsalted butter, chilled and diced – 1 egg yolk – 2-3 tablespoons ice water, as needed – 1/2 teaspoon vanilla extract | Creates a crisp, buttery base that holds the filling |
| Pastry Cream Filling | – 2 cups whole milk – 1/2 cup granulated sugar – 1/4 cup cornstarch – 4 large egg yolks – 1 teaspoon vanilla extract – 2 tablespoons unsalted butter – Pinch of salt | Provides a creamy, vanilla-scented foundation for the fruit |
| Fresh Fruit Topping | – 1 cup mixed fresh berries (strawberries, blueberries, raspberries) – 2 kiwis, peeled and sliced – 1/2 cup mandarin orange segments – 1/4 cup sliced peaches (when in season) – 2 tablespoons lemon juice (to prevent browning) | Adds natural sweetness, vibrant color, and fresh flavor |
| Glaze | – 1/4 cup apricot preserves or clear fruit jam – 1 tablespoon water | Creates a glossy finish and helps preserve fruit freshness |
| Optional Enhancements | – 1/4 teaspoon almond extract (for crust) – 2 tablespoons toasted sliced almonds – Zest of 1 lemon (for pastry cream) – 1 tablespoon honey (for glaze) – Fresh mint leaves for garnish | Elevates flavor profiles and adds visual interest |
Creating Perfect Mini Tart Shells and Fillings
Mastering the Foundation of Your Dessert
Follow these detailed steps to create mini fruit tarts that are both visually stunning and irresistibly delicious. The key to success is patience during the cooling stages and gentle handling of the delicate components.
- Prepare the tart dough: In a food processor, pulse together 1 1/2 cups all-purpose flour, 1/4 cup granulated sugar, and 1/2 teaspoon salt until combined. Add 1/2 cup cold, diced butter and pulse 8-10 times until the mixture resembles coarse crumbs with some pea-sized pieces remaining. Add 1 egg yolk, 1/2 teaspoon vanilla extract, and drizzle in 2 tablespoons of ice water while pulsing, just until the dough begins to come together. If needed, add the remaining tablespoon of water.
- Chill the dough: Turn the dough onto a lightly floured surface and form into a flat disk. Wrap in plastic wrap and refrigerate for at least 30 minutes or up to 2 days. This critical resting period allows the gluten to relax and the butter to firm up, ensuring a tender, flaky crust.
- Preheat and prepare: Preheat your oven to 350°F (175°C). Lightly spray a 12-cup mini tart pan or individual tart molds with non-stick cooking spray.
- Form the tart shells: Remove the chilled dough from the refrigerator and let it sit at room temperature for 5-10 minutes to slightly soften. On a lightly floured surface, roll the dough to about 1/8-inch thickness. Using a round cutter slightly larger than your tart molds, cut out circles of dough. Gently press each circle into the tart molds, ensuring the dough reaches the corners without stretching. Trim any excess dough from the edges.
- Blind bake the shells: Prick the bottom of each tart shell with a fork to prevent bubbling. Place a small piece of parchment paper in each shell and fill with pie weights or dried beans. Bake for 10 minutes, then remove the weights and parchment and continue baking for 8-12 minutes until golden brown. Watch closely as mini shells can brown quickly.
- Prepare the pastry cream: While the shells are cooling, make the filling. In a medium saucepan, heat 2 cups of milk until steaming but not boiling. Meanwhile, in a separate bowl, whisk together 1/2 cup sugar, 1/4 cup cornstarch, and a pinch of salt. Add 4 egg yolks and whisk until smooth and pale yellow.
- Cook the pastry cream: Slowly pour about half of the hot milk into the egg mixture, whisking constantly to prevent curdling. Pour this mixture back into the saucepan with the remaining milk. Cook over medium heat, whisking constantly, until the mixture thickens and begins to bubble (about 3-5 minutes). Continue cooking for 1 more minute to ensure the cornstarch is fully activated.
- Finish the cream: Remove from heat and stir in 1 teaspoon vanilla extract and 2 tablespoons butter until completely incorporated. Strain through a fine-mesh sieve into a clean bowl to remove any lumps. Press plastic wrap directly onto the surface to prevent a skin from forming. Cool completely before using, either at room temperature or in the refrigerator.
- Prepare the fruit topping: Wash and thoroughly dry all fruit. Slice larger fruits like strawberries and kiwis into thin, even pieces. Toss sliced fruits with 2 tablespoons lemon juice to prevent browning and enhance flavor.
- Assemble the tarts: Spoon or pipe the cooled pastry cream into the cooled tart shells, filling each about 3/4 full. Arrange the prepared fruits decoratively on top of the cream. For the most visually appealing presentation, start from the outside and work your way toward the center, overlapping pieces slightly.
- Add the glaze: In a small saucepan, heat 1/4 cup apricot preserves or clear jam with 1 tablespoon of water until melted and smooth. Strain if needed to remove fruit pieces. While still warm, gently brush the glaze over the arranged fruit using a pastry brush. This adds shine and helps preserve the fruit’s freshness.
- Chill before serving: Refrigerate the completed tarts for at least 30 minutes to set the filling and glaze before serving. This chilling time also allows the flavors to meld beautifully.
Expert Tricks for Bakery-Quality Mini Tarts
Achieving Professional Results at Home
These professional tips and tricks will help elevate your mini fruit tarts from homemade to bakery-quality. “The same attention to detail found in these easy strawberry shortcake bars recipe applies to mini fruit tarts, where proper technique transforms simple ingredients into impressive desserts.”
- Perfectly flaky crust: Ensure all your ingredients for the crust are cold before mixing. The cold butter creates steam pockets during baking, which results in that desirable flaky texture. If your kitchen is warm, chill your mixing bowl and flour before beginning.
- Even tart shells: For uniform thickness in your tart shells, place two 1/8-inch wooden dowels on either side of your dough when rolling. This creates a guide that prevents you from rolling too thin in spots.
- Prevent soggy bottoms: Brush the inside of the baked and cooled tart shells with a thin layer of melted white chocolate before adding the pastry cream. This creates a moisture barrier that keeps the crust crisp longer.
- Silky-smooth pastry cream: For the smoothest possible pastry cream, strain it twice—once after cooking and again after it has cooled. This removes any potential lumps that may have formed during cooling.
- Fruit selection strategy: Choose fruits with similar moisture content to place together. Berries work well grouped together, while more watery fruits like kiwi and mandarin should be placed separately to prevent color bleeding.
- Creative piping: Use a star tip to pipe the pastry cream into the shells for an extra decorative touch. The ridges in the cream create interesting visual texture beneath the fruit.
- Make-ahead components: Both the tart shells and pastry cream can be made 1-2 days in advance. Store baked shells in an airtight container at room temperature, and keep pastry cream refrigerated with plastic wrap directly on the surface.
Preserving Freshness and Flavor
Optimal Storage Methods for Different Timeframes
Proper storage is crucial for maintaining the quality and freshness of your mini fruit tarts. The components have different shelf lives, so understanding how to store them separately and as assembled tarts will help you enjoy them at their best. “When handling delicate desserts with multiple components, similar care should be taken as with these salted caramel cupcakes where proper storage techniques preserve both texture and flavor integrity.”
For the freshest experience, it’s best to assemble mini fruit tarts shortly before serving. However, if you need to store them, here are the best practices:
Assembled Mini Fruit Tarts: Once fully assembled, mini fruit tarts are best consumed within 24 hours. Store them in the refrigerator in a single layer in an airtight container. The moisture from the fruit and cream will gradually soften the crust, which is why prompt consumption is recommended. Before serving, let them sit at room temperature for 10-15 minutes to take the chill off and allow flavors to bloom.
Tart Shells (Unfilled): Baked and cooled tart shells can be stored at room temperature in an airtight container for up to 3 days. For longer storage, place them in a freezer-safe container with parchment paper between layers and freeze for up to 1 month. Thaw at room temperature before filling.
Pastry Cream: Store pastry cream in the refrigerator with plastic wrap pressed directly onto the surface to prevent a skin from forming. It will keep for up to 3 days. Before using refrigerated pastry cream, whisk it gently to restore its smooth texture. Never freeze pastry cream as it will separate and become grainy.
Prepared Fruit: Sliced fruits that have been treated with lemon juice can be stored in the refrigerator for up to 24 hours. Keep them in an airtight container lined with paper towels to absorb excess moisture. For best appearance, however, cut fruit just before assembly whenever possible.
Fruit Glaze: Prepared glaze can be stored in the refrigerator for up to 5 days. Reheat gently in the microwave or on the stovetop until just liquid before applying to fruits.
For the best balance of convenience and quality, consider preparing the components separately and assembling just before serving. This “component approach” allows for fresh tarts without the last-minute rush of creating everything from scratch.
Exciting Twists on Classic Mini Fruit Tarts
Creative Variations to Suit Every Taste
While traditional mini fruit tarts are delightful on their own, these variations offer exciting new flavor profiles and presentations that will keep your dessert offerings fresh and interesting.
Tropical Paradise Tarts
Transform your mini fruit tarts into a vacation-inspired treat by using a coconut pastry cream (add 1/2 cup toasted coconut to the standard recipe) and topping with diced mango, pineapple, and kiwi. Finish with a passion fruit glaze instead of the traditional apricot for an extra tropical punch. The combination of creamy coconut with bright, acidic tropical fruits creates a balanced flavor profile that’s reminiscent of island desserts.
Chocolate Lover’s Fruit Tarts
For chocolate enthusiasts, modify the tart shell by adding 3 tablespoons of cocoa powder to the dough. Fill with chocolate pastry cream (add 4 ounces of melted bittersweet chocolate to the standard cream once it’s cooked) and top with strawberries, raspberries, and a light dusting of cocoa powder. The rich chocolate components provide a decadent backdrop for the bright, fresh berries.
Citrus Celebration Tarts
Create a citrus-forward version by adding 1 tablespoon of lemon zest to the tart dough and filling with lemon or orange-infused pastry cream (add 2 tablespoons of zest to the milk when heating). Top with supremed citrus segments (grapefruit, orange, and blood orange), and finish with a honey-citrus glaze. The bright, tangy flavors make these perfect for spring and summer gatherings.
Nutty Caramel Mini Tarts
Add 1/4 cup finely chopped toasted hazelnuts or almonds to the tart dough for texture. Fill the baked shells with a thin layer of caramel sauce before adding vanilla pastry cream. Top with sliced bananas, strawberries, and a sprinkle of chopped nuts. Finish with a traditional glaze. The combination of nuts, caramel, and fruit creates a dessert reminiscent of elegant patisserie offerings.
Seasonal Celebration Tarts
Adapt your mini fruit tarts to highlight the best produce of each season. For spring, focus on strawberries and rhubarb compote; summer calls for stone fruits and berries; fall can feature poached pears and cranberries; winter shines with citrus supremes and pomegranate arils. Using seasonal fruits ensures the best flavor and creates a changing dessert experience throughout the year.
Rustic Galette-Style Mini Tarts
For a more casual presentation, fold the edges of the dough partially over the filling instead of using tart pans. This free-form style resembles a galette but in individual portions. This variation works particularly well with heartier fruits like plums, peaches, and apples tossed with a bit of sugar and cinnamon before baking. The rustic appearance offers a charming alternative to the more formal traditional tarts.
Presenting Your Mini Fruit Tarts with Flair
Creative Serving Ideas for Maximum Impact
How you serve your mini fruit tarts can elevate them from merely delicious to truly memorable. These presentation ideas help showcase your beautiful creations in ways that will delight your guests. When considering unique ways to present bite-sized desserts, you might find inspiration from classic ambrosia fruit salad presentations, which similarly combine colorful fruits in appealing arrangements.
Elegant Dessert Platters
Arrange mini fruit tarts in concentric circles on a large white or mirrored cake stand. Place tarts with different fruit toppings in an alternating pattern to create a vibrant color wheel effect. For added dimension, use cake stands of varying heights to create a tiered display. This approach works beautifully for formal gatherings, weddings, or holiday celebrations where visual impact is desired.
Individual Dessert Plates
For a sit-down dinner party, serve each guest their own dessert plate featuring one or two mini tarts alongside complementary elements. Consider adding a small scoop of vanilla bean ice cream, a dollop of lightly sweetened whipped cream, a drizzle of fruit coulis, and a sprig of fresh mint. This restaurant-style presentation makes each serving feel special and carefully composed.
Dessert Grazing Tables
Create a dessert grazing table where mini fruit tarts are one element in a larger sweet spread. Pair them with other bite-sized treats like chocolate truffles, French macarons, and chocolate-dipped strawberries. Use cake stands, wooden boards, and decorative plates of varying heights to create visual interest. This casual yet impressive serving style is perfect for larger gatherings where guests can help themselves.
Brunch Presentation
For morning or midday gatherings, present mini fruit tarts alongside breakfast pastries on a rustic wooden board. Serve with fresh coffee, tea, and mimosas for an elegant brunch dessert option. The colorful fruits provide a refreshing counterpoint to richer breakfast offerings and make the spread feel special.
Picnic or Outdoor Party Service
For outdoor gatherings, consider serving mini tarts in individual clear plastic cups or small Mason jars with lids. Layer the tart components—crust crumbles at the bottom, pastry cream in the middle, and fresh fruit on top—for a deconstructed, picnic-friendly version that travels well. This approach allows guests to enjoy the flavors without needing plates or forks.
Seasonal Table Settings
Enhance your tart presentation by coordinating with seasonal décor. In summer, serve on a table scattered with fresh flower petals; for fall, arrange around small ornamental pumpkins and colored leaves; during winter holidays, incorporate evergreen sprigs and cinnamon sticks. These thoughtful details create a cohesive aesthetic that elevates the entire dining experience.
Answering Your Mini Fruit Tart Questions
Troubleshooting Common Challenges
Why did my tart shells shrink during baking?
Shrinkage typically occurs when the dough has been overworked or not properly chilled before baking. To prevent this, handle the dough minimally, just enough to bring it together, and ensure it’s thoroughly chilled before rolling and shaping. Also, make sure to prick the bottoms with a fork and use pie weights during the initial baking to help the shells maintain their shape. If you’re still experiencing shrinkage, try freezing the shaped tart shells for 15-20 minutes before baking.
How can I prevent my pastry cream from becoming lumpy?
Lumpy pastry cream usually results from cooking at too high a temperature or not whisking constantly enough. For smooth results, use medium-low heat, whisk continuously (especially when the mixture begins to thicken), and strain the finished cream through a fine-mesh sieve. If you notice lumps forming while cooking, immediately remove from heat and whisk vigorously or blend with an immersion blender. Remember that pastry cream thickens significantly as it cools, so don’t overcook it attempting to reach the final consistency while still hot.
Can I make mini fruit tarts in advance for a party?
Yes, but it’s best to prepare the components separately rather than fully assembling too far in advance. The tart shells can be baked up to 3 days ahead and stored at room temperature in an airtight container. The pastry cream can be made 1-2 days ahead and refrigerated with plastic wrap directly on the surface. For the best presentation and texture, assemble the tarts no more than 4 hours before serving, and keep them refrigerated until about 15 minutes before serving. If you must assemble further in advance, consider brushing the inside of the shells with melted white chocolate to create a moisture barrier that will help keep the crusts crisp longer.
Sweet Endings: The Joy of Homemade Mini Fruit Tarts
A Versatile Dessert for Your Recipe Collection
Mini fruit tarts represent the perfect blend of simple elegance and delightful flavor that can transform any gathering into a special occasion. These beautiful bite-sized desserts showcase the natural beauty of fresh fruits against a backdrop of buttery pastry and silky cream, creating a balanced dessert that’s never too heavy or too sweet. “If you enjoy creating impressive yet approachable desserts, these cupcakes basic recipe offers another foundation that can be customized with seasonal flavors and decorative touches.”
What makes these mini tarts truly special is their versatility. By changing the fruits with the seasons, adjusting the pastry cream flavors, or experimenting with different glazes, you can create endless variations that keep this classic dessert feeling fresh and exciting. From casual family gatherings to elegant dinner parties, these tarts fit seamlessly into any menu and always leave guests impressed.
The skills you develop while creating these mini fruit tarts—making short pastry, cooking custard, and arranging fruits artistically—transfer beautifully to many other desserts in your baking repertoire. Each component builds your confidence and expands your culinary capabilities.
We encourage you to make these mini fruit tarts your own by experimenting with the variations suggested or creating new combinations that reflect your personal taste preferences. Don’t be intimidated by the multiple components—break the process down into manageable steps, and you’ll find these impressive little desserts are well within your reach. Remember that even imperfectly shaped tarts taste delicious, and with practice, your technique will steadily improve.
So gather your ingredients, preheat your oven, and embark on a baking adventure that’s sure to bring joy to both the creator and the fortunate recipients of these delightful mini fruit tarts. Happy baking!
PrintMini Fruit Tarts

- Delightful mini fruit tarts with buttery shortcrust pastry shells, silky vanilla pastry cream, and fresh seasonal fruit toppings.
- Perfect for parties, brunches, or any special occasion that calls for an elegant bite-sized dessert.
- Easy to customize with different fruits and flavors for year-round enjoyment.
- Prep Time: 60
- Cook Time: 30
- Total Time: 1 hour 30 minutes
- Yield: 12 mini tarts 1x
- Category: Dessert
- Method: Baking
- Cuisine: French
Ingredients
- 1 1/2 cups all-purpose flour
- 1/4 cup granulated sugar
- 1/2 teaspoon salt
- 1/2 cup unsalted butter, chilled and diced
- 1 egg yolk
- 1/2 teaspoon vanilla extract
- 2–3 tablespoons ice water, as needed
- 2 cups whole milk
- 1/2 cup granulated sugar
- 1/4 cup cornstarch
- 4 large egg yolks
- 1 teaspoon vanilla extract
- 2 tablespoons unsalted butter
- Pinch of salt
- 1 cup mixed fresh berries (strawberries, blueberries, raspberries)
- 2 kiwis, peeled and sliced
- 1/2 cup mandarin orange segments
- 1/4 cup sliced peaches (when in season)
- 2 tablespoons lemon juice
- 1/4 cup apricot preserves or clear fruit jam
- 1 tablespoon water
Instructions
- In a food processor, pulse together flour, sugar, and salt until combined.
- Add cold butter and pulse 8-10 times until mixture resembles coarse crumbs.
- Add egg yolk, vanilla extract, and drizzle in ice water while pulsing until dough begins to come together.
- Turn dough onto a floured surface, form into a disk, wrap in plastic wrap, and refrigerate for 30 minutes.
- Preheat oven to 350°F (175°C) and prepare mini tart pans with non-stick spray.
- Roll chilled dough to 1/8-inch thickness and cut into rounds slightly larger than tart molds.
- Press dough into tart molds, trim excess, prick bottoms with fork, add parchment and pie weights.
- Bake for 10 minutes, remove weights and parchment, then bake 8-12 more minutes until golden.
- For pastry cream, heat milk until steaming (not boiling).
- In a separate bowl, whisk together sugar, cornstarch, salt, and egg yolks until smooth.
- Slowly add half the hot milk to egg mixture, whisking constantly, then return mixture to remaining milk.
- Cook over medium heat, whisking constantly, until thickened and bubbling (3-5 minutes).
- Cook 1 minute more, then remove from heat and stir in vanilla and butter until incorporated.
- Strain through a fine-mesh sieve, cover with plastic wrap touching surface, and cool completely.
- Prepare fruits by washing, drying, and slicing as needed. Toss with lemon juice to prevent browning.
- Fill cooled tart shells with pastry cream, about 3/4 full.
- Arrange prepared fruits decoratively on top of the cream.
- Heat apricot preserves with water until melted and smooth. Strain if needed.
- Brush warm glaze over arranged fruit.
- Refrigerate tarts for at least 30 minutes before serving.
Notes
- For the freshest experience, assemble tarts within 4 hours of serving.
- Tart shells and pastry cream can be made 1-2 days in advance and stored separately.
- Brush the inside of cooled tart shells with melted white chocolate to create a moisture barrier that keeps the crust crisp longer.
- Use seasonal fruits for the best flavor and appearance.
- Nutrition facts are estimates and may vary based on ingredients used, portion sizes, and preparation methods.
Nutrition
- Serving Size: 1 mini tart
- Calories: 215
- Sugar: 18
- Sodium: 125
- Fat: 12
- Saturated Fat: 7
- Unsaturated Fat: 4
- Carbohydrates: 24
- Fiber: 1
- Protein: 3
- Cholesterol: 95
Keywords: mini fruit tarts, fruit tart recipes, mini tart crust, easy dessert bites, fresh fruit toppings
Let’s connect! Follow me for more Joylicious Recipes: Facebook, Instagram, Pinterest