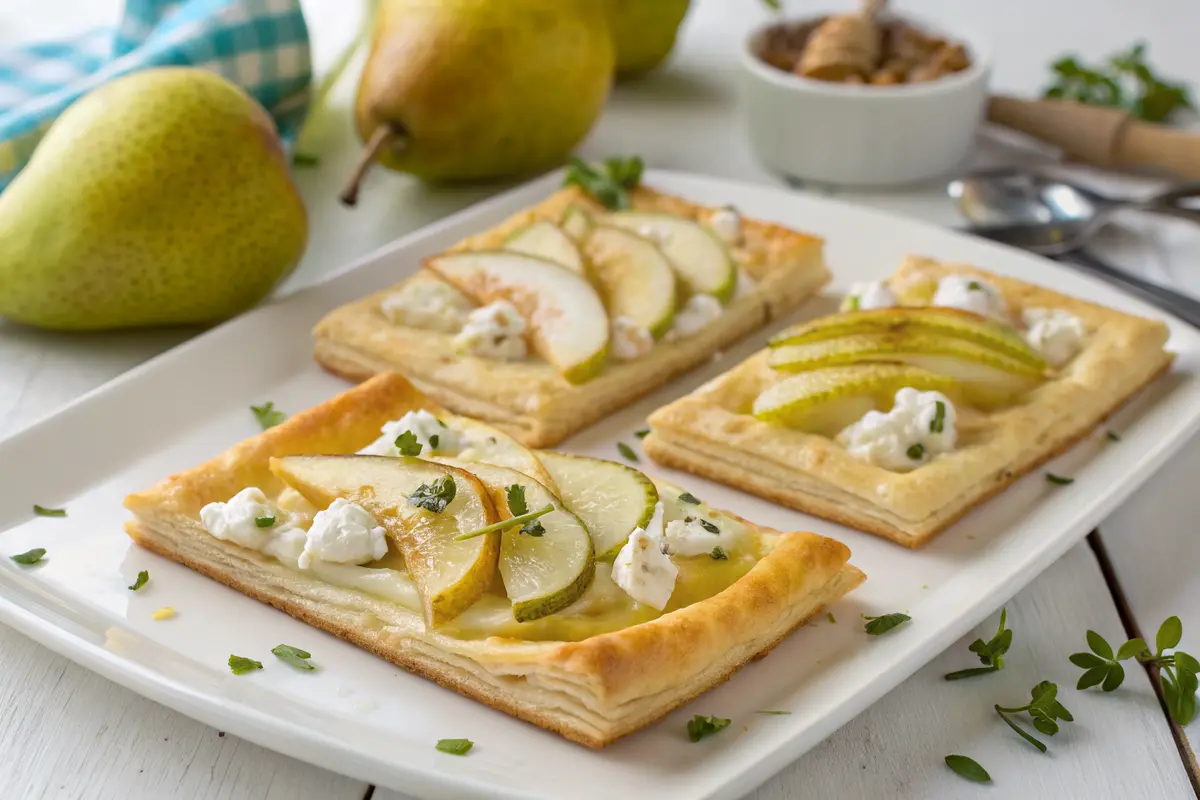
Elegant Pear Goat Cheese Puff Pastry Tarts: A Symphony of Savory and Sweet
Why These Tarts Will Become Your New Favorite
Pear Goat Cheese Puff Pastry Tarts combine the delicate sweetness of ripe pears with the tangy creaminess of goat cheese, all nestled in flaky, buttery puff pastry. These sophisticated little bites strike the perfect balance between savory and sweet flavors, creating an irresistible taste experience that feels both indulgent and refined. The contrast of textures—crispy pastry, juicy pears, and creamy cheese—makes each bite a delightful sensory experience that will impress even the most discerning palates. “For another delightful combination of sweet and savory flavors, try these Roasted Sweet Potatoes with Honey and Cinnamon as a perfect side dish for any meal.”
These versatile tarts shine as an elegant brunch centerpiece, sophisticated appetizer, or even as part of a light lunch paired with a fresh green salad. They’re equally at home at casual weekend gatherings or more formal occasions, offering a touch of culinary sophistication that’s surprisingly simple to achieve. The beauty of these tarts lies in their ability to feel special without requiring advanced cooking skills, making them perfect for both novice cooks and experienced home chefs.
Fresh and Flavorful Components for Perfect Pear Tarts
Core Ingredients and Enhancement Options
The magic of these tarts comes from the quality of their simple ingredients. Here’s everything you’ll need to create these delicious treats:
| Essential Ingredients | Quantity | Notes |
|---|---|---|
| Puff pastry sheet, thawed | 1 sheet (approximately 14 oz) | Allow to thaw for 40 minutes at room temperature |
| Ripe pears | 2 medium | Anjou or Bosc varieties work best, thinly sliced |
| Goat cheese | 4 ounces | Softened at room temperature for easy spreading |
| Honey | 2 teaspoons | Plus extra for drizzling after baking |
| Fresh thyme leaves | 1 teaspoon | Stripped from stems |
| Black pepper | Pinch | Freshly ground is best |
| Optional Enhancements | Quantity | Purpose |
|---|---|---|
| Egg wash | 1 egg beaten with 1 tablespoon water | Creates a beautiful golden crust |
| Walnuts or pecans | 3 tablespoons, chopped | Adds delightful crunch and nutty flavor |
| Fig jam or apricot preserves | 2 tablespoons | Spread under cheese for extra sweetness |
| Balsamic glaze | 1 tablespoon | Drizzle after baking for tangy contrast |
| Flaky sea salt | Pinch | Sprinkle before serving to enhance flavors |
| Lemon zest | 1 teaspoon | Adds brightness and citrus notes |
| Arugula | 1 cup | Scatter over finished tarts for peppery freshness |
“If you’re looking for another delicious recipe featuring creamy cheese, our Broccoli Cheddar Soup offers the perfect comforting combination of vegetables and rich dairy flavors.”
Crafting Your Pear and Goat Cheese Delights: Step-by-Step Guide
Preparing the Perfect Puff Pastry Base
Follow these detailed instructions to create perfectly flaky, golden tarts every time:
- Preheat your oven to 400°F (200°C) and line a baking sheet with parchment paper. The parchment prevents sticking and makes cleanup easier while ensuring even heating.
- Remove the thawed puff pastry from refrigeration about 10-15 minutes before working with it. Unfold it carefully on a lightly floured surface, using gentle pressure to remove any creases.
- Using a sharp knife or pizza cutter, cut the puff pastry sheet into 9 equal squares (about 3×3 inches each). Transfer the squares to your prepared baking sheet, leaving at least 1 inch of space between each square to allow for expansion.
- With a sharp knife, score a ½-inch border around each pastry square, cutting about halfway through the dough but not all the way through. This creates the classic tart edge that will puff up around the filling.
- Using a fork, prick the inner portion of each pastry square several times. This prevents the center from puffing up too much while baking, creating the perfect space for your toppings.
- In a small bowl, mix the softened goat cheese with half the honey (1 teaspoon) until smooth and spreadable. Spread a thin layer of this mixture onto the center portion of each pastry square, staying within the scored border.
- Arrange 2-3 thin pear slices attractively on top of the goat cheese layer. Avoid overcrowding, as the pears will release moisture during baking.
- Drizzle the remaining honey over the pears, then sprinkle each tart with fresh thyme leaves and a light dusting of freshly ground black pepper for a perfect flavor balance.
- Optional but recommended: Brush the exposed pastry border with egg wash to achieve a beautiful golden-brown finish.
- Bake in the preheated oven for 15-20 minutes, or until the pastry is puffed and golden brown around the edges. You’ll know they’re done when the bottom of the pastry is crisp and the pears are tender but still hold their shape.
- Allow the tarts to cool on the baking sheet for 5 minutes before transferring to a wire rack. This brief resting period helps the pastry set and makes the tarts easier to handle.
- Serve warm or at room temperature for the best flavor experience. If desired, finish with an extra light drizzle of honey, a sprinkle of fresh thyme, or any of the optional enhancements like balsamic glaze or flaky sea salt.
“Looking for a hearty main dish to serve after enjoying these tarts as appetizers? The Mushroom Steak Pitas provide a satisfying option with rich umami flavors that complement the sweetness of the pears.”
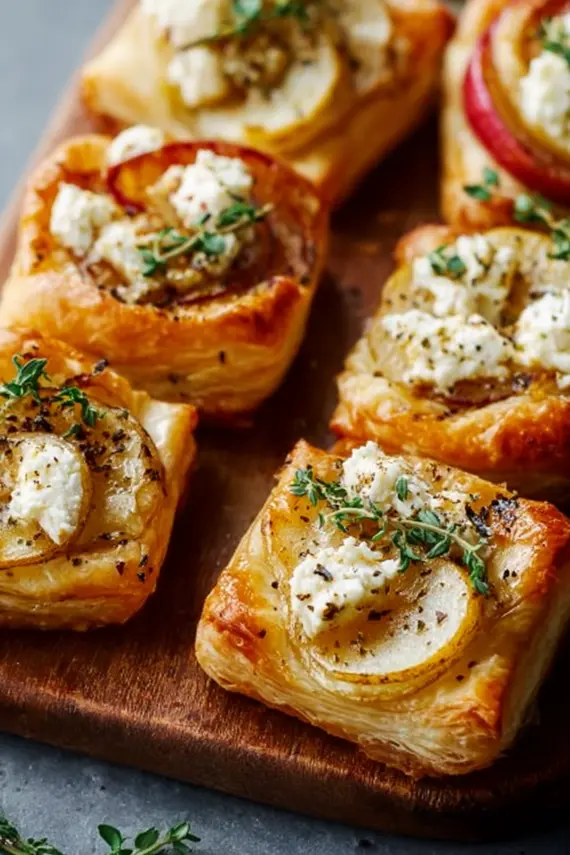
Insider Secrets for Tart Perfection Every Time
Expert Techniques and Clever Shortcuts
Elevate your pear goat cheese tarts from good to exceptional with these professional tips and tricks:
- Pastry perfection: For the flakiest results, make sure your puff pastry is cold but pliable when working with it. If it gets too warm and soft, return it to the refrigerator for 10-15 minutes before cutting and shaping.
- Pear selection strategy: Choose pears that are ripe but still firm. If they’re too soft, they’ll release too much moisture during baking and make your pastry soggy. The ideal pear should yield slightly to pressure at the stem end.
- Cheese temperature matters: Allow your goat cheese to reach room temperature before mixing it with honey. This creates a much smoother texture that’s easier to spread without tearing the delicate puff pastry.
- Prevent soggy bottoms: After scoring your pastry borders, brush the center portion lightly with beaten egg before adding goat cheese. This creates a moisture barrier between the pastry and toppings.
- Flavor boost: Toast your fresh thyme leaves in a dry pan for 30 seconds before sprinkling them on the tarts. This quick step releases the herb’s essential oils, intensifying the aromatic quality.
- Make-ahead option: You can assemble these tarts up to 24 hours in advance. Keep them refrigerated, uncovered, on the baking sheet, then bake directly from the refrigerator, adding 2-3 minutes to the baking time.
- Reheating method: If you need to reheat leftover tarts, use a 300°F (150°C) oven for 5-7 minutes rather than a microwave, which would make the pastry soggy and lose its delightful crispness.
“For a refreshing side dish to accompany these tarts at brunch, try our Nicoise Salad which provides a bright contrast with its vibrant vegetables and zesty dressing.”
Keeping Your Tarts Fresh and Flavorful
Smart Storage Strategies for Maximum Enjoyment
While these tarts are undeniably best when freshly baked, proper storage techniques can help maintain their quality for later enjoyment. Follow these recommendations to preserve both taste and texture:
For freshly baked tarts that you plan to enjoy within a day, simply store them in a single layer at room temperature, lightly covered with parchment paper. This method keeps the pastry crisp while protecting the tarts from dust or kitchen odors. Avoid plastic wrap or airtight containers at room temperature, as they trap moisture and will quickly soften your crispy pastry.
If you need to store the tarts for longer periods, refrigeration is necessary due to the cheese component. Place cooled tarts in an airtight container, separating layers with parchment paper to prevent sticking. Refrigerated tarts will keep well for up to 3 days, though the pastry will gradually lose some of its crispness.
For the best eating experience with refrigerated tarts, allow them to come to room temperature for about 15 minutes, then reheat in a 300°F (150°C) oven for 5-7 minutes to restore the pastry’s crispness. Microwaving is not recommended as it makes the pastry soggy and unappetizing.
If you’re planning ahead, consider freezing unbaked assembled tarts for up to one month. Place them on a baking sheet in a single layer and freeze until solid, then transfer to freezer bags or containers. When ready to enjoy, bake directly from frozen, adding about 5-7 minutes to the baking time.
For make-ahead convenience without compromising quality, consider preparing components separately. The goat cheese and honey mixture can be made up to 3 days ahead and stored refrigerated in an airtight container. Slice pears just before assembly to prevent browning.
Delicious Twists on the Classic Pear and Goat Cheese Combination
Creative Flavor Profiles to Explore
While the classic pear and goat cheese pairing is undeniably delicious, these creative variations will keep your taste buds intrigued:
Mediterranean-Inspired Savory Tart
Transform these tarts with a Mediterranean twist by replacing thyme with fresh rosemary and adding sun-dried tomatoes and black olives alongside the pears. A sprinkle of pine nuts just before serving adds wonderful texture contrast. The combination of sweet pears with savory Mediterranean ingredients creates a sophisticated flavor profile that works beautifully for an elevated appetizer or light lunch option.
Spiced Autumn Version
Embrace warm fall flavors by adding a light dusting of cinnamon, nutmeg, and clove to the pears before arranging them on the pastry. Replace the thyme with a sprinkle of chopped candied ginger and swap the goat cheese for mascarpone mixed with a touch of maple syrup. This variation highlights the natural sweetness of the pears while incorporating classic autumn spices for a cozy seasonal treat.
Blue Cheese Luxury Option
For cheese enthusiasts, substitute the goat cheese with a mild blue cheese like Gorgonzola dolce. Add a thin layer of caramelized onions beneath the pears and finish with chopped walnuts and a drizzle of honey. The pungent blue cheese beautifully complements the sweetness of the pears and caramelized onions, creating a more robust flavor experience with sophisticated depth.
Vegan-Friendly Alternative
Create a dairy-free version using vegan cream cheese blended with nutritional yeast for a tangy, cheese-like spread. Layer with pears as usual, but add a sprinkle of toasted pumpkin seeds and finish with a drizzle of agave nectar instead of honey. This plant-based version maintains the sweet-savory balance while accommodating dairy-free dietary preferences without sacrificing flavor.
Breakfast Tart Variation
For a morning-appropriate version, spread a thin layer of almond butter beneath the goat cheese, use thinly sliced apples instead of pears, and drizzle with maple syrup instead of honey. A dusting of cinnamon and granola sprinkled on top after baking adds a breakfast-inspired crunch that makes these tarts perfect for a special brunch offering.
Savory Herb Garden Version
For an herb-forward flavor profile, mix the goat cheese with finely chopped fresh herbs like basil, chives, and parsley. Layer with both pear and thinly sliced cucumber for a fresh, garden-inspired taste. A light drizzle of high-quality olive oil and flaky sea salt finishes this bright, herbaceous interpretation that’s perfect for spring and summer gatherings.
Elegant Presentation Ideas for Every Occasion
From Casual Brunch to Sophisticated Soirées
These versatile pear and goat cheese tarts can be styled to suit any dining occasion with the right presentation approach:
For an elegant weekend brunch, serve the warm tarts on a wooden board alongside fresh berries and a small pot of extra honey for drizzling. Add small sprigs of fresh herbs for visual appeal and a mimosa bar for a festive touch. Individual servings of two tarts per person on small plates with a side of fresh fruit make for a beautiful plated presentation that feels special yet not overly formal.
When hosting a cocktail party, cut the tarts into smaller, bite-sized squares (approximately 1.5 inches) to create elegant finger food that guests can enjoy while mingling. Arrange them on a tiered serving platter interspersed with clusters of grapes and fresh fig halves for a stunning visual display that complements the flavors of the tarts. Pair these sophisticated appetizers with a refreshing Southwest salad to provide a vibrant contrast to the rich pastries.
For family-style dining, serve larger rectangular tarts that can be sliced at the table. Place them on a bed of fresh arugula lightly dressed with lemon and olive oil, which provides a peppery counterpoint to the sweet-savory tarts. Add a few edible flowers like pansies or nasturtiums for a touch of color and elegance that elevates the entire presentation.
When packing for a picnic or potluck, individually wrap cooled tarts in parchment paper tied with twine for easy handling and an artisanal touch. This practical presentation keeps the tarts intact during transport while also creating a charming rustic aesthetic when arranged in a basket or on a serving platter.
For holiday gatherings, arrange the tarts in a circular pattern on a large round platter, creating a wreath-like effect. Garnish with seasonal elements like pomegranate seeds, rosemary sprigs, or edible gold leaf for a festive appearance that makes these tarts feel like a special occasion centerpiece.
Consider serving these tarts alongside a simple mixed greens salad dressed with a light vinaigrette for a perfect light lunch. The crisp, fresh greens provide a wonderful textural and flavor contrast to the rich, buttery pastry and creamy goat cheese filling.
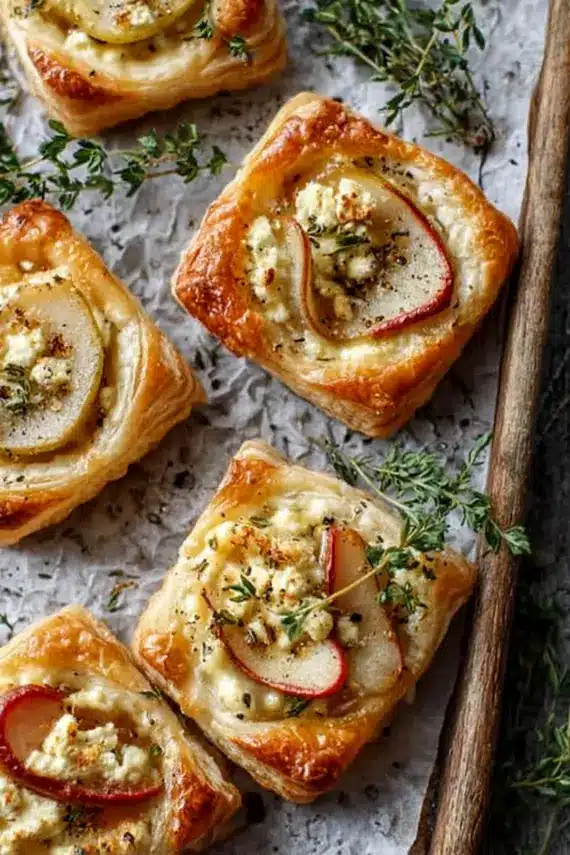
Answers to Your Burning Pear Tart Questions
Expert Solutions to Common Challenges
Can I make these tarts with ready-made puff pastry cups instead of cutting squares?
Yes, pre-made puff pastry cups or shells work wonderfully for a time-saving alternative. Simply thaw according to package directions, then fill each cup with a small amount of the goat cheese mixture and top with thinly sliced pears. The baking time may need to be reduced by 2-3 minutes since the pastry cups are smaller and already shaped. This version creates adorable mini tarts that are perfect for cocktail parties or when you need elegant single-bite appetizers.
My puff pastry didn’t rise properly around the edges. What went wrong?
Several factors can affect puff pastry rising. First, ensure your pastry was properly chilled before baking – warm pastry won’t puff as effectively. Second, check that you didn’t cut all the way through when scoring the border – you want to create a guide, not separate pieces. Third, make sure your oven was fully preheated to the correct temperature, as puff pastry needs immediate high heat to rise properly. Finally, avoid overhandling the pastry, as warm hands can melt the butter layers that create the puff effect.
How can I prevent the pears from making my pastry soggy?
To prevent soggy pastry when working with juicy fruits like pears, try these techniques: First, use pears that are ripe but still firm, not overly soft. Second, pat the sliced pears with paper towels to remove excess moisture before arranging them on the pastry. Third, create a moisture barrier by brushing the center of the pastry with beaten egg or a thin layer of melted white chocolate before adding the goat cheese. Finally, avoid overloading the pastry with too many pear slices, as this increases moisture content during baking.
What’s the best way to serve these tarts for a large gathering?
For large gatherings, consider a batch-cooking approach. You can prepare several sheets of tarts the day before and refrigerate them unbaked. On the day of your event, bake them in batches so guests receive freshly made tarts throughout the gathering. Alternatively, bake all tarts 2-3 hours ahead and reheat them at 300°F for 5 minutes just before serving. For self-service buffets, consider making slightly smaller tarts that are easier to handle, and provide small plates and napkins nearby. Label the tarts if you’ve created different variations to accommodate various preferences or dietary restrictions.
Your New Go-To Recipe for Impressive Entertaining
Why These Pear Tarts Will Become a Staple in Your Recipe Collection
Pear Goat Cheese Puff Pastry Tarts represent the perfect balance of sophisticated flavor and straightforward preparation, making them an invaluable addition to your culinary repertoire. Their elegant appearance belies how simple they are to create, giving you a reliable recipe that consistently impresses without causing kitchen stress. The combination of sweet pears, tangy goat cheese, and flaky pastry creates a memorable taste experience that guests invariably comment on and request again.
What makes these tarts particularly special is their versatility across seasons and occasions. While they shine with perfectly ripe summer or fall pears, they work beautifully year-round with whatever fruit is at its peak. The basic technique can be adapted endless ways, giving you a template for creative expression in the kitchen that evolves with your tastes and available ingredients. “If you enjoy these flavorful tarts, you’ll also appreciate our Curried Chicken Sandwich recipe which features a similar balance of sweet and savory elements.”
Perhaps most importantly, these tarts represent approachable gourmet cooking that brings a touch of café elegance to your home kitchen. They embody the joy of creating something that looks and tastes special without requiring professional training or obscure ingredients. We encourage you to make this recipe your own—experiment with the variations, adjust the sweetness to your preference, and discover the satisfaction that comes from serving something both beautiful and delicious that you’ve created with your own hands. “For another simple yet impressive recipe that’s perfect for entertaining, try our refreshing Ramen Noodle Salad which pairs wonderfully with these savory puff pastry appetizers.”
PrintPear Goat Cheese Puff Pastry Tarts

- Elegant tarts featuring sweet pears and tangy goat cheese on flaky puff pastry.
- A perfect balance of savory and sweet flavors in every bite.
- Ideal for brunch, appetizers, or a sophisticated light meal.
- Prep Time: 20
- Cook Time: 20
- Total Time: 40 minutes
- Yield: 9 tarts 1x
- Category: Breakfast & Brunch
- Method: Baking
- Cuisine: European
Ingredients
- 1 sheet puff pastry, thawed
- 2 medium ripe pears (Anjou or Bosc), thinly sliced
- 4 ounces goat cheese, softened
- 2 teaspoons honey, plus extra for drizzling
- 1 teaspoon fresh thyme leaves
- Pinch of freshly ground black pepper
- 1 egg beaten with 1 tablespoon water (optional, for egg wash)
- Flaky sea salt (optional, for garnish)
Instructions
- Preheat oven to 400°F (200°C) and line a baking sheet with parchment paper.
- Unfold thawed puff pastry on a lightly floured surface and cut into 9 equal squares (about 3×3 inches each).
- Transfer squares to prepared baking sheet, leaving 1 inch between each.
- Score a ½-inch border around each pastry square, cutting halfway through the dough.
- Prick the inner portion of each square several times with a fork.
- Mix softened goat cheese with 1 teaspoon honey until smooth.
- Spread goat cheese mixture onto the center of each square, staying within the scored border.
- Arrange 2-3 thin pear slices on top of the goat cheese.
- Drizzle remaining honey over pears and sprinkle with thyme leaves and black pepper.
- Brush pastry borders with egg wash if desired.
- Bake for 15-20 minutes until pastry is puffed and golden brown.
- Allow tarts to cool for 5 minutes before transferring to a wire rack.
- Serve warm or at room temperature with additional honey drizzle if desired.
Notes
- For best results, use pears that are ripe but still firm to prevent excess moisture.
- Tarts can be assembled up to 24 hours in advance and kept refrigerated before baking.
- Store leftover tarts in the refrigerator for up to 3 days and reheat in a 300°F oven for 5-7 minutes to restore crispness.
- Nutrition facts are estimates and may vary based on ingredients used, portion sizes, and preparation methods.
Nutrition
- Serving Size: 1 tart
- Calories: 165
- Sugar: 3
- Sodium: 125
- Fat: 11
- Saturated Fat: 4
- Unsaturated Fat: 6
- Carbohydrates: 14
- Fiber: 1
- Protein: 4
- Cholesterol: 7
Keywords: pear goat cheese puff pastry tarts, pear tart recipe, goat cheese pastry, savory puff pastry appetizers, brunch bite ideas
Let’s connect! Follow me for more Joylicious Recipes: Facebook, Instagram, Pinterest