How to Make the Best Red Velvet Brownies from Scratch
Red velvet brownies are a rich, chewy twist on classic brownies. They combine a light cocoa flavor with a sweet, tangy bite and a bold red color. These eye-catching treats are perfect for holidays, birthdays, or anytime you want to impress.
Unlike regular brownies, red velvet brownies use less cocoa. They also include ingredients like vinegar and food coloring to create their signature look and taste. The result is a soft, fudgy brownie that’s both unique and satisfying.
In this article, you’ll learn what makes red velvet brownies different. We’ll break down the science behind the ingredients, explain how to get the perfect texture, and walk through each step of the recipe. You’ll also get tips to make your brownies taste just like they came from a bakery.
Check out our Fudgy Chewy Brookies Recipe if you love desserts with rich flavor and soft centers.
What Are Red Velvet Brownies and Why They’re So Special
Understanding Red Velvet Brownies vs Traditional Brownies
Red velvet brownies stand out for their bold red hue and subtle tangy flavor. While they share a chocolaty base like traditional brownies, red velvet versions use less cocoa powder and often include white vinegar or buttermilk to create that signature tang.
Here’s a simple comparison table to break it down:
| Feature | Red Velvet Brownies | Traditional Brownies |
|---|---|---|
| Color | Bright red | Dark brown |
| Cocoa Content | Light | Heavy |
| Vinegar/Buttermilk | Yes | Rarely |
| Flavor | Mild cocoa + tangy sweet | Deep, rich chocolate |
| Frosting (optional) | Cream cheese | Usually none or chocolate |
The result? A chewy, moist brownie with a velvety texture that pairs beautifully with creamy frosting. These brownies aren’t just eye-catching—they deliver a layered flavor that surprises in the best way.
A Brief History of Red Velvet in Baking Culture
Red velvet as a dessert flavor has been around for nearly a century. Originally, it was more popular in cake form, with origins tracing back to the early 20th century when natural cocoa powder created reddish tones when mixed with acidic ingredients like vinegar or buttermilk.
Over the years, red velvet evolved from cakes to cupcakes, cookies, and now brownies. Its explosion in popularity during the early 2000s, thanks to trendy bakeries and food bloggers, made red velvet a modern classic.
Now, the brownie version has taken its place as a beloved dessert for its beautiful color, soft bite, and perfect pairing with cream cheese frosting.
Looking for inspiration? Try our Easy Strawberry Shortcake Bars Recipe for another elegant and simple dessert.
The Science Behind Red Velvet – More Than Just Red Color
Is Red Velvet Just Chocolate with Vinegar? Debunking the Myth
Many people think red velvet is just chocolate cake dyed red. But there’s more to it than that. While it does contain cocoa powder, the flavor of red velvet is much lighter than a regular chocolate brownie.
What makes red velvet special is how the ingredients work together. The cocoa powder gives a mild chocolate taste. Then vinegar and sometimes buttermilk add a tangy flavor that balances the sweetness. The red food coloring adds a bold look, but it’s the flavor that keeps people coming back.
So no, red velvet isn’t just chocolate with vinegar. It’s a carefully balanced blend of flavors. That’s what makes it taste so unique—and why red velvet brownies are such a hit.
How Vinegar Changes the Texture and Color
Vinegar might seem like an odd ingredient for dessert, but it plays an important role. In red velvet brownies, vinegar reacts with cocoa and baking agents to help the brownies rise slightly while staying dense and chewy.
This reaction also helps bring out a rich red tone—especially when using natural cocoa powder. Even if you’re using food coloring, the vinegar still helps improve the texture. It adds a subtle lift that keeps the brownies soft but not cakey.
Here’s a breakdown of what vinegar does in red velvet brownies:
| Role of Vinegar | Effect |
|---|---|
| Reacts with cocoa | Enhances color and flavor |
| Lightens dense batter | Creates soft, fudgy texture |
| Balances sweetness | Adds a mild, tangy contrast |
When used in the right amount, vinegar gives red velvet brownies their signature texture. This tiny ingredient has a powerful impact.
Discover great ideas like our Chocolate Chip Cookie Dough Brownie Bombs if you’re into exciting flavor combos.
Ingredients That Make Red Velvet Brownies Stand Out
Why Every Ingredient Matters in Baking Chemistry
Red velvet brownies may look simple, but every ingredient has a purpose. Baking is like science. If one thing is off, the results change. These brownies have the perfect balance of rich, soft, and chewy—and that comes from using each ingredient the right way.
Let’s look at what each part does:
- Butter gives flavor and helps with that soft, rich bite.
- Granulated and brown sugar add sweetness and moisture.
- Eggs and egg yolk hold everything together and make the texture smooth.
- Vanilla extract adds depth and warmth to the flavor.
- Vegetable oil keeps the brownies extra moist.
- Cocoa powder gives the light chocolate flavor.
- Flour, cornstarch, and salt control structure and texture.
- Vinegar gives the batter a lift and a light tang.
- Red food coloring brings that vibrant red color.
Even a small change—like too much flour—can make your brownies cakey. So measuring carefully matters. As a rule of thumb, use a kitchen scale if you have one. That helps keep everything exact.
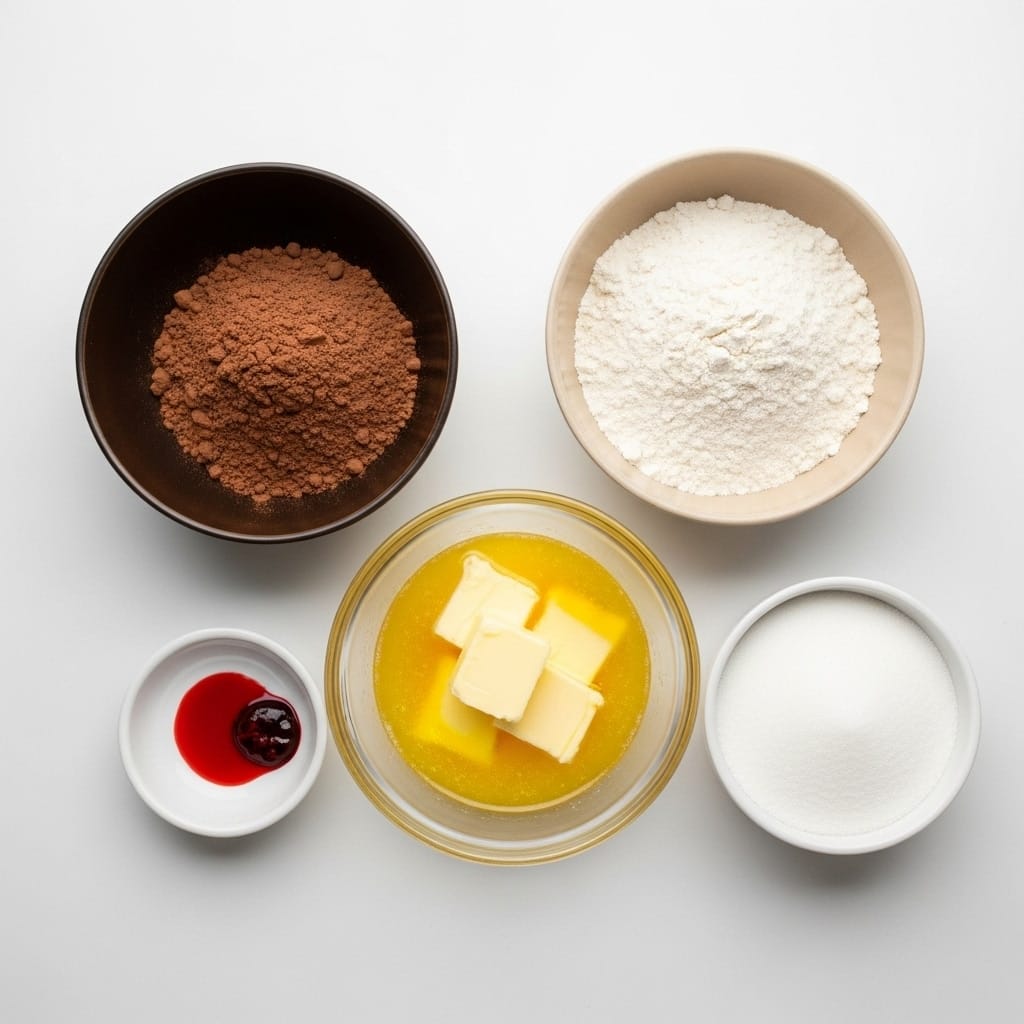
The Role of Cocoa, Food Coloring, and Vinegar in Red Velvet Brownies
Cocoa, vinegar, and food coloring are the heart of red velvet flavor and color. Together, they create the brownie’s signature look and taste.
- Cocoa powder adds a light chocolate taste. But not too much—just enough to keep the red color strong.
- Red food coloring creates the brownies’ rich, festive hue. You can use gel for deeper shades.
- Vinegar helps the cocoa react and brings a soft tang to the flavor.
Here’s a quick guide:
| Ingredient | Purpose in Red Velvet Brownies |
|---|---|
| Cocoa Powder | Mild chocolate flavor |
| Red Food Coloring | Bright, bold color |
| Vinegar | Enhances color and gives light tang |
When used together, these three ingredients make red velvet brownies stand out from the crowd. It’s not just about the look—it’s the perfect blend of color, flavor, and texture.
Don’t miss our Lemon Blueberry Bread for another bright and flavorful treat that’s easy to bake.
Mastering Texture – Fudgy vs Cakey Red Velvet Brownies
How to Make Red Velvet Brownies Fudgy
One of the biggest brownie debates is texture—fudgy or cakey? Red velvet brownies are best when they’re rich, moist, and a little gooey in the middle. To get that perfect fudgy bite, it all comes down to the ingredients and how you mix them.
Here’s how to get that chewy, dense texture:
- Use more fat than flour. Butter and oil give brownies that soft, rich feel.
- Don’t overmix the batter. Mixing too much adds air, which makes brownies rise like cake.
- Measure carefully. Just a little too much flour can throw off the texture.
- Bake just until done. Take them out when a toothpick has moist crumbs—not clean.
Keep an eye on the baking time. Overbaking leads to dry edges and a cakier center. Underbaking helps maintain that moist, fudgy center everyone loves.
Why Extra Eggs Can Shift Texture in Brownies
Eggs do more than hold the batter together. They also change the way your brownies turn out. Using more eggs than needed can shift the texture from dense to fluffy. That’s great for cake—not brownies.
In most red velvet brownie recipes, you’ll see:
- Whole eggs – give structure
- Extra egg yolk – adds richness without making them too airy
Too many eggs = spongy brownies
One extra yolk = creamy, chewy perfection
Here’s a quick look:
| Eggs in Brownies | Texture Result |
|---|---|
| Just enough eggs | Dense and fudgy |
| Too many eggs | Light, fluffy, cake-like |
| Added yolk only | Creamy and chewy |
So, if you want bakery-style red velvet brownies, watch your eggs. It’s a small detail, but it makes a huge difference.
Looking for inspiration? Try our Mini Pineapple Upside Down Cheesecakes for another soft and rich dessert.
Step-by-Step – How to Make the Perfect Red Velvet Brownies
Essential Tools and Preparation Tips
Before you start baking, it’s important to prepare your space. That way, you can move through the steps quickly and avoid mistakes.
Here’s what you’ll need:
- A 9-inch square baking pan
- Mixing bowls (preferably two)
- A whisk and a rubber spatula
- A kitchen scale or measuring cups
- Parchment paper
- A microwave-safe bowl for melting butter
A few tips before you begin:
First, line your pan with parchment paper. It helps you lift the brownies out easily after baking.
Second, preheat the oven to 350°F (180°C), or 160°C if you’re using a fan-assisted oven.
Finally, weigh your ingredients if possible. Measuring by weight gives more accurate and consistent results than measuring by cups.
Once everything is set, it’s time to dive into the baking process.
Step-by-Step Baking Instructions for Red Velvet Brownies
Step 1: Melt the Butter
Place ¾ stick of unsalted butter in a microwave-safe bowl. Heat in the microwave for 30 seconds at a time, stirring between each round, until completely melted.
Step 2: Mix the Sugars and Butter
Add 1 cup of granulated sugar and ¼ cup of light brown sugar to a large mixing bowl. Pour in the melted butter. Whisk the mixture until it’s smooth.
Step 3: Add Eggs, Yolk, and Vanilla
Next, add 3 large eggs, 1 egg yolk, and 1 teaspoon of vanilla extract. Gently mix until blended. Be careful not to overmix—this helps keep the brownies dense.
Step 4: Stir in Cocoa and Oil
Add ¼ cup of cocoa powder and ⅓ cup of vegetable oil. Stir slowly until the batter is glossy and smooth.
Step 5: Add Red Food Coloring
Scoop a few spoonfuls of batter into a separate bowl. Stir in ½ teaspoon of red food coloring until there are no lumps. Add it back to the main bowl and mix well.
Step 6: Fold in Dry Ingredients
At this stage, switch to a spatula. Gently fold in ¾ cup of all-purpose flour, 1 tablespoon cornstarch, and ¼ teaspoon salt. Mix just until there are no dry spots.
Step 7: Add Vinegar for Final Texture Boost
Pour in 1 tablespoon of vinegar and fold gently. Vinegar reacts with the cocoa and adds that signature red velvet tang and softness.
Step 8: (Optional) Add White Chocolate Chips
If you like extra texture or sweetness, fold in ¾ cup of white chocolate chips. This is totally optional—some prefer their brownies plain.
Baking and Cooling the Brownies Properly
Step 9: Pour and Bake
Pour the finished batter into your prepared pan. Use a spatula to spread it evenly. Bake for 20–25 minutes. Use a toothpick to check doneness—it should come out with a few moist crumbs, not wet batter.
Step 10: Cool Before Cutting or Frosting
Once baked, remove the brownies from the oven. Let them cool completely in the pan. This helps them set and makes them easier to cut and frost later.
Looking for another bakery-style dessert? Check out our Cinnamon Swirl Pancakes with Cream Cheese Glaze—they’re light, sweet, and full of flavor.
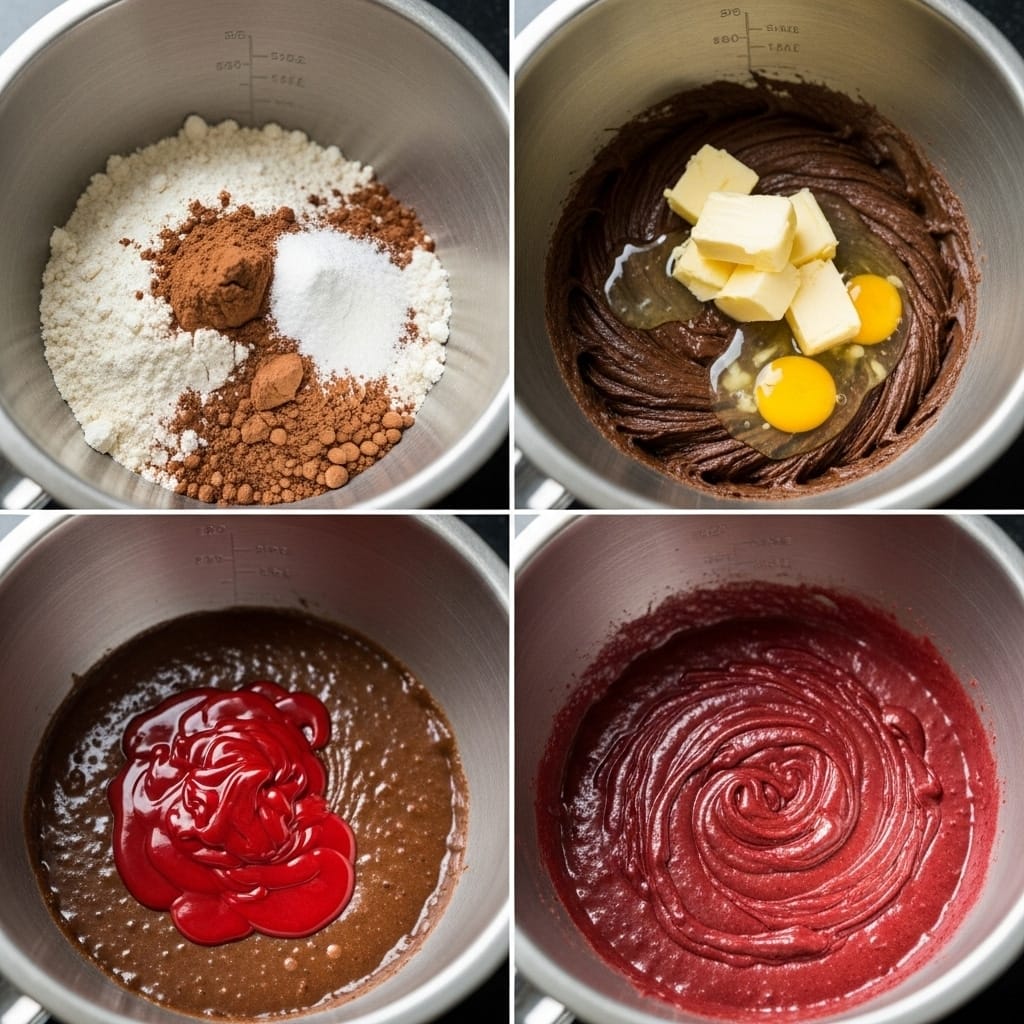
Red Velvet Cream Cheese Frosting – The Icing on the Brownie
Why Cream Cheese Pairs Perfectly with Red Velvet
Red velvet and cream cheese are a classic match. The rich, cocoa-tinted brownie has a sweet and tangy flavor. Cream cheese frosting brings out those flavors even more.
The smooth, creamy topping adds a cool contrast to the dense, fudgy texture. It also balances the sweetness of the brownie with a slight tang. That’s why so many red velvet recipes—cakes, cookies, and brownies—are topped with this frosting.
If you’ve never made cream cheese frosting before, don’t worry. It’s simple, and you only need a few ingredients.
Easy Steps to Make the Fluffiest Frosting Ever
Here’s how to make a light, fluffy cream cheese frosting that spreads like a dream:
Step 1: Beat the Butter and Cream Cheese
Start by adding 4 oz of cream cheese and ¾ stick of unsalted butter to a bowl. Make sure both are at room temperature. Mix them until the texture is soft and completely smooth.
Step 2: Add the Powdered Sugar Slowly
Next, add 4 cups of powdered sugar, a little at a time. This keeps it from flying everywhere. Once it’s all added, beat the mixture on high for a few minutes until it becomes light and fluffy.
Step 3: Finish with Vanilla
Finally, add 1 teaspoon of vanilla extract and mix it in. This adds a warm, sweet touch to the frosting.
Step 4: Spread Over Cooled Brownies
Once your brownies are completely cool, spread the frosting evenly over the top. Use a spatula for smooth edges, or swirl it for a rustic look.
Don’t forget—if you frost brownies before they cool, the frosting will melt and become runny. So be patient, and let them sit before topping.
Looking for another simple dessert with creamy layers? Try our Easy Strawberry Shortcake Bars Recipe—they’re light, fruity, and loaded with whipped topping.
Tips to Make Your Red Velvet Brownies Bakery-Worthy
How to Make Brownies Taste Like They Came from a Bakery
Want your red velvet brownies to look and taste like they came from a fancy bakery? It’s totally possible—right from your home kitchen. You just need a few small tricks that make a big difference.
Here’s how to level up your brownies:
1. Use room-temperature ingredients
Let your eggs, butter, and cream cheese sit out for 30–60 minutes. When they’re at room temp, they mix better and give smoother results.
2. Don’t skip the scale
Bakers use a scale for a reason. Even a little too much flour or sugar can change the texture. So for best results, weigh your ingredients instead of using cups.
3. Avoid overmixing
Once you add flour, mix gently and only until the batter comes together. Overmixing adds air and makes the brownies cakey.
4. Keep your oven accurate
Use an oven thermometer if you can. Many ovens run hot or cold, and even 10 degrees can affect your bake.
5. Watch the clock—but trust your eyes
Start checking at the 20-minute mark. Look for a set top and moist crumbs on a toothpick. If it comes out clean, they’re likely overdone.
These tips are simple, but they can give you bakery-level results.
Common Mistakes and How to Avoid Them
Even skilled bakers can make mistakes. Here are the most common ones when making red velvet brownies—and how to fix them.
Mistake #1: Using too much flour
Adding even a spoon too much can dry out your brownies. Instead, use a digital scale to measure by weight.
Mistake #2: Overbaking
If the edges are crusty and the center is dry, you’ve baked too long. Always test a few minutes early.
Mistake #3: Frosting too soon
If you frost hot brownies, the cream cheese will melt into a mess. Let the brownies cool fully before adding the topping.
Mistake #4: Skipping vinegar
It may seem like a small step, but vinegar adds the subtle tang and helps the color pop. Don’t leave it out.
Mistake #5: Using cold butter or cream cheese
Cold ingredients won’t mix well. Always let them come to room temperature for a smooth, creamy finish.
By avoiding these mistakes, your red velvet brownies will not only taste amazing—but also look picture-perfect.
Don’t miss our Chocolate Chip Cookie Dough Brownie Bombs for more bakery-style treats with a creative twist.
Serving, Storing, and Reheating Red Velvet Brownies
Best Ways to Slice, Store, and Enjoy Them Fresh
You’ve baked the perfect red velvet brownies. Now what? Serving them the right way and storing leftovers properly helps keep their flavor and texture just right.
Here’s how to do it:
Let them cool completely before slicing
If you try to cut warm brownies, they’ll crumble or stick to the knife. Wait at least 30 minutes after they’ve cooled in the pan. Then use a clean, sharp knife. For even cleaner cuts, wipe the knife between slices.
Use a warm knife for neat edges
Dip your knife in warm water, then dry it off. This trick helps cut through the frosting cleanly without dragging or tearing.
Serve with extras
Want to impress your guests? Serve a square of red velvet brownie with a scoop of vanilla ice cream or a drizzle of melted chocolate. Fresh berries also add a pop of color and flavor.
How to Store and Reheat Without Losing Texture
Storing at room temperature
If you’ll eat them within 1–2 days, store the brownies in an airtight container at room temperature. Keep them in a cool, dry spot away from sunlight.
Refrigerating for longer shelf life
Want to keep them longer? Place them in the fridge. They’ll stay fresh for up to 5 days. Just be sure they’re in a sealed container so they don’t dry out.
Freezing for later
Red velvet brownies freeze well! Wrap each piece in plastic wrap and place them in a freezer-safe bag or container. They’ll keep for up to 2 months.
To reheat:
Let frozen brownies thaw at room temperature for about an hour. If you want them warm, microwave for 10–15 seconds. This brings back their soft, chewy texture.
Here’s a quick table for storage reference:
| Storage Method | Duration | Notes |
|---|---|---|
| Room Temperature | 1–2 days | Airtight container, cool place |
| Refrigerator | Up to 5 days | Keeps frosting firm |
| Freezer | Up to 2 months | Wrap individually |
By following these steps, your brownies will stay as delicious as the day you baked them.
Looking for another sweet make-ahead recipe? Try our Fudgy Chewy Brookies Recipe—they freeze beautifully and taste even better the next day.
Creative Variations & Toppings for Red Velvet Brownies
Swirling in Cream Cheese or Nutella
If you want to add a little flair to your red velvet brownies, try swirling in some flavor. Not only does it look pretty, but it also adds rich, creamy layers to every bite.
Cream cheese swirl:
Mix 4 oz of cream cheese, 2 tablespoons of sugar, and 1 egg yolk until smooth. Then drop spoonfuls onto your brownie batter before baking. Gently swirl it into the top layer using a knife.
Nutella swirl:
Warm Nutella slightly to soften it. Spoon it over the batter and gently swirl it in. The result is a rich, chocolate-hazelnut twist that pairs beautifully with the mild red velvet flavor.
Both of these are easy to do and can be added right before baking.
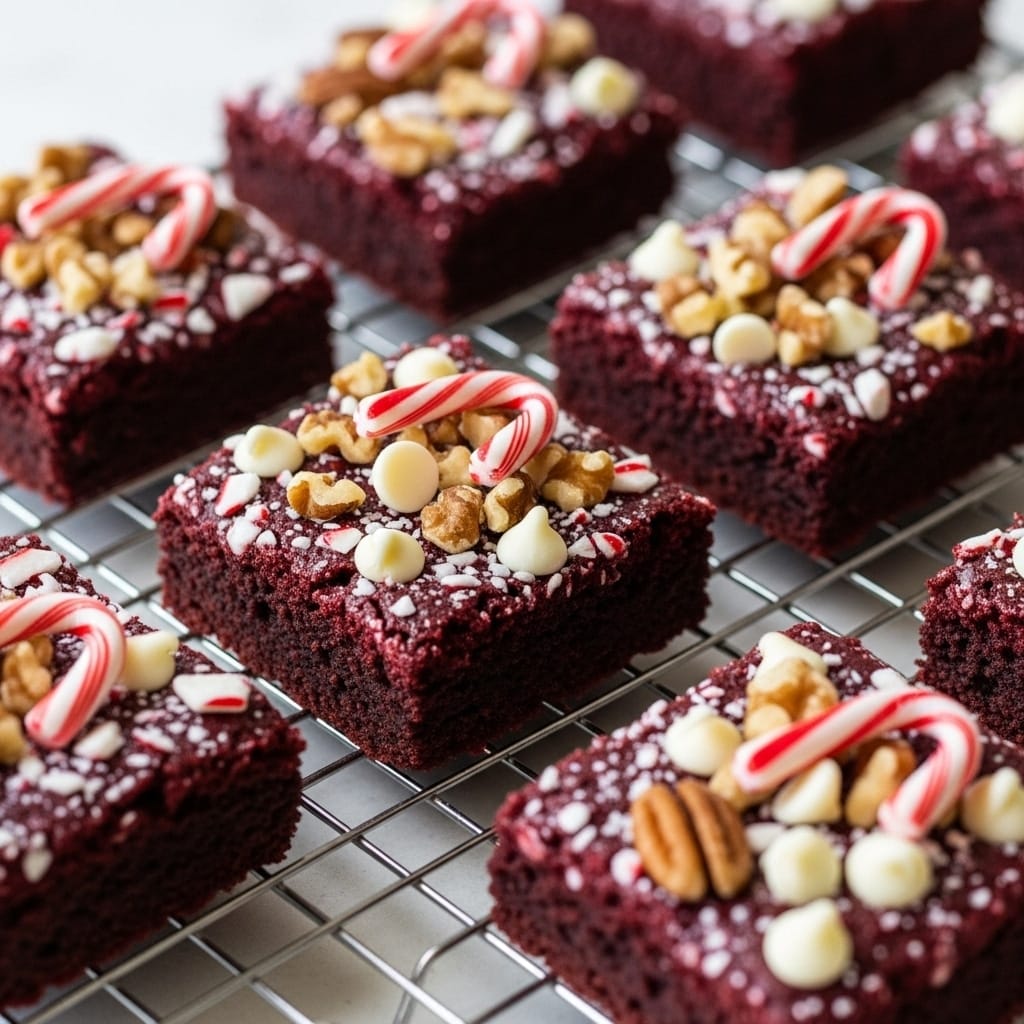
Topping Ideas: White Chocolate, Nuts, Candy, and More
Once your brownies are baked and cooled, you can dress them up even more. Toppings can add texture, sweetness, and a bit of crunch.
Here are some tasty topping ideas:
- White chocolate chips – Add inside or sprinkle on top after baking.
- Crushed nuts – Walnuts or pecans work well and add a nice crunch.
- Mini marshmallows – Place on top in the last 5 minutes of baking for a gooey finish.
- Crushed candy canes – Perfect for a festive holiday version.
- Chocolate drizzle – Melt dark or white chocolate and pour over cooled brownies.
Want to go all-out? Try stacking brownie squares and adding frosting between layers to make red velvet brownie sandwiches.
Fun Flavor Combos to Try Next Time
Red velvet is a great base for all sorts of flavor experiments. Here are a few combinations to inspire your next batch:
- Red velvet + raspberry jam: Swirl jam into the batter before baking.
- Red velvet + caramel: Add a caramel drizzle over the frosting.
- Red velvet + Oreo crumble: Sprinkle crushed Oreos over the top.
- Red velvet + peanut butter: Swirl peanut butter into the batter for a salty-sweet twist.
With red velvet brownies, the options are endless. You can keep them simple or go bold with mix-ins and toppings.
Don’t miss our Lemon Blueberry Bread if you’re looking for another colorful, customizable treat!
FAQs – Answering Top Questions About Red Velvet Brownies
What’s the difference between red velvet brownies and regular brownies?
Red velvet brownies have a mild cocoa flavor, while regular brownies are rich and deeply chocolaty. Red velvet also includes vinegar and red food coloring, which gives it a tangy taste and a bold red look. Plus, it often comes topped with cream cheese frosting.
Is red velvet just chocolate with vinegar?
Not exactly. While red velvet does include cocoa and vinegar, the flavor is more than that. The vinegar reacts with other ingredients to create a light tang and soft texture. Red velvet also has less cocoa than regular chocolate desserts, giving it a smoother, less intense taste.
Why add vinegar to red velvet brownies?
Vinegar helps the brownies stay moist and chewy. It also brings out the red color when mixed with cocoa. Without it, the brownies might turn out too dense or lack that signature red hue and subtle tang.
What makes brownies fudgy vs cakey?
Fudgy brownies have more fat (like butter or oil) and less flour. Cakey brownies have more flour and often more eggs, which makes them rise. If you want a fudgy texture, don’t overmix and avoid overbaking.
How to make brownies taste like a bakery?
Use high-quality ingredients, measure carefully, and don’t overbake. Also, let your ingredients come to room temperature before mixing. Finish them with a smooth frosting or a fun topping for that bakery-style finish.
What does adding an extra egg to box brownies do?
An extra egg adds more structure and makes the brownies lighter and more cake-like. If you prefer chewy, dense brownies, stick to the amount of eggs listed in the recipe—or add just an extra yolk instead.
Conclusion
Red velvet brownies are more than just a colorful dessert—they’re a perfect mix of rich cocoa, soft texture, and creamy frosting. From choosing the right ingredients to mastering the bake time, each step makes a difference. With a little care and attention, you can create brownies that taste just as good as the ones from your favorite bakery.
Remember to measure carefully, avoid overmixing, and let the brownies cool before adding frosting. If you want to get creative, try swirling in cream cheese or adding fun toppings like white chocolate or candy.
Whether you’re baking for a holiday, a party, or just because you love red velvet, this recipe will deliver soft, chewy, and delicious results every time.
Want even more baking ideas? Don’t miss our Easy Strawberry Shortcake Bars Recipe—they’re fruity, creamy, and perfect for any occasion.
Let’s connect! Follow me for more Joylicious Recipes:
PrintHow to Make the Best Red Velvet Brownies from Scratch
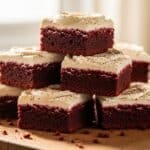
These red velvet brownies are soft, chewy, and rich in cocoa flavor, topped with a fluffy cream cheese frosting—perfect for any occasion.
- Prep Time: 10 minutes
- Bake Time: 30minutes minutes
- Total Time: 47 minute
- Yield: 16 brownies 1x
- Category: Appetizer
Ingredients
For the Red Velvet Brownies
¾ stick Unsalted Butter (85g)
1 cup Granulated Sugar (200g)
¼ cup Light Brown Sugar (55g)
3 Large Eggs
1 large Egg Yolk
1 teaspoon Vanilla Extract
⅓ cup Vegetable Oil (72g / 80ml)
¼ cup Cocoa Powder (25g)
¾ cup All-purpose Flour (90g)
1 tablespoon Vinegar
1 tablespoon Cornstarch
¼ teaspoon Salt
½ teaspoon Red Food Coloring
¾ cup White Chocolate Chips (optional)
For the Cream Cheese Frosting
4 oz Cream Cheese (114g), room temperature
¾ stick Unsalted Butter (85g), room temperature
4 cups Powdered Sugar (480g)
1 teaspoon Vanilla Extract
Instructions
Make the Red Velvet Brownies
Preheat the oven to 350°F (180°C), or 160°C for fan-assisted ovens. Line a 9-inch square pan with parchment paper.
Melt the butter in the microwave using 30-second intervals, stirring until fully melted.
In a large bowl, mix granulated sugar and brown sugar. Add melted butter and whisk until smooth.
Add eggs, yolk, and vanilla. Mix gently—do not overmix.
Add cocoa and vegetable oil. Stir until combined and smooth.
Color the batter: Mix a few spoonfuls of the batter with the red food coloring in a small bowl. Stir until smooth, then return to main bowl and mix.
Fold in dry ingredients: Add flour, cornstarch, and salt. Mix with a spatula until just combined.
Add vinegar, stir gently. If using, fold in white chocolate chips.
Pour batter into the pan, spreading evenly.
Bake for 20–25 minutes or until a toothpick comes out with moist crumbs. Let cool completely in the pan.
Make the Cream Cheese Frosting
Beat cream cheese and butter together until smooth.
Add powdered sugar slowly, then beat on high for 2–3 minutes until fluffy.
Add vanilla extract and mix briefly.
Spread frosting over cooled brownies before slicing.
Notes
Use a kitchen scale for best results—measurements matter!
Don’t overmix once the flour is added—this keeps brownies fudgy.
Cool completely before frosting to prevent melting.
Use gel food coloring for a deeper red hue.
To freeze: Wrap slices individually in plastic and freeze for up to 2 months.
Nutrition
- Serving Size: 16 brownies
- Calories: 367kcal
- Sugar: 51g
- Sodium: 149mg
- Fat: 15g
- Saturated Fat: 9g
- Trans Fat: 0.4g
- Carbohydrates: 57g
- Fiber: 1g
- Protein: 3g
- Cholesterol: 75mg
Keywords: Cream cheese, white chocolate chips, brown sugar, unsweetened cocoa powder, apple cider vinegar, red food coloring, Red velvet cake, coconut oil
Let’s connect! Follow me for more Joylicious Recipes: Facebook, Instagram, Pinterest