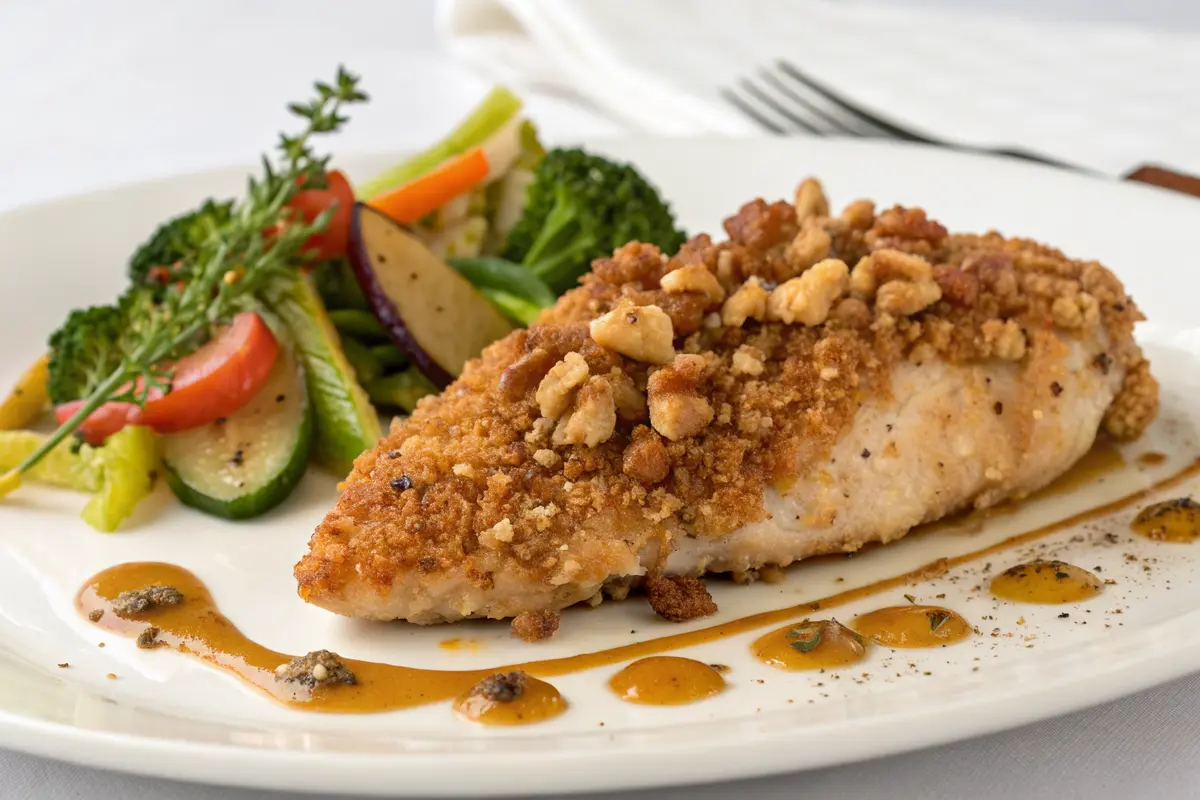
The Perfect Walnut Crusted Chicken: A Gourmet Dinner Made Simple
Why You’ll Love This Nutty Chicken Delight
Walnut crusted chicken transforms ordinary poultry into an extraordinary culinary experience with its perfect balance of crunch and tenderness. This elegant dish features succulent chicken breasts enveloped in a golden-brown coating of finely chopped walnuts and crisp breadcrumbs, creating a satisfying textural contrast that elevates your dinner table. “The Grilled Huli Huli Chicken technique offers similar staged-cooking approaches to prevent burning while developing maximum flavor.”
This versatile recipe works beautifully for both casual weeknight meals and special occasions when you want to impress guests without spending hours in the kitchen. The natural oils in the walnuts infuse the chicken with a rich, buttery quality while creating a protective coating that locks in moisture and enhances flavor. Whether served alongside roasted vegetables, atop a fresh salad, or with a simple side of steamed rice, this walnut chicken delivers restaurant-quality results with minimal effort.
Essential Ingredients for the Ultimate Nutty Coating
Building Your Flavorful Walnut Crust
The magic of walnut crusted chicken starts with high-quality ingredients that work together to create the perfect balance of flavors and textures. Here’s everything you’ll need to prepare this delicious dish:
| Core Ingredients | Quantity | Notes |
|---|---|---|
| Chicken breast fillets | 2 (about 6-8 oz each) | Boneless, skinless, pounded to even thickness |
| Walnuts | 1 cup | Finely chopped (use a food processor for best results) |
| Breadcrumbs | ½ cup | Panko preferred for extra crispiness |
| Egg | 1 large | Beaten well for better adhesion |
| Olive oil | 2 tablespoons | Extra virgin for better flavor |
| Salt and pepper | To taste | Kosher salt works best |
| Optional Flavor Enhancers | Quantity | Notes |
| Parmesan cheese | ¼ cup | Freshly grated, adds savory depth |
| Dried herbs | 1 tablespoon | Thyme, rosemary, or Italian seasoning blend |
| Garlic powder | 1 teaspoon | Adds aromatic dimension |
| Lemon zest | 1 teaspoon | For bright citrus notes |
| Dijon mustard | 1 tablespoon | Adds tangy flavor and helps coating adhere |
| Honey | 1 tablespoon | Adds subtle sweetness and helps browning |
| Paprika | ½ teaspoon | Sweet or smoked for color and flavor |
“The Crispy Chicken Sandwich recipe uses a similar breading technique that ensures maximum coating adhesion while keeping the chicken juicy inside.”
When selecting walnuts for your crusted chicken, look for pieces that are fresh and not bitter. Toast them lightly before chopping to enhance their nutty flavor profile. For those with nut allergies, sunflower seeds or pumpkin seeds make excellent substitutions, offering a similar textural crunch while remaining allergen-friendly. If you prefer a gluten-free version, simply replace traditional breadcrumbs with gluten-free alternatives or crushed rice crackers for equally delicious results.
Creating Your Masterpiece: Detailed Cooking Instructions
Perfecting the Walnut Crust Technique
Follow these expanded step-by-step instructions to create perfectly crispy walnut crusted chicken every time:
- Prepare your workspace by preheating the oven to 400°F (200°C) and lining a baking sheet with parchment paper. This prevents sticking and makes cleanup easier. Position an oven rack in the center position for even heat distribution.
- If your chicken breasts are uneven in thickness, place them between two sheets of plastic wrap and gently pound to an even thickness of about ½-inch using a meat mallet or heavy skillet. Pat dry thoroughly with paper towels to ensure the coating adheres properly.
- Set up your breading station with three shallow dishes: one for ½ cup all-purpose flour seasoned with ¼ teaspoon salt and pepper (optional but recommended), one for the beaten egg (optionally whisked with 1 tablespoon Dijon mustard), and one for your walnut coating mixture.
- For the walnut coating, combine the finely chopped walnuts, breadcrumbs, ½ teaspoon salt, ¼ teaspoon black pepper, and any optional seasonings like ¼ cup grated Parmesan, herbs, garlic powder, or lemon zest. Mix thoroughly to ensure even distribution of flavors.
- Season each chicken breast lightly with salt and pepper on both sides. Working with one piece at a time, dredge first in the flour mixture (if using), shaking off excess, then dip into the beaten egg mixture, allowing excess to drip off.
- Press the chicken firmly into the walnut mixture, turning and pressing several times to ensure an even, thick coating adheres on all sides. For extra crispiness, let the coated chicken rest on a wire rack for 5 minutes before baking.
- Arrange the coated chicken pieces on the prepared baking sheet, ensuring they don’t touch. Drizzle each piece with about 1 tablespoon of olive oil or lightly spray with cooking spray to promote browning.
- Bake in the preheated oven for 20-25 minutes until the crust is golden brown and the internal temperature reaches 165°F (74°C) when tested with an instant-read thermometer. For extra browning, switch to the broiler for the final 1-2 minutes, watching carefully to prevent burning.
- Remove the chicken from the oven and let it rest for 5 minutes on the baking sheet. This critical resting period allows the juices to redistribute throughout the meat, ensuring maximum tenderness.
- Serve the walnut crusted chicken hot, garnished with fresh herbs like parsley or thyme and lemon wedges for squeezing over just before eating.
“The Pomegranate Ginger Chicken shares similar principles of balancing sweet and savory flavors that complement protein beautifully.”
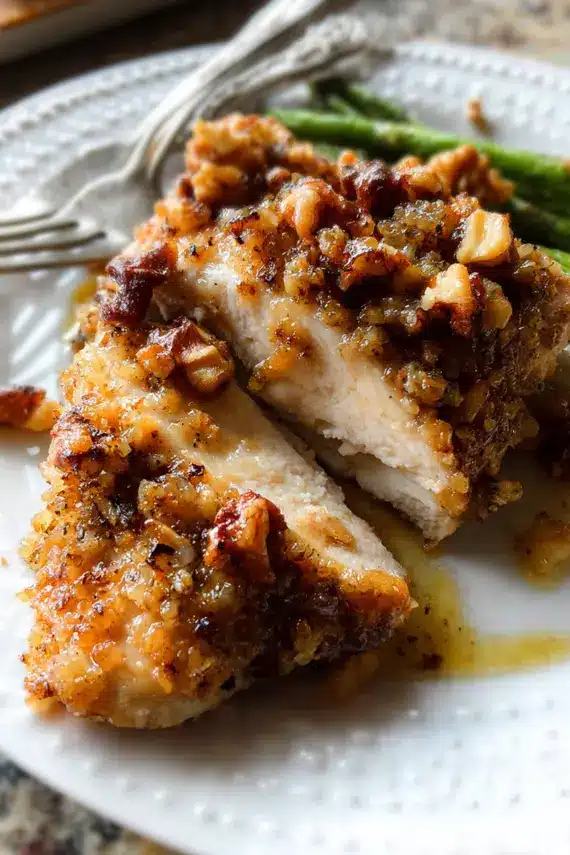
Expert Tips for Guaranteed Success Every Time
Mastering the Art of Walnut Crusted Chicken
Elevate your walnut crusted chicken from good to extraordinary with these professional cooking tips:
- Temperature matters: Always bring chicken to room temperature for about 20 minutes before coating. Cold chicken straight from the refrigerator creates steam when cooking, which can make your crust soggy instead of crispy.
- Double-dipping technique: For an extra-thick, restaurant-style crust, repeat the egg and walnut coating process twice. This creates multiple layers of crunch that stay crisp even when served with sauce.
- Walnut preparation: Toast your walnuts in a dry skillet for 3-5 minutes before chopping to enhance their flavor. Allow them to cool completely before mixing with other coating ingredients to prevent the breadcrumbs from becoming damp.
- Adhesion secrets: If you’re having trouble getting the coating to stick, chill the breaded chicken in the refrigerator for 20-30 minutes before baking. This helps the coating set and adhere better during cooking.
- Oil application: Instead of drizzling oil, use an oil mister or spray bottle to apply a fine, even layer over the coating. This promotes uniform browning without making certain areas soggy.
- Doneness indicator: The most reliable way to check for doneness is using an instant-read thermometer inserted into the thickest part of the chicken. The perfect temperature is 165°F (74°C) – any lower is unsafe, any higher risks dry chicken.
- Serving strategy: For the crispiest results, serve the chicken on a warmed plate with any sauces on the side rather than poured over the top. This preserves the delightful textural contrast between the crunchy exterior and juicy interior.
“The Marry Me Chicken Tortellini Recipe demonstrates how proper ingredient preparation can elevate simple chicken into an unforgettable meal.”
Keeping Your Crusted Creation Fresh and Delicious
Smart Storage Solutions for Walnut Chicken
Proper storage is essential for maintaining the quality of your walnut crusted chicken, whether you’re saving leftovers or preparing it in advance for busy weeknights.
For refrigerator storage, allow the chicken to cool completely before transferring to an airtight container. Line the container with paper towels to absorb excess moisture, which is the enemy of crispy coatings. Place another paper towel on top of the chicken before sealing the container. Stored this way, your walnut crusted chicken will remain delicious for up to 3 days in the refrigerator.
If you’d like to freeze your walnut crusted chicken, I recommend flash-freezing the pieces first. Place the cooled chicken on a parchment-lined baking sheet, ensuring pieces don’t touch, and freeze for 2 hours. Once solid, transfer to a freezer-safe container or heavy-duty freezer bag, placing parchment paper between layers to prevent sticking. Properly stored, the chicken will maintain quality for up to 2 months in the freezer.
For the best texture when reheating refrigerated leftovers, avoid the microwave which will make the coating soggy. Instead, place the chicken on a wire rack over a baking sheet and reheat in a 350°F (175°C) oven for about 10 minutes until warmed through and re-crisped. If reheating from frozen, thaw overnight in the refrigerator first for best results, then reheat using the oven method.
“The Cheesy Cauliflower Chicken Casserole demonstrates similar techniques for preserving texture when storing and reheating protein-based dishes.”
Exciting Twists on the Classic Walnut Chicken Recipe
Creative Flavor Combinations and Dietary Adaptations
Explore these innovative variations of walnut crusted chicken to keep your meal planning fresh and exciting:
Mediterranean Herb Walnut Chicken: Enhance the walnut coating with a Mediterranean flair by adding 1 tablespoon each of dried oregano and basil, plus 2 teaspoons of lemon zest to the nut mixture. Serve with a side of tzatziki sauce for dipping and a Greek salad for a complete meal that transports you to the Mediterranean coast.
Spicy Maple Walnut Chicken: Create a sweet-heat sensation by incorporating 1 tablespoon of maple syrup, ½ teaspoon cayenne pepper, and ¼ teaspoon cinnamon into your walnut mixture. This combination creates a delightful contrast of flavors that pairs wonderfully with sweet potato fries or roasted Brussels sprouts.
Asian-Inspired Walnut Chicken: Transform the flavor profile by adding 1 tablespoon of sesame seeds, 1 teaspoon of ground ginger, and ½ teaspoon of five-spice powder to your walnut coating. Serve with a side of stir-fried vegetables and a drizzle of honey-soy sauce for an Asian fusion experience that delights the palate.
Keto-Friendly Walnut Chicken: Make this recipe perfect for low-carb diets by omitting the breadcrumbs entirely and replacing them with ¼ cup of almond flour mixed with 2 tablespoons of grated Parmesan cheese. This adaptation maintains the crispy texture while significantly reducing the carbohydrate content.
Walnut Pesto Crusted Chicken: For an Italian twist, mix 3 tablespoons of prepared basil pesto into your walnut coating. The aromatic herbs and garlic in the pesto infuse the crust with vibrant flavor that pairs beautifully with roasted cherry tomatoes and fresh mozzarella for a complete Italiano-inspired meal.
Gluten-Free Herb Walnut Chicken: Replace traditional breadcrumbs with crushed rice cereal or certified gluten-free breadcrumbs, then add 2 tablespoons of fresh chopped herbs like rosemary, thyme, and parsley to the mix. This variation ensures everyone can enjoy this delicious dish regardless of dietary restrictions.
Delicious Ways to Serve Your Walnut Chicken Creation
Elevating Your Meal with Perfect Pairings
Transform your walnut crusted chicken from a simple protein to the centerpiece of an impressive meal with these thoughtful serving suggestions:
For an elegant dinner party presentation, slice the walnut crusted chicken on a bias and fan it over a bed of wild rice pilaf studded with dried cranberries and fresh herbs. The rich nuttiness of the chicken complements the earthy flavors of the rice, while the cranberries provide bright pops of sweetness and color. Garnish with fresh microgreens or herb sprigs for a restaurant-quality appearance.
Create a hearty family-style meal by serving whole chicken breasts alongside roasted root vegetables such as carrots, parsnips, and sweet potatoes. Toss the vegetables with olive oil, salt, pepper, and a touch of honey before roasting until caramelized. The sweet, earthy flavors of the vegetables balance perfectly with the savory, crunchy chicken coating.
For a lighter option perfect for lunch or a casual dinner, slice the walnut crusted chicken and arrange it atop a bed of mixed greens with sliced apples, crumbled blue cheese, and toasted walnuts. This Mexican chicken salad recipe offers additional inspiration for creating vibrant, nutritionally balanced meals centered around perfectly cooked chicken.
Transform leftover walnut crusted chicken into an impressive sandwich by layering slices between artisan bread with crisp lettuce, ripe tomatoes, and a spread of honey-Dijon mayo. This makes for a perfect packed lunch that will have colleagues eyeing your meal with envy.
For a cozy autumn or winter dinner, serve your walnut chicken alongside creamy mashed potatoes and steamed green beans. The contrast between the crispy chicken coating and the smooth, buttery potatoes creates a satisfying textural experience that epitomizes comfort food at its finest.
When entertaining guests who follow different dietary patterns, offer a build-your-own bowl station with walnut crusted chicken as the protein option. Provide bases like quinoa, brown rice, or cauliflower rice, and toppings such as roasted vegetables, avocado slices, pickled onions, and various sauces to accommodate different preferences while keeping the chicken as the star.
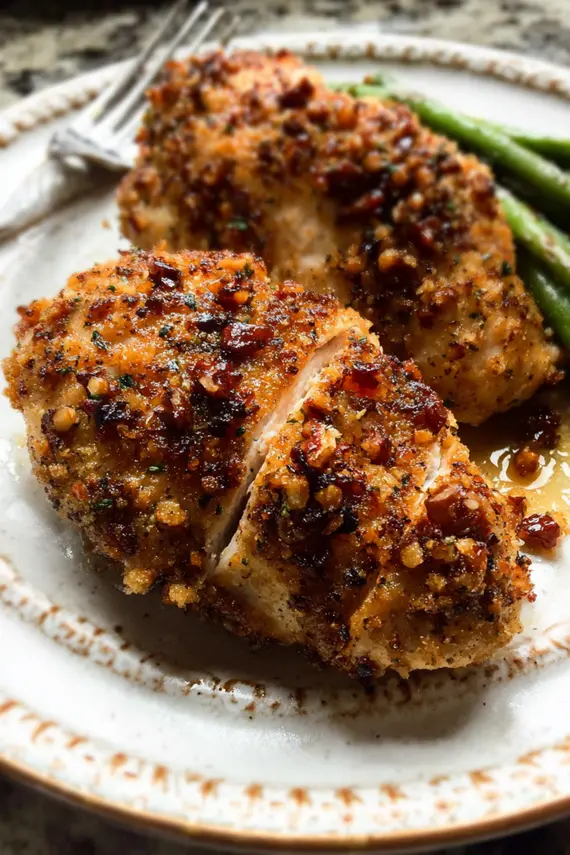
Common Questions About Perfect Walnut Chicken
Troubleshooting and Expert Advice
Why does my walnut coating fall off during baking?
This typically happens when the chicken surface is too wet or the coating hasn’t properly adhered. Ensure you thoroughly pat the chicken dry with paper towels before starting the coating process. Another effective technique is to lightly dust the chicken with flour before the egg dip, which creates a better surface for the egg to stick to. Finally, after coating the chicken, press the walnut mixture firmly onto all surfaces and let it rest for 10-15 minutes before baking to help the coating set.
Can I prepare walnut crusted chicken in an air fryer?
Absolutely! Air fryers are excellent for creating crispy walnut crusted chicken with less oil. Preheat your air fryer to 375°F (190°C), lightly spray the coated chicken with cooking oil, then cook for about 12-15 minutes, flipping halfway through. The exact timing will depend on your air fryer model and the thickness of your chicken. Always check that the internal temperature reaches 165°F (74°C) before serving. The advantage of using an air fryer is an exceptionally crispy exterior while maintaining a juicy interior.
How can I prevent the walnuts from burning before the chicken is fully cooked?
If you notice the walnut coating browning too quickly, there are several solutions. First, ensure your oven rack is positioned in the middle rather than too close to the heat source. You can also tent the chicken loosely with aluminum foil after the first 10-15 minutes of baking to prevent further browning while allowing the chicken to finish cooking. Another effective approach is to lower your oven temperature to 375°F (190°C) and extend the cooking time slightly. For very thick chicken breasts, consider butterflying or pounding them thinner for more even cooking.
Why This Walnut Crusted Chicken Will Become a Family Favorite
The Perfect Balance of Nutrition and Indulgence
Walnut crusted chicken represents the perfect intersection of gourmet flavor and everyday practicality. With its golden, crunchy exterior giving way to tender, juicy meat, this dish satisfies both sophisticated palates and picky eaters alike. The natural richness of walnuts not only provides outstanding flavor but also contributes heart-healthy omega-3 fatty acids to your meal, making this an indulgence you can feel good about serving regularly.
What truly sets this recipe apart is its versatility. Whether you’re preparing a casual weeknight dinner, meal prepping for busy days ahead, or hosting a special gathering, walnut crusted chicken rises to the occasion. The basic recipe can be endlessly customized to suit different flavor preferences or dietary needs while maintaining its core appeal—a testament to truly great home cooking.
“The Smothered Chicken and Gravy offers another delicious way to transform humble chicken into a memorable meal your family will request again and again.”
I encourage you to make this walnut crusted chicken your own by experimenting with the variations and serving suggestions provided. The joy of cooking comes not just from following recipes but from adapting them to suit your personal taste and creating new family traditions in the process. Give this recipe a try, and discover why nutty, crispy chicken deserves a permanent place in your cooking repertoire!
PrintWalnut Crusted Chicken
- Crispy, golden walnut crusted chicken with a satisfying crunch and tender interior.
- The perfect balance of nutty flavor and succulent chicken in every bite.
- An elegant yet easy dinner that’s sure to impress family and guests alike.
- Prep Time: 15
- Cook Time: 25
- Total Time: 40 minutes
- Yield: 2 servings 1x
- Category: Dinner
- Method: Baking
- Cuisine: American
Ingredients
- 2 chicken breast fillets (about 6–8 oz each), pounded to even thickness
- 1 cup walnuts, finely chopped
- ½ cup breadcrumbs (preferably Panko)
- 1 large egg, beaten
- 2 tbsp olive oil
- Salt and pepper to taste
- ¼ cup grated Parmesan cheese (optional)
- 1 tbsp dried herbs (thyme, rosemary, or Italian seasoning) (optional)
- 1 tsp garlic powder (optional)
- 1 tsp lemon zest (optional)
- 1 tbsp Dijon mustard (optional)
- ½ tsp paprika (optional)
Instructions
- Preheat the oven to 400°F (200°C) and line a baking sheet with parchment paper.
- Pat chicken breasts dry with paper towels and season lightly with salt and pepper on both sides.
- In a shallow dish, combine chopped walnuts, breadcrumbs, salt, pepper, and any optional seasonings you’re using.
- In another shallow dish, beat the egg. If using Dijon mustard, whisk it into the egg.
- Dip each chicken fillet in the beaten egg mixture, ensuring it’s fully coated.
- Press the chicken firmly into the walnut mixture, turning and pressing to coat all sides evenly.
- Place coated chicken on the prepared baking sheet, ensuring pieces don’t touch.
- Drizzle or spray each piece with olive oil to promote browning.
- Bake for 20-25 minutes until golden brown and internal temperature reaches 165°F (74°C).
- Remove from oven and let rest for 5 minutes before serving.
Notes
- For extra crispiness, toast the walnuts before chopping them.
- The chicken can be breaded up to 8 hours ahead and refrigerated until ready to bake.
- Serve with a side salad, roasted vegetables, or mashed potatoes for a complete meal.
- Nutrition facts are estimates and may vary based on ingredients used, portion sizes, and preparation methods.
Nutrition
- Serving Size: 1 chicken breast
- Calories: 520
- Sugar: 2
- Sodium: 410
- Fat: 32
- Saturated Fat: 5
- Unsaturated Fat: 25
- Carbohydrates: 14
- Fiber: 3
- Protein: 45
- Cholesterol: 145
Keywords: walnut crusted chicken, walnut chicken, crusted chicken, nutty chicken, walnut pesto, baked chicken, nut-crusted chicken
Let’s connect! Follow me for more Joylicious Recipes: Facebook, Instagram, Pinterest