Easy Salmon Sushi Balls: Bite-Sized Japanese Appetizers You’ll Love
What Makes Sushi Balls So Popular
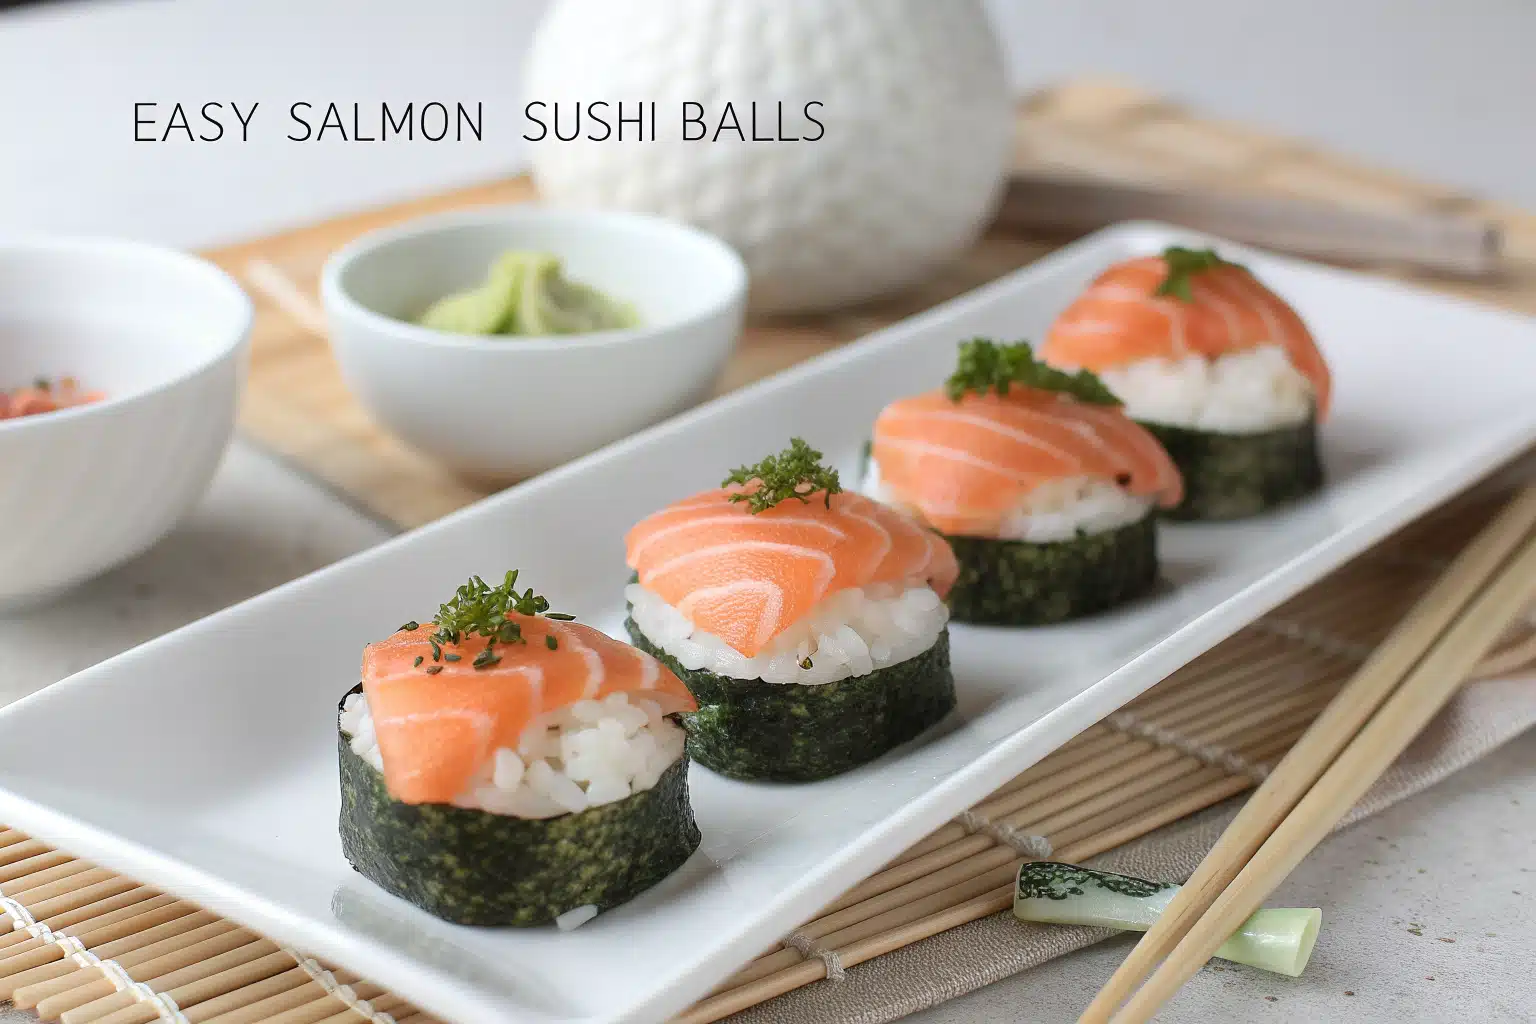
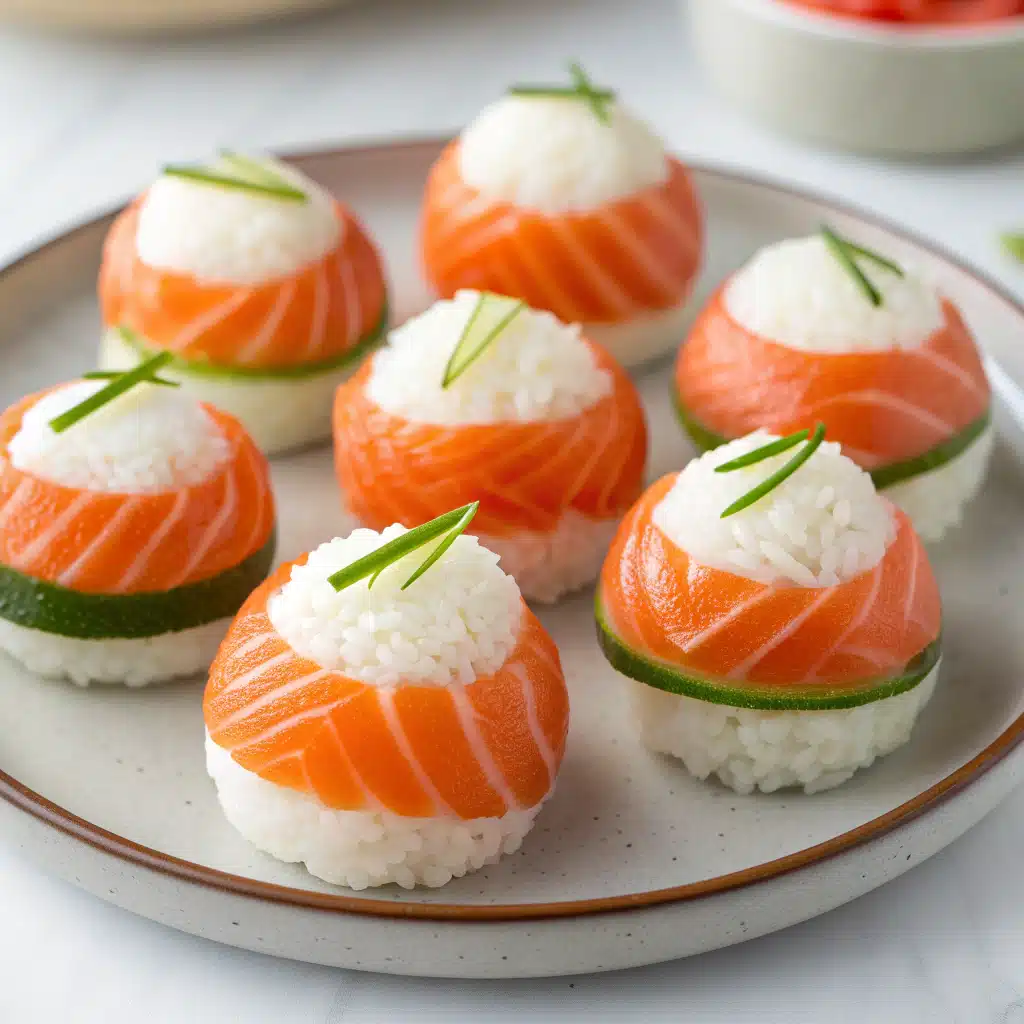
Easy salmon sushi balls have become increasingly popular as a no-fuss alternative to traditional sushi rolls. These bite-sized delights deliver all the delicious flavors of sushi without requiring any special rolling techniques or equipment. Perfect for beginners, these versatile treats combine seasoned sushi rice with flavorful salmon in a convenient, pop-in-your-mouth format. Whether you’re hosting a dinner party or looking for a creative lunch option, these easy salmon sushi balls will certainly impress your guests while being remarkably simple to prepare.
“Check out our salmon sushi bake for another creative way to enjoy sushi flavors without the rolling technique.”
Benefits of Making Sushi Balls Instead of Rolls
The beauty of easy salmon sushi balls lies in their simplicity and convenience. Unlike traditional sushi rolls that require bamboo mats and precise rolling techniques, these balls can be formed with just your hands or basic kitchen tools. Additionally, they’re highly customizable, allowing you to adjust the flavors and toppings to your preference.
Making sushi balls is also significantly faster than rolling sushi, making them perfect for busy weeknights when you’re craving Japanese flavors without the fuss. Furthermore, their bite-sized nature makes them ideal for serving at gatherings where finger foods are preferred.
Essential Ingredients for Perfect Salmon Sushi Balls
Core Ingredients Breakdown
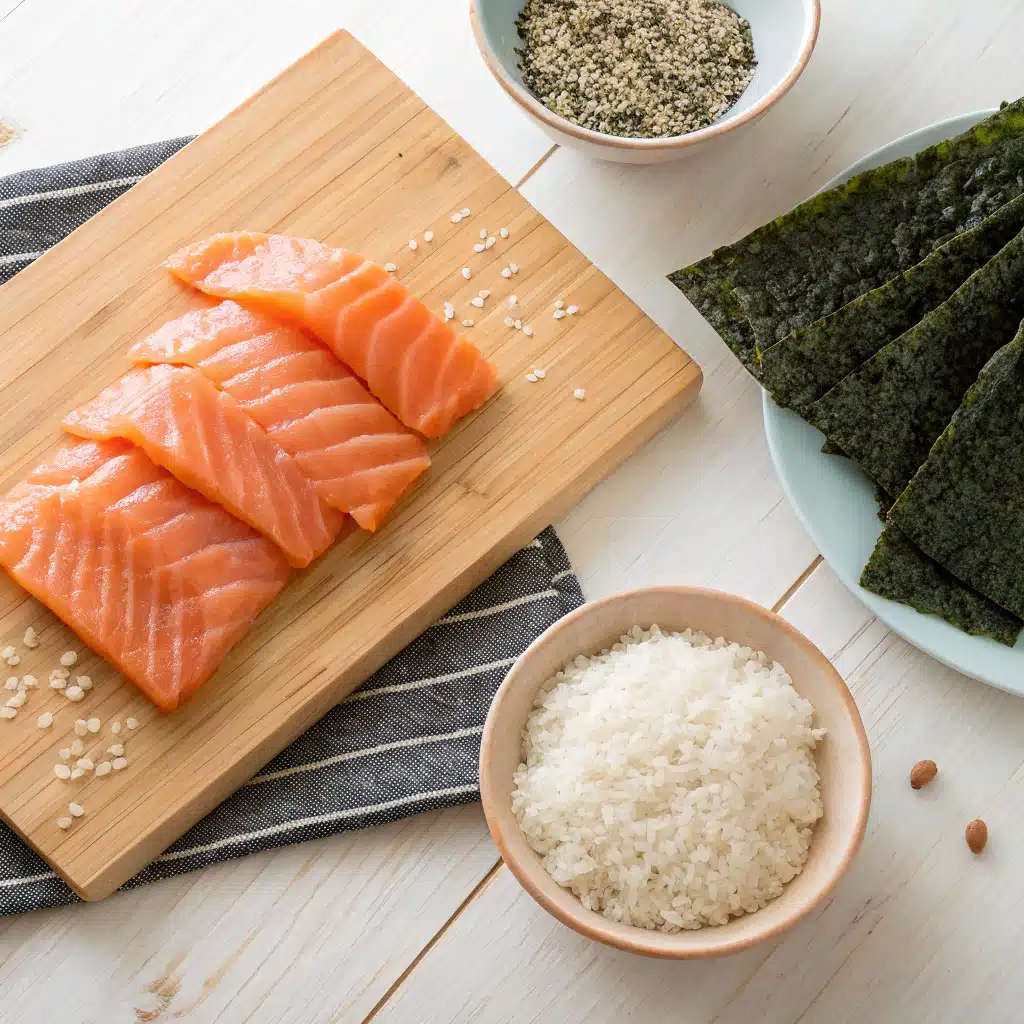
Creating delicious easy salmon sushi balls requires just a handful of key ingredients that work together to deliver authentic Japanese flavors. Here’s what you’ll need:
| Ingredient | Amount | Notes |
|---|---|---|
| Sushi rice (uncooked) | 1/2 cup | Short-grain Japanese rice works best |
| Cooked salmon | 10 oz | Pan-seared or baked |
| Sesame oil | 1 tablespoon | Adds nutty flavor |
| Rice vinegar | 2 teaspoons | For authentic sushi taste |
| Soy sauce | 2 tablespoons | Provides saltiness and umami |
| Optional: Wasabi | To taste | For extra heat |
| Optional: Nori sheets | 1-2 sheets | Cut into small strips for garnish |
| Optional: Green onions | 2-3 stalks | Finely sliced for garnish |
Selecting the Best Salmon for Sushi Balls
When making easy salmon sushi balls, the quality of your salmon significantly impacts the final result. For this recipe, we recommend using pre-cooked salmon for safety and convenience. Pan-seared or baked salmon works wonderfully, as it maintains moisture while developing flavor.
If you prefer using raw salmon, ensure it’s sushi-grade and purchased from a reputable fishmonger. Farm-raised Atlantic salmon tends to have a milder flavor and works well in these sushi balls, while wild-caught sockeye salmon offers a more robust taste. Regardless of your choice, ensure the salmon is fresh and of high quality for the best flavor experience.
Step-by-Step Guide to Making Easy Salmon Sushi Balls
Preparing the Perfect Sushi Rice
The foundation of delicious easy salmon sushi balls is properly cooked and seasoned sushi rice. Start by thoroughly rinsing 1/2 cup of short-grain Japanese rice until the water runs clear, which removes excess starch. Then:
- Cook the rice according to package instructions, typically using a 1:1.2 ratio of rice to water.
- While the rice cooks, prepare your seasoning mixture by combining 2 teaspoons of rice vinegar with a pinch of salt and sugar in a small bowl.
- Once the rice is cooked, transfer it to a wide, non-metallic bowl and allow it to cool slightly until it’s just warm to the touch.
- Drizzle the vinegar mixture evenly over the warm rice and gently fold it in using a cutting motion with a rice paddle or wooden spoon.
- Continue folding until the rice appears glossy and has absorbed the seasoning.
- Cover with a damp cloth and let it rest for about 10 minutes before using.
“Looking for inspiration? Try our creamy salmon pasta recipe for another delicious way to enjoy salmon in your meals.”
Cooking and Seasoning the Salmon
Properly cooking the salmon ensures your easy salmon sushi balls have the perfect texture and flavor. Follow these steps:
- Preheat your oven to 375°F (190°C) or prepare a skillet over medium-high heat.
- For baking: Place a 10 oz salmon fillet on a lined baking sheet, drizzle with olive oil, and season with salt and pepper. Bake for 12-15 minutes until just cooked through but still moist.
- For pan-searing: Heat 1 tablespoon of oil in a skillet. Season the salmon with salt and pepper, then cook skin-side down for 4-5 minutes. Flip and cook for another 2-3 minutes until just cooked through.
- Allow the salmon to cool completely to room temperature.
- Once cooled, remove any skin and flake the salmon into small pieces using a fork, being careful to remove any bones you might find.
- In a bowl, gently mix the flaked salmon with 1 tablespoon of sesame oil and 2 tablespoons of soy sauce until evenly coated.
Forming and Garnishing Your Sushi Balls
Now comes the fun part – creating your easy salmon sushi balls and adding beautiful garnishes for eye-catching presentation:
- In a large mixing bowl, combine the seasoned sushi rice and flaked salmon mixture. Gently fold together until well incorporated.
- Lightly wet your hands with water or a bit of rice vinegar to prevent sticking.
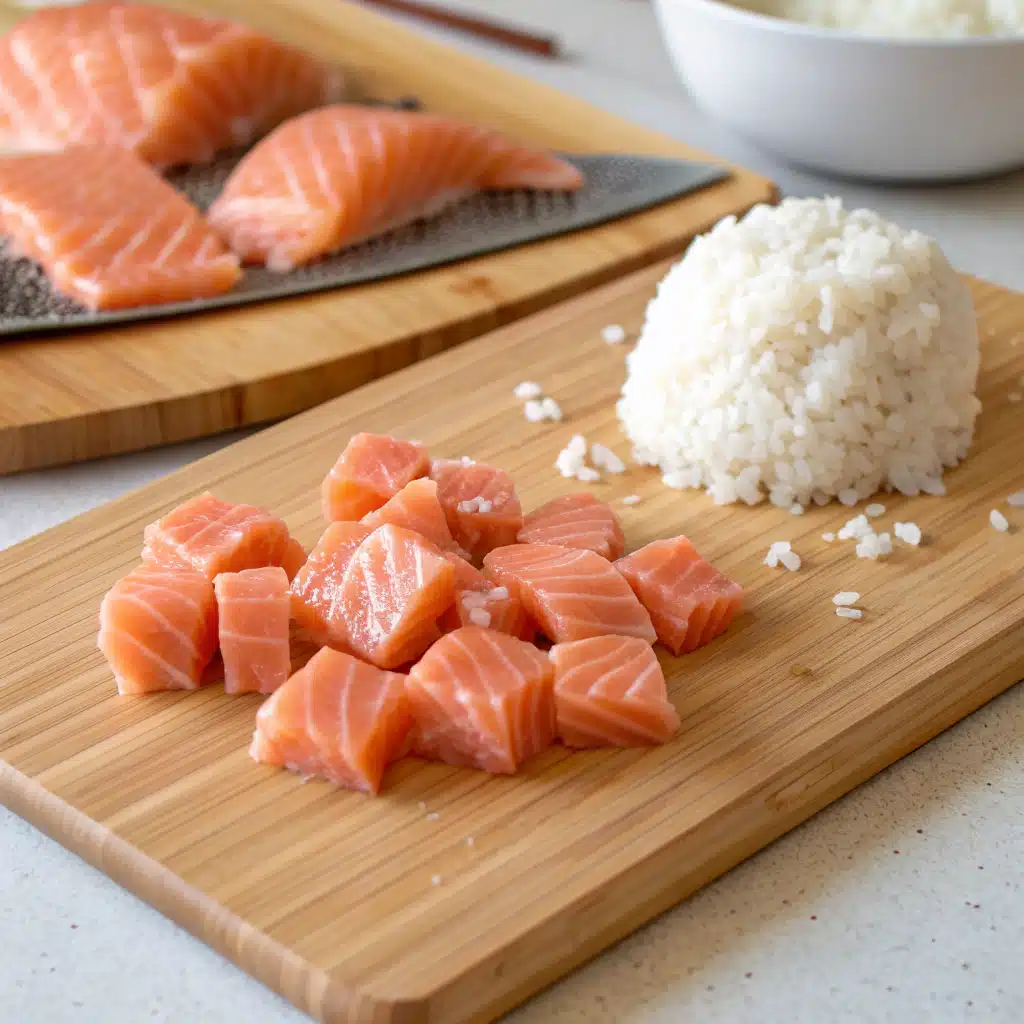
- Take about 2 tablespoons of the mixture and gently compress it between your palms, forming a ball about 1.5 inches in diameter.
- Place the formed balls on a serving plate and continue until all the mixture is used.
- For garnishing, drizzle each ball with a small amount of teriyaki sauce or spicy mayo.
- Top each sushi ball with your choice of garnishes: thin strips of nori, sliced green onions, sesame seeds, small pieces of avocado, or a tiny dot of wasabi.
- For added presentation, you can place each ball in a decorative cupcake liner or arrange them on a bed of shredded daikon radish.
Essential Tips for Perfect Salmon Sushi Balls
Getting the Rice Texture Just Right
The perfect texture of rice is crucial when making easy salmon sushi balls. To achieve ideal results, remember these important tips:
First, always use short-grain Japanese rice, sometimes labeled as “sushi rice” in stores. This variety contains the right amount of starch needed for proper stickiness. When cooking, use slightly less water than you would for regular rice—aim for a ratio of 1:1.2 (rice:water) for the perfect texture.
Additionally, never skip the rinsing step, as it removes excess starch that can make your rice too sticky. After cooking, let the rice cool just enough to handle comfortably—around 100°F (38°C). Rice that’s too hot will become gummy when mixed, while rice that’s too cold won’t hold together properly.
Finally, when mixing seasonings into your rice, use a cutting and folding motion rather than stirring, which can crush the grains and create an undesirable mushy texture. Your goal is rice that sticks together enough to form balls but still maintains distinct grains.
Ensuring Food Safety with Salmon
Food safety is paramount when preparing easy salmon sushi balls, particularly when handling fish. If using pre-cooked salmon as this recipe suggests, ensure it reaches an internal temperature of 145°F (63°C) before cooling and flaking. Never leave cooked salmon at room temperature for more than two hours.
When purchasing salmon, look for fresh-smelling fish with firm, moist flesh and no discoloration. Keep it refrigerated until ready to cook. If you prefer using raw salmon in your sushi balls, only use sushi-grade fish purchased from reputable sources. This specially-handled fish has been frozen according to FDA guidelines to kill potential parasites.
Always practice proper hand washing before and after handling raw fish, and use separate cutting boards and utensils for fish and other ingredients. By following these safety measures, you’ll ensure your easy salmon sushi balls are not only delicious but also safe to consume.
“Discover great ideas like our miso salmon recipe for another flavorful way to prepare this versatile fish.”
Creative Presentation Ideas
- Elevate your easy salmon sushi balls from simple snacks to impressive appetizers with these creative presentation ideas:
- Create a “sushi garden” by arranging your balls on a bed of microgreens or thinly sliced cucumber, mimicking a Japanese garden aesthetic. Use small food picks or decorative toothpicks with colorful ends to make your sushi balls easy to grab and add visual interest.
- Try a color gradient by garnishing different balls with various toppings in a spectrum of colors—from bright orange tobiko (flying fish roe) to green avocado slices, purple shiso leaves, and black sesame seeds. Serve your sushi balls in individual ceramic spoons for an elegant single-bite presentation at dinner parties.
- For family-style serving, arrange the balls in concentric circles on a round platter, alternating garnishes to create patterns. Include small bowls of additional sauces like spicy mayo, eel sauce, or ponzu for dipping options. Remember that in Japanese cuisine, presentation is just as important as taste—so take your time to arrange your easy salmon sushi balls with intention and artistic flair.
Storing and Making Ahead Salmon Sushi Balls
Proper Storage Techniques
- Proper storage is essential for maintaining the quality and safety of your easy salmon sushi balls. For short-term storage, place the formed sushi balls in an airtight container lined with a slightly damp paper towel to prevent the rice from drying out. They can be refrigerated for up to 24 hours, though they’re best consumed within 4-6 hours of preparation.
- If you need to store them overnight, cover the container with a tight-fitting lid and place it in the coldest part of your refrigerator, typically the back. Avoid storing the sushi balls near strong-smelling foods, as rice easily absorbs odors. For optimal texture, don’t add delicate garnishes like nori strips or green onions until just before serving, as these will soften or wilt in the refrigerator.
- Never freeze fully assembled salmon sushi balls, as the texture of the rice will deteriorate significantly upon thawing. However, you can freeze the cooked, seasoned salmon separately for up to one month in an airtight container, allowing you to prepare part of the recipe in advance.
“Here’s your guide to Sriracha honey salmon bowls for another delicious salmon preparation you can make ahead.”
How Far in Advance Can You Prepare Components?
Planning ahead makes preparing easy salmon sushi balls for gatherings much more manageable. Fortunately, several components can be prepared well in advance:
The cooked salmon can be prepared up to two days before assembly and stored in an airtight container in the refrigerator. You can even flake and season it a day ahead, which allows the flavors to develop more deeply. Sushi rice can be cooked and seasoned up to 24 hours in advance, though it’s best used within 12 hours. Store it covered in the refrigerator and bring to room temperature before using.
Garnishes and toppings can be prepared up to a day ahead: slice green onions and store in a damp paper towel, mix spicy mayo and store in a squeeze bottle, and prepare any other sauces in advance. Cut nori sheets into strips just before assembly to ensure crispness.
For the most efficient preparation, cook and season the rice and salmon the morning of your event, then form the balls within 1-2 hours of serving. This approach balances convenience with quality, ensuring your easy salmon sushi balls are at their best when served.
Refreshing Leftover Sushi Balls
- Leftover easy salmon sushi balls can be refreshed to regain much of their original texture and flavor. Start by removing them from the refrigerator about 20 minutes before serving to allow them to come closer to room temperature, which significantly improves their taste and texture. If the rice has hardened, lightly sprinkle each ball with a few drops of water and microwave on 50% power for 10-15 seconds—just enough to soften without cooking further.
- For sushi balls that have dried out slightly, try wrapping them individually in a damp paper towel and microwaving for 5-7 seconds. This gentle steam revives the rice without making it mushy. Alternatively, you can repurpose leftover sushi balls by breaking them apart and heating the mixture in a small pan with a bit of broth to create a quick salmon rice bowl.
- Another creative approach is to flatten leftover sushi balls and pan-fry them in a little oil until crispy on both sides, creating delicious salmon rice cakes that can be topped with a fresh garnish and sauce. Remember that leftover salmon sushi balls should be consumed within 24 hours of initial preparation for food safety reasons.
Delicious Variations of Salmon Sushi Balls
Spicy Salmon Sushi Ball Option
For those who enjoy a kick of heat, easy salmon sushi balls can be transformed into a spicy version that’s bursting with flavor. To create this variation, simply mix 1-2 tablespoons of sriracha or your favorite hot sauce with 3 tablespoons of mayonnaise until smooth. Then fold about two-thirds of this spicy mayo directly into your flaked salmon before combining it with the rice.
You can also add a teaspoon of togarashi (Japanese seven-spice blend) or a half teaspoon of cayenne pepper to the salmon mixture for an extra dimension of heat. For garnishing these spicy salmon sushi balls, top each one with a small dollop of the remaining spicy mayo and a sprinkle of toasted sesame seeds.
Consider adding finely diced cucumber to the rice mixture as well, as its cool crunchiness provides a wonderful contrast to the spicy flavors. For an additional layer of flavor complexity, mix a teaspoon of orange zest into your salmon mixture—the citrus notes beautifully complement the heat while enhancing the salmon’s natural richness.
Vegetarian and Vegan Alternatives
Easy salmon sushi balls can be adapted into delicious plant-based versions that maintain the essence of the original. For a vegetarian option, substitute the salmon with smashed avocado mixed with a dash of soy sauce, rice vinegar, and a sprinkle of sea salt. The creamy texture of avocado mimics the richness of salmon quite well.
For a more complex vegan alternative, try using crumbled tofu marinated in a mixture of 2 tablespoons soy sauce, 1 teaspoon liquid smoke, 1 tablespoon maple syrup, and a pinch of nori powder. Let the tofu absorb these flavors for at least 30 minutes before using in place of salmon. Another excellent vegan option involves using roasted and mashed carrots seasoned with rice vinegar, a touch of sugar, and soy sauce—the natural sweetness and color of carrots create a visually similar result to salmon.
Enhance either of these plant-based variations with ingredients like thinly sliced radish, microgreens, or pickled ginger for added texture and flavor complexity. Don’t forget that many commercial mayonnaises aren’t vegan, so use a plant-based alternative for any sauces if preparing a fully vegan version.
“Don’t miss our vegetable soup recipe for more delicious vegetarian options in your meal planning.”
Adding Complementary Ingredients
- Elevate your easy salmon sushi balls by incorporating complementary ingredients that enhance the core flavors. Consider folding in 1-2 tablespoons of tobiko or masago (flying fish roe) for delightful pops of saltiness and texture throughout the balls. A teaspoon of yuzu kosho (a Japanese condiment made from yuzu peel, chili peppers, and salt) adds a complex citrusy-spicy note that pairs beautifully with salmon.
- For added freshness and crunch, mix 2 tablespoons of finely diced cucumber or thinly sliced radish into your rice mixture. Small bits of mango or pineapple can introduce a surprising sweetness that complements the savory salmon wonderfully. Try incorporating a teaspoon of wasabi into the rice for an authentic sushi experience with a gentle heat that enhances the salmon’s flavor.
- For an interesting textural contrast, consider adding tempura crumbs to the exterior of your sushi balls or mixing in finely chopped pickled ginger for bright flavor accents. You might also experiment with different types of rice—brown sushi rice or a mixture of white rice and quinoa can add nutritional value and a nuttier flavor profile to your easy salmon sushi balls.
Serving Suggestions for Salmon Sushi Balls
Perfect Dipping Sauces and Accompaniments
Enhance your easy salmon sushi balls with these complementary dipping sauces and accompaniments. Start with a classic soy sauce mixture by combining 3 tablespoons of low-sodium soy sauce with 1 teaspoon of freshly grated ginger and a dash of rice vinegar. For a richer option, prepare a quick eel sauce by simmering 1/4 cup soy sauce, 1/4 cup mirin, and 2 tablespoons sugar until slightly thickened—this sweet and savory sauce pairs beautifully with salmon.
Wasabi-infused soy sauce offers a sinus-clearing kick; simply mix a small amount of wasabi paste into soy sauce to your desired spiciness level. A citrusy ponzu sauce brightens the rich salmon flavor wonderfully. For something creamy, serve with Japanese Kewpie mayonnaise mixed with a touch of rice vinegar and lemon zest.
Traditional accompaniments like pickled ginger (gari) provide a palate-cleansing effect between bites, while a small bowl of edamame sprinkled with sea salt makes a perfect starter alongside your sushi balls. Consider serving cucumber or daikon radish salad with a rice vinegar dressing for a refreshing contrast to the rich sushi balls.
“Want more ideas? Check out our miso salmon recipe for complementary flavor profiles that work well with these easy salmon sushi balls.”
Creating a Complete Japanese-Inspired Meal
Transform your easy salmon sushi balls into part of an impressive Japanese-inspired feast. Begin with a light miso soup garnished with tofu, green onions, and wakame seaweed as a warming appetizer that prepares the palate. Arrange your sushi balls on a beautiful platter as the centerpiece of your meal, perhaps alongside a few pieces of store-bought or homemade nigiri for variety.
Include a simple cucumber sunomono salad dressed with rice vinegar, sugar, and salt for a refreshing side dish. Add a small plate of vegetable tempura with tentsuyu dipping sauce for a delightful textural contrast to your meal. For a heartier accompaniment, consider serving a bowl of cold soba noodles with dipping sauce or a small portion of chicken teriyaki.
Complete your Japanese-inspired meal with a pot of good quality green tea, which cleanses the palate and aids digestion. For dessert, offer something light and traditional like mochi ice cream or fresh fruit with a touch of honey and sesame seeds. This thoughtfully composed meal showcases your easy salmon sushi balls while providing a well-rounded dining experience with balanced flavors and textures.
Presentation Ideas for Special Occasions
For special occasions, elevate your easy salmon sushi balls with these impressive presentation techniques. Create a sushi ball tower by carefully stacking them in a pyramid shape on a serving platter lined with banana leaves or shiso leaves for an elegant visual impact. Alternatively, arrange them in a circular pattern around a small bowl of dipping sauce, creating a beautiful “wreath” effect that invites guests to gather around.
For an interactive experience, set up a DIY sushi ball station where guests can add their own toppings and sauces to basic salmon sushi balls. Provide small bowls of various garnishes like tobiko, microgreens, sesame seeds, and sauce bottles with different options.
Consider serving individual portions on small plates or in decorative Asian soup spoons for an upscale presentation at seated dinners. Each spoon can hold one sushi ball topped with a unique garnish, creating a beautiful first course. For a stunning visual effect, place sushi balls on a bed of crushed ice with fresh herbs and edible flowers scattered around, perhaps with strategically placed battery-operated tea lights for a magical glow.
Remember that in Japanese cuisine, negative space is as important as the food itself—don’t overcrowd your serving vessels. A thoughtfully arranged plate with just a few perfectly formed easy salmon sushi balls can make a more sophisticated impression than a crowded platter.
Frequently Asked Questions About Salmon Sushi Balls
What type of rice should I use and how should it be seasoned for sushi balls?
Short-grain Japanese rice, often labeled as “sushi rice,” is essential for easy salmon sushi balls due to its sticky texture when cooked. After cooking, season it with a mixture of rice vinegar, sugar, and salt (about 2 tablespoons vinegar, 1 tablespoon sugar, and 1 teaspoon salt per 2 cups of cooked rice). Fold this seasoning in gently while the rice is still warm, then let it cool to room temperature before forming balls.
Should the salmon be raw or cooked for sushi balls and how to ensure safety?
For easy salmon sushi balls, cooked salmon is recommended for safety, especially for home cooks. Ensure your salmon reaches an internal temperature of 145°F (63°C). If you prefer using raw salmon, only use sushi-grade fish purchased from reputable sources that has been properly frozen to kill potential parasites according to FDA guidelines. Always keep raw fish refrigerated and use within a day of purchase.
What molds or tools can help shape sushi balls neatly?
While easy salmon sushi balls can be shaped by hand, several tools can help create uniform results. Ice cream scoops or cookie scoops work well for consistent sizing. Small ring molds or rice ball shapers (onigiri molds) can also be used. For a traditional method, try using plastic wrap: place a portion of the mixture in the center of plastic wrap, gather the edges, and twist to form a compact ball.
What toppings or sauces work best for salmon sushi balls?
Popular toppings for easy salmon sushi balls include thinly sliced green onions, sesame seeds, tobiko (flying fish roe), small pieces of nori, and microgreens. For sauces, spicy mayo (mayonnaise mixed with sriracha), unagi sauce (sweet soy glaze), ponzu sauce, or a simple mixture of soy sauce and wasabi complement the salmon flavors beautifully. A small amount of wasabi or a thin slice of avocado also makes an excellent topping.
How far ahead can I prepare them and how to store them for freshness?
Easy salmon sushi balls can be prepared up to 4 hours ahead and stored in the refrigerator. Place them in a single layer in an airtight container with a damp paper towel to maintain moisture. For best texture and flavor, add toppings just before serving. Leftover sushi balls can be refrigerated for up to 24 hours but may become firmer; bring them to room temperature before serving to restore their soft texture.
Can I make a vegetarian version and what could substitute the salmon?
Yes, easy salmon sushi balls can be made vegetarian by substituting the salmon with avocado mashed with a little lemon juice and salt. Other excellent alternatives include seasoned scrambled tofu with nori flakes, roasted and seasoned sweet potato, or cooked mushrooms sautéed with soy sauce and mirin. For added umami flavor in vegetarian versions, consider incorporating small amounts of miso paste or nutritional yeast into your rice mixture.
Conclusion: Mastering Easy Salmon Sushi Balls
Why Salmon Sushi Balls Will Become a Favorite
Easy salmon sushi balls are likely to become a staple in your recipe collection for several compelling reasons. First, their impressive visual appeal belies their simple preparation, making them perfect for both everyday meals and special occasions. They deliver the sophisticated flavors of traditional sushi without requiring specialized skills or equipment, democratizing Japanese cuisine for home cooks of all experience levels.
These versatile bites also offer excellent value, allowing you to create restaurant-quality appetizers at a fraction of the cost. The recipe’s flexibility means you can easily adapt it to suit dietary preferences and available ingredients. Perhaps most importantly, easy salmon sushi balls provide a fun, interactive cooking experience that can involve the whole family—children especially enjoy shaping the rice balls and adding creative toppings.
Their portable nature makes them perfect for packed lunches, picnics, or potlucks, while their elegant presentation ensures they’ll be the star of any appetizer spread. With their perfect balance of protein, carbohydrates, and healthy fats, these delightful morsels satisfy both nutritional needs and culinary desires, explaining why they quickly become a favorite for many home cooks.
“Learn more about cooking with seafood through our collection of simple yet impressive recipes.”
Building on Your Sushi-Making Skills
Mastering easy salmon sushi balls lays an excellent foundation for expanding your Japanese cooking repertoire. The techniques you’ve learned—properly seasoning sushi rice, balancing flavors, and creating visually appealing presentations—transfer directly to other sushi preparations. Once comfortable with these basics, you might progress to making temaki (hand rolls), where you wrap similar ingredients in cone-shaped nori sheets, or hosomaki (thin rolls), which require minimal rolling skills.
Your newfound confidence with Japanese ingredients opens doors to exploring related dishes like chirashi (scattered sushi bowls), which uses the same components but arranged in a bowl rather than formed into shapes. You might also experiment with different proteins or try incorporating various vinegars in your sushi rice preparation to develop your personal style.
Consider joining online sushi-making communities or taking a virtual class to further refine your techniques. The journey of mastering Japanese cuisine is ongoing, but begins with simple successes like these easy salmon sushi balls. Each time you prepare them, you’ll likely discover small improvements or variations that make them even more delicious—the mark of a truly engaged home chef continuing to develop their craft.
PrintEasy Salmon Sushi Balls

Delicious bite-sized sushi balls featuring seasoned sushi rice and flavorful salmon – no rolling required!
- Prep Time: 15
- Cook Time: 25
- Total Time: 40 minutes
- Yield: 15 1x
- Category: Appetizer
- Cuisine: Japanese
Ingredients
- 1/2 cup sushi rice (uncooked)
- 10 oz cooked salmon (pan-seared or baked)
- 1 tablespoon sesame oil
- 2 teaspoons rice vinegar
- 2 tablespoons soy sauce
Instructions
- Cook sushi rice according to package instructions and let cool slightly.
- Bake or pan-cook salmon until fully cooked, then cool to room temperature.
- In a mixing bowl, flake the salmon with a fork. Add the cooked rice, sesame oil, rice vinegar, and soy sauce.
- Mix until well combined, then form into bite-sized balls using your hands or a small scoop.
- Garnish with teriyaki sauce, mayonnaise, seaweed strips, and sliced green onion.
Notes
Nutrition facts are estimates and may vary based on ingredients used, portion sizes, and preparation methods.
Nutrition
- Serving Size: 15
- Calories: 78Kcal
- Sugar: 0.5g
- Sodium: 186mg
- Fat: 3.5g
- Saturated Fat: 0.6g
- Carbohydrates: 6.2g
- Fiber: 0.2g
- Protein: 6.8g
- Cholesterol: 18mg
Keywords: salmon sushi, sushi balls, easy sushi, Japanese appetizers, no-roll sushi, salmon rice balls
Let’s connect! Follow me for more Joylicious Recipes: Facebook, Instagram, Pinterest