Creamy Biscoff Cookie Butter Homemade Ice Cream: A Decadent Frozen Treat
Why This Dessert Will Win Your Heart
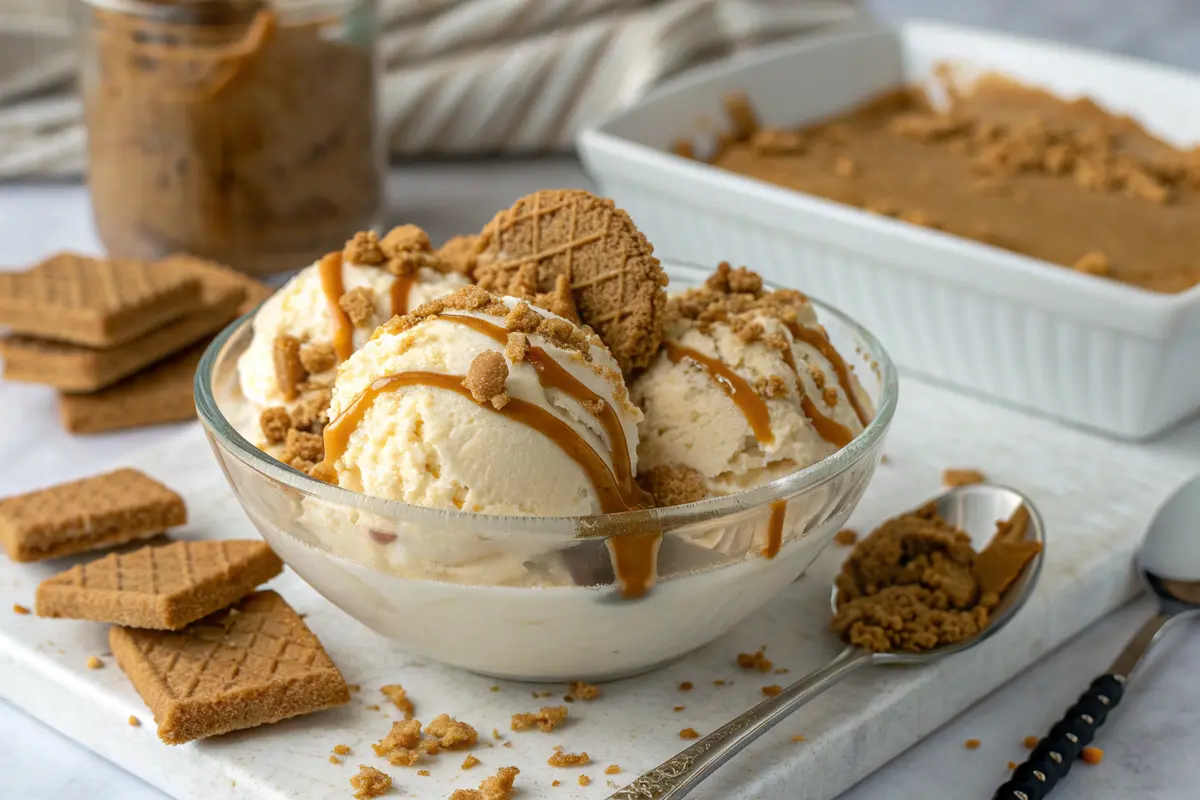
Biscoff cookie butter homemade ice cream transforms the beloved spiced cookie spread into a luxuriously smooth frozen dessert that’s impossible to resist. The rich, caramelized notes of Biscoff cookies blend perfectly with the velvety custard base, creating a dessert that’s both nostalgic and sophisticated. Each spoonful delivers that distinctive cinnamon-spice flavor that Biscoff lovers crave, enveloped in a creamy texture that melts perfectly on your tongue. “The mini ice cream cones make an adorable serving vessel for this homemade treat, perfect for portion control while still satisfying your sweet tooth.”
This homemade frozen delight is perfect for summer gatherings, special occasions, or simply as a rewarding treat after a long day. Serve it in sugar cones for the kids, in elegant dessert bowls for dinner parties, or sandwiched between two Biscoff cookies for an extraordinary ice cream sandwich experience. The possibilities are endless with this versatile dessert that brings the beloved cookie butter flavor into frozen form.
Essential Components for Cookie Butter Frozen Bliss
Base Ingredients You’ll Need
The foundation of great biscoff ice cream begins with quality ingredients. Here’s everything you’ll need to create this spectacular homemade treat:
| Ingredient | Amount | Notes |
|---|---|---|
| Biscoff cookie butter | 1 cup | Creamy variety works best |
| Heavy cream | 2 cups | For richness and proper freezing |
| Whole milk | 1 cup | Provides balanced creaminess |
| Granulated sugar | 1/2 cup | Sweetens and improves texture |
| Egg yolks | 4 large | Creates custard base and richness |
| Salt | Pinch | Enhances all flavors |
| Vanilla extract | 1 teaspoon | Complements the cookie butter |
| Biscoff cookies | 8-10 cookies | Crushed for mix-ins (optional) |
| Caramel sauce | 1/4 cup | For swirling (optional) |
| Brown sugar | 2 tablespoons | Deepens caramel notes (optional) |
| Cinnamon | 1/4 teaspoon | Enhances the Biscoff flavor (optional) |
| Sea salt flakes | 1/4 teaspoon | For salted cookie butter variation (optional) |
“The chicken noodle casserole makes a hearty main course that contrasts beautifully with this sweet, indulgent dessert for a complete meal that satisfies all your comfort food cravings.”
Creating Your Biscoff Dream: Complete Preparation Guide
Mastering the Custard Base
Follow these detailed steps to create the perfect biscoff cookie butter homemade ice cream from scratch. The key to success is patience and attention to detail during the custard-making process.
- In a medium saucepan, combine 1 cup whole milk, 2 cups heavy cream, 1/4 cup granulated sugar, and a pinch of salt. Heat over medium heat, stirring occasionally, until the mixture begins to simmer around the edges (about 5-7 minutes). Do not let it boil.
- While the milk mixture heats, place 4 egg yolks in a medium bowl and add the remaining 1/4 cup sugar. Whisk vigorously until the mixture becomes pale yellow and slightly thickened, about 2-3 minutes. The sugar should be mostly dissolved and the mixture will fall from the whisk in ribbons.
- Once the milk mixture is simmering, carefully ladle about 1 cup of the hot liquid into the egg yolk mixture, whisking constantly. This tempers the eggs, gradually raising their temperature without scrambling them. Continue adding hot liquid in 1/2 cup increments while whisking until you’ve added about half of the hot liquid.
- Pour the tempered egg mixture back into the saucepan with the remaining milk mixture, whisking continuously as you add it. Return to medium-low heat and cook, stirring constantly with a wooden spoon or heat-resistant spatula, making sure to scrape the bottom and sides of the pan.
- Continue cooking the custard until it thickens enough to coat the back of a spoon, about 3-5 minutes. The ideal temperature is 170-175°F if you have a kitchen thermometer. To check without a thermometer, run your finger through the custard coating the back of the spoon – if it leaves a clear path that doesn’t immediately fill in, it’s ready.
- Remove the saucepan from heat immediately and add 1 cup of Biscoff cookie butter and 1 teaspoon vanilla extract. Whisk vigorously until the cookie butter is completely melted and the mixture is smooth and homogeneous. If you encounter any lumps, strain the mixture through a fine-mesh sieve.
- Transfer the custard to a large bowl. For faster cooling, place this bowl inside a larger bowl filled with ice water, creating an ice bath. Stir occasionally until the mixture cools to room temperature, about 15-20 minutes.
- Cover the cooled custard with plastic wrap, pressing it directly onto the surface to prevent a skin from forming. Refrigerate for at least 4 hours, preferably overnight. The colder the custard, the better your ice cream will turn out.
- When the custard is thoroughly chilled, pour it into your ice cream maker and churn according to the manufacturer’s instructions, usually 20-25 minutes or until the consistency resembles soft-serve ice cream. In the last minute of churning, add any optional mix-ins like crushed Biscoff cookies.
- Transfer the churned ice cream to an airtight container. For a swirl effect, layer the ice cream with drizzles of caramel sauce or additional melted cookie butter. Cover with parchment paper pressed directly onto the surface, then seal with a lid.
- Freeze for at least 4 hours, preferably overnight, until firm. For the best texture and flavor, let the ice cream sit at room temperature for 5-10 minutes before serving.
“The seafood chowder provides a savory starting point for a meal that concludes with this sweet, indulgent Biscoff ice cream for perfect flavor balance.”
Expert Insights for Cookie Butter Ice Cream Success
Troubleshooting Common Issues
Elevate your biscoff cookie butter homemade ice cream with these professional tips that will ensure perfect results every time:
- Chill thoroughly: Ensure your custard base is completely cold before churning. Warm custard won’t freeze properly and can damage some ice cream makers.
- Prevent ice crystals: Store your ice cream in a shallow container rather than a deep one. The faster it freezes, the smaller the ice crystals will be, resulting in smoother ice cream.
- Enhance the flavor: For an even more intense Biscoff flavor, add 1-2 tablespoons of crushed Biscoff cookies to the custard before chilling.
- Perfect swirls: If adding cookie butter swirls, warm the additional cookie butter slightly so it’s easier to swirl but not so warm that it melts the ice cream.
- Texture boost: Adding a tablespoon of vodka or bourbon to the custard can lower the freezing point, resulting in a softer, more scoopable ice cream straight from the freezer. The alcohol flavor won’t be noticeable.
- No ice cream maker? Pour the chilled custard into a shallow freezer-safe container. Freeze for 45 minutes, then vigorously whisk to break up ice crystals. Repeat this process every 30 minutes for about 3-4 hours until frozen.
- Creamier result: For an ultra-creamy texture, replace 2 tablespoons of the granulated sugar with corn syrup or honey, which helps prevent large ice crystals from forming.
“The garlic parmesan grilled chicken offers a savory dinner option that sets up the perfect contrast when followed by this sweet, decadent Biscoff ice cream dessert.”
Keeping Your Cookie Butter Creation Fresh
Maintaining Maximum Flavor and Texture
Proper storage is crucial for preserving the exceptional texture and flavor of your biscoff ice cream. Follow these guidelines to maintain its quality:
For immediate enjoyment, homemade biscoff cookie butter ice cream will maintain optimal flavor and texture for up to two weeks when properly stored in the freezer. Keep it in an airtight container with a layer of plastic wrap or parchment paper pressed directly onto the surface of the ice cream before securing the lid. This helps prevent freezer burn and ice crystal formation by minimizing exposure to air.
For longer-term storage, you can keep the ice cream for up to one month, though the texture may gradually become icier as time passes. If you notice ice crystals forming on the surface, you can revitalize the texture by letting it soften slightly, then beating it with an electric mixer and refreezing.
If you plan to serve your cookie butter ice cream at a party, you can pre-scoop it up to 24 hours in advance. Place the individual scoops on a parchment-lined baking sheet and freeze until solid, then transfer to a freezer-safe container. This makes serving quick and easy when guests arrive.
For the best flavor experience, remove your biscoff ice cream from the freezer about 5-10 minutes before serving. This short rest at room temperature allows the ice cream to soften slightly, releasing more flavor and achieving that perfect creamy consistency that showcases the rich cookie butter flavor.
Delicious Twists on the Classic Biscoff Frozen Delight
Creative Flavor Combinations
While the classic biscoff cookie butter homemade ice cream is already divine, these variations offer exciting ways to customize your frozen treat:
Chocolate Swirl Biscoff Ice Cream: Before the final freeze, swirl in 1/4 cup of melted dark or milk chocolate. The combination of chocolate and cookie butter creates a flavor profile reminiscent of chocolate-dipped Biscoff cookies. The contrast between the rich chocolate and the spiced cookie butter creates an irresistible flavor combination.
Salted Caramel Biscoff Ice Cream: Add a caramel ribbon by layering homemade or store-bought salted caramel sauce between scoops of ice cream before the final freeze. The salt enhances the caramelized notes in the cookie butter while adding complexity to the overall flavor profile.
Biscoff Cookie Chunk Ice Cream: Fold in 1 cup of roughly chopped Biscoff cookies during the last minute of churning for added texture and concentrated pockets of spiced cookie flavor. The contrast between the smooth ice cream and the crunchy cookie pieces creates a delightful textural experience.
Cinnamon Biscoff Ice Cream: Add 1/2 teaspoon of ground cinnamon to the custard base to amplify the spiced notes naturally present in the cookie butter. This variation highlights the warming spices that make Biscoff cookies so beloved, creating a cozy, comforting dessert experience.
White Chocolate Biscoff Ice Cream: Incorporate 4 ounces of melted white chocolate into the custard base before chilling. The creamy sweetness of white chocolate complements the slightly caramelized, spiced notes of the cookie butter, resulting in a sophisticated flavor profile.
Banana Biscoff Ice Cream: Fold 1 cup of caramelized banana pieces into the churned ice cream. The natural sweetness and soft texture of caramelized bananas pair beautifully with the spiced cookie butter, creating a dessert reminiscent of banana bread with cookie spread.
Elegant Presentation Ideas for Your Cookie Butter Masterpiece
From Casual Treats to Impressive Desserts
Elevate your biscoff cookie butter ice cream with these creative serving suggestions that will impress family and friends:
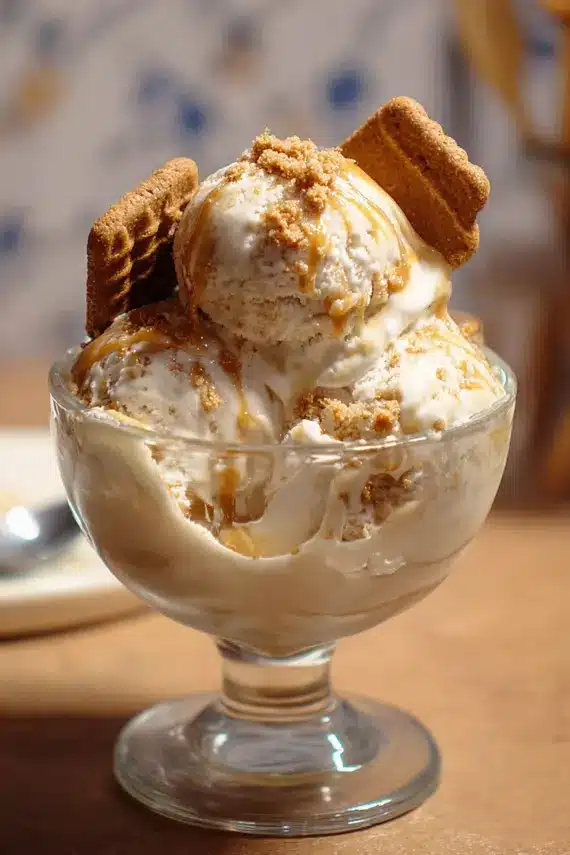
Create a decadent sundae by scooping your homemade biscoff ice cream into elegant dessert bowls and topping with warm cookie butter sauce (simply microwave cookie butter with a splash of cream), crushed Biscoff cookies, and a dollop of freshly whipped cream. This presentation transforms a simple ice cream into a restaurant-worthy dessert.
For a fun family dessert night, set up a biscoff ice cream sandwich station with freshly baked cookies. Sugar cookies, chocolate chip cookies, or additional Biscoff cookies all pair beautifully with this ice cream. Allow everyone to create their own custom ice cream sandwich by placing a scoop between two cookies and rolling the edges in sprinkles, mini chocolate chips, or crushed nuts.
A light apple salad with pecans makes a refreshing contrast when served before this rich, indulgent dessert, balancing the meal perfectly.
Turn your biscoff ice cream into elegant individual desserts by layering it in small glass jars with alternating layers of crushed cookies, caramel sauce, and whipped cream to create biscoff ice cream parfaits. These can be assembled ahead of time and stored in the freezer until ready to serve, making them perfect for dinner parties.
For a special occasion, create a biscoff ice cream cake by layering slightly softened ice cream with thin layers of cookie crumbs in a springform pan. Freeze thoroughly between layers, then finish with a cookie butter glaze made from melted cookie butter mixed with a little coconut oil. This impressive dessert serves a crowd and can be made days ahead.
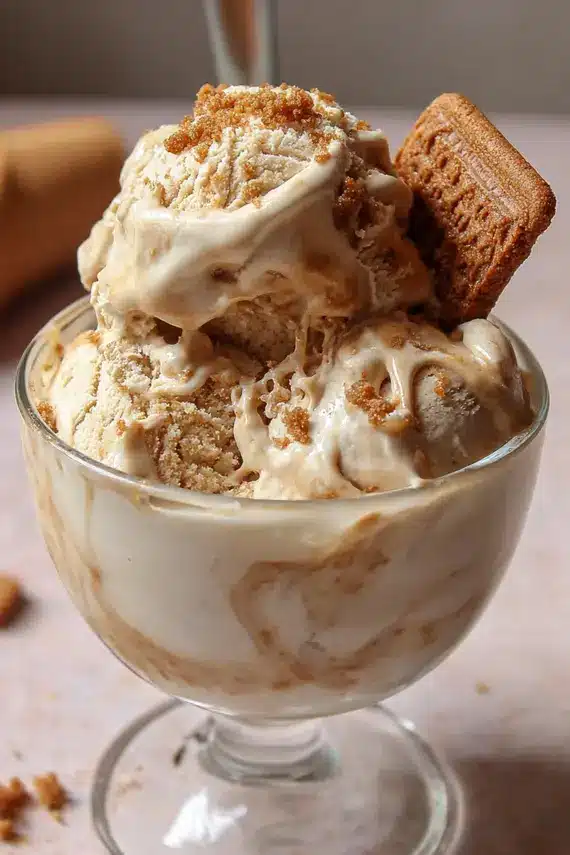
For a quick weeknight treat, simply scoop the ice cream into bowls and dust with a sprinkle of cinnamon or cocoa powder. Sometimes the simplest presentation allows the exceptional flavor of homemade biscoff cookie butter ice cream to truly shine.
Common Questions About Biscoff Ice Cream Creation
Troubleshooting Your Homemade Frozen Dessert
Can I make this biscoff cookie butter homemade ice cream without an ice cream maker?
Yes, you can make this without a specialized machine. After preparing and chilling your custard base, pour it into a freezer-safe container and freeze for about 45 minutes. Remove and vigorously whisk to break up any ice crystals, then return to the freezer. Repeat this process every 30 minutes for about 3-4 hours. Alternatively, you can use a food processor or stand mixer to beat the partially frozen mixture. While the texture may not be identical to machine-churned ice cream, it will still be delicious.
What can I substitute for cookie butter if I can’t find it?
If Biscoff cookie butter is unavailable, you have several options. Any brand of speculoos cookie spread will work perfectly. You could also substitute peanut butter, almond butter, or Nutella, though these will yield a different flavor profile. For a DIY approach, blend 8 ounces of Biscoff cookies with 2 tablespoons of brown sugar, 1/4 cup of oil, and 2 tablespoons of water in a food processor until smooth.
Why did my ice cream develop ice crystals after a few days?
Ice crystal formation typically happens when ice cream is exposed to temperature fluctuations or air. To prevent this, store your ice cream in a shallow airtight container with plastic wrap pressed directly onto the surface before putting the lid on. Avoid keeping ice cream in the freezer door where temperatures fluctuate most. If your ice cream does develop crystals, let it soften slightly, then beat with an electric mixer and refreeze for improved texture.
Your Next Favorite Homemade Frozen Treat Awaits
The Perfect Project for Ice Cream Lovers
Biscoff cookie butter homemade ice cream represents the perfect marriage of convenience and luxury – a dessert that tastes like it came from a premium ice cream shop but can be created right in your own kitchen. The distinctive caramelized spice flavor of Biscoff cookies transformed into a smooth, creamy frozen dessert creates an unforgettable treat that will quickly become a family favorite.
The beauty of making this ice cream at home lies in the ability to control exactly what goes into it. No artificial preservatives or additives – just pure, simple ingredients coming together to create something magical. You’ll taste the difference in every spoonful, from the rich custard base to the warm, spiced notes of the cookie butter.
“The buffalo chicken casserole provides a spicy, satisfying dinner option that pairs wonderfully with this sweet, creamy dessert for a complete meal that hits all the flavor notes.”
Whether you’re making this as a special treat for yourself, serving it at a summer gathering, or gifting a batch to a friend, this biscoff ice cream is sure to impress. So gather your ingredients, embrace the joy of homemade ice cream making, and prepare to indulge in one of the most delicious frozen desserts you’ll ever taste. Your ice cream journey begins now – and what a sweet journey it will be!
“If you’re looking for more easy dessert options that will impress your family, the easy salsa chicken crock pot recipe frees up your time to focus on creating this spectacular biscoff cookie butter homemade ice cream for dessert.”
Biscoff Cookie Butter Homemade Ice Cream

- Indulge in the rich caramelized flavors of Biscoff cookies transformed into a luxuriously smooth frozen dessert.
- This homemade ice cream perfectly captures the distinctive cinnamon-spice notes of cookie butter in every creamy spoonful.
- Easily customizable with mix-ins and swirls for your ultimate cookie butter dessert experience.
- Prep Time: 30
- Cook Time: 15
- Total Time: 45 minutes
- Yield: 1 quart (about 8 servings) 1x
- Category: Dessert
- Method: Churning
- Cuisine: European-Inspired
Ingredients
- 1 cup Biscoff cookie butter (creamy variety)
- 2 cups heavy cream
- 1 cup whole milk
- 1/2 cup granulated sugar
- 4 large egg yolks
- Pinch of salt
- 1 teaspoon vanilla extract
- 8–10 Biscoff cookies, crushed (optional, for mix-ins)
- 1/4 cup caramel sauce (optional, for swirling)
- 2 tablespoons brown sugar (optional)
- 1/4 teaspoon ground cinnamon (optional)
Instructions
- In a medium saucepan, combine milk, cream, half the sugar, and salt. Heat over medium heat until simmering around the edges (5-7 minutes). Do not boil.
- In a medium bowl, whisk egg yolks with remaining sugar until pale yellow and slightly thickened (2-3 minutes).
- Carefully ladle about 1 cup of the hot milk mixture into the egg mixture, whisking constantly to temper the eggs. Continue adding hot liquid in 1/2 cup increments while whisking.
- Pour the tempered egg mixture back into the saucepan with the remaining milk mixture, whisking continuously.
- Cook over medium-low heat, stirring constantly, until the custard thickens enough to coat the back of a spoon (3-5 minutes).
- Remove from heat and whisk in the Biscoff cookie butter and vanilla until completely smooth.
- Transfer custard to a large bowl and cool to room temperature, then cover with plastic wrap pressed directly onto the surface.
- Refrigerate for at least 4 hours, preferably overnight.
- Pour chilled custard into your ice cream maker and churn according to manufacturer’s instructions (usually 20-25 minutes).
- In the last minute of churning, add any optional mix-ins like crushed Biscoff cookies.
- Transfer to an airtight container, adding swirls of additional ingredients if desired.
- Freeze for at least 4 hours or until firm. Let sit at room temperature for 5-10 minutes before serving.
Notes
- For the best texture, ensure your custard base is completely chilled before churning.
- If you don’t have an ice cream maker, pour the chilled custard into a shallow container and freeze for 45 minutes, then vigorously whisk. Repeat every 30 minutes for 3-4 hours.
- Store with plastic wrap pressed directly on the surface to prevent ice crystals.
- Nutrition facts are estimates and may vary based on ingredients used, portion sizes, and preparation methods.
Nutrition
- Serving Size: 1/2 cup
- Calories: 385
- Sugar: 28
- Sodium: 185
- Fat: 28
- Saturated Fat: 16
- Unsaturated Fat: 10
- Carbohydrates: 32
- Fiber: 1
- Protein: 5
- Cholesterol: 165
Keywords: biscoff cookie butter homemade ice cream, biscoff ice cream, cookie butter ice cream, homemade ice cream recipe, biscoff dessert ideas
Let’s connect! Follow me for more Joylicious Recipes: Facebook, Instagram, Pinterest