Make These Easy Cookie Dough Bites – Safe to Eat Raw!
Cookie dough bites are one of the most loved sweet treats today. These chewy, no-bake snacks are quick to make and safe to enjoy. You don’t need an oven or eggs—just a few pantry ingredients and ten minutes.
In the past, eating raw dough was risky because of uncooked flour and eggs. But now, edible cookie dough is everywhere—from candy boxes to ice cream pints. Cookie dough bites offer that same rich, doughy flavor—without the health risks.
In this guide, you’ll learn how to make your own cookie dough bites step-by-step. We’ll explore popular versions like Ben & Jerry’s and give you smart variations to try at home. You’ll also find out why they taste so good and what to do if they make you feel sick.
Don’t miss our Chocolate Chip Cookie Dough Brownie Bombs if you’re craving a next-level dessert twist.
Let’s get started.
What Are Cookie Dough Bites?
The Rise of Edible Cookie Dough in the USA
Cookie dough bites are more than just a trend—they’re a safer twist on an old favorite. Back then, eating raw cookie dough wasn’t exactly safe. It often contained eggs and untreated flour, which could carry harmful bacteria. However, that never stopped cookie lovers from sneaking a bite.
As a result, edible cookie dough surged in popularity. Now, you can find it in cafés, freezer aisles, and even vending machines. Cookie dough bites evolved from that idea. Unlike traditional dough, they are designed to eat straight from the container—no baking required.
Difference Between Regular Dough and Cookie Dough Bites
So, what exactly makes cookie dough bites different? While regular cookie dough requires baking, these bites skip that step entirely. More importantly, they don’t include raw eggs. Instead, they rely on heat-treated flour and shelf-stable ingredients.
Here’s why cookie dough bites stand out:
- First, they are safe to eat raw.
- Second, they have a softer, smoother texture.
- Third, they’re stored cold, which makes them perfect for grab-and-go snacking.
Additionally, traditional dough becomes crisp when baked. In contrast, these bites stay chewy and soft—just the way cookie dough fans love them.
Are Cookie Dough Bites Safe to Eat Raw?
Absolutely—if made the right way. For example, you must heat the flour to kill bacteria like E. coli. You also need to skip raw eggs entirely. This simple method ensures each bite is safe and satisfying.
Because of these precautions, you can enjoy cookie dough bites with peace of mind. Not only are they delicious, but they also remove the risks that come with eating raw dough.
Don’t miss our Easy Crumbl Sugar Cookie Recipe if you’re craving more creative dessert ideas.
Cookie Dough Bites Ingredients and Substitutes
Classic Ingredients for Cookie Dough Bites
To make irresistible cookie dough bites, you only need a few basic ingredients. Most are already in your pantry. These ingredients work together to deliver the perfect creamy texture and sweet flavor.
Here’s what you’ll need for the original recipe:
| Ingredient | Measurement |
|---|---|
| Flour (gluten-free 1:1 or all-purpose) | 1 cup |
| Unsalted butter, room temperature | ½ cup |
| Light brown sugar, tightly packed | ½ cup |
| Granulated sugar | 2 tbsp |
| Milk | 1 tbsp |
| Vanilla extract | ½ tsp |
| Sea salt | Pinch |
| Mini chocolate chips | ⅓ cup |
Each ingredient plays an important role. For instance, the brown sugar adds moisture and a deep, rich sweetness. The granulated sugar balances texture. Butter binds the dough and makes it smooth. Meanwhile, vanilla enhances flavor, and chocolate chips add that signature crunch.
Before mixing, heat-treat the flour in the oven at 350°F for 5–7 minutes. This step kills any harmful bacteria, making the dough completely safe to eat.
Check out our Mini Lemon Cheesecakes for another no-bake dessert idea that’s just as quick and delicious.
Substitute Options for Gluten-Free and Dairy-Free Diets
Want to make cookie dough bites healthier or allergy-friendly? Luckily, this recipe adapts well. Below are common substitutions that keep the flavor and texture on point.
Gluten-Free Options:
- Swap regular flour with 1-to-1 gluten-free flour. This keeps the texture close to the original.
Dairy-Free Substitutes:
- Use vegan butter or coconut oil in place of dairy butter.
- Replace milk with almond milk, oat milk, or another non-dairy option.
- Opt for dairy-free chocolate chips to make the recipe completely vegan.
Other Natural Sweeteners:
- Coconut sugar works well in place of brown sugar.
- Maple syrup can replace granulated sugar but may slightly soften the texture.
Flavor Twists:
- Add cinnamon or nutmeg for a cozy feel.
- Mix in peanut butter, sprinkles, or chopped nuts to get creative.
Because cookie dough bites don’t rely on baking, you have flexibility. So feel free to experiment with flavors and textures without worrying about structure.
How to Make Cookie Dough Bites (Step-by-Step Recipe)
Step 1: Heat-Treat the Flour
Start by making the flour safe to eat. Raw flour may carry bacteria like E. coli, so this step is essential.
To heat-treat:
- Preheat your oven to 350°F (175°C).
- Spread 1 cup of flour evenly on a parchment-lined baking pan.
- Bake for 5–7 minutes, stirring once halfway through.
- Let it cool completely before mixing.
With the flour now safe, you can start making the dough.
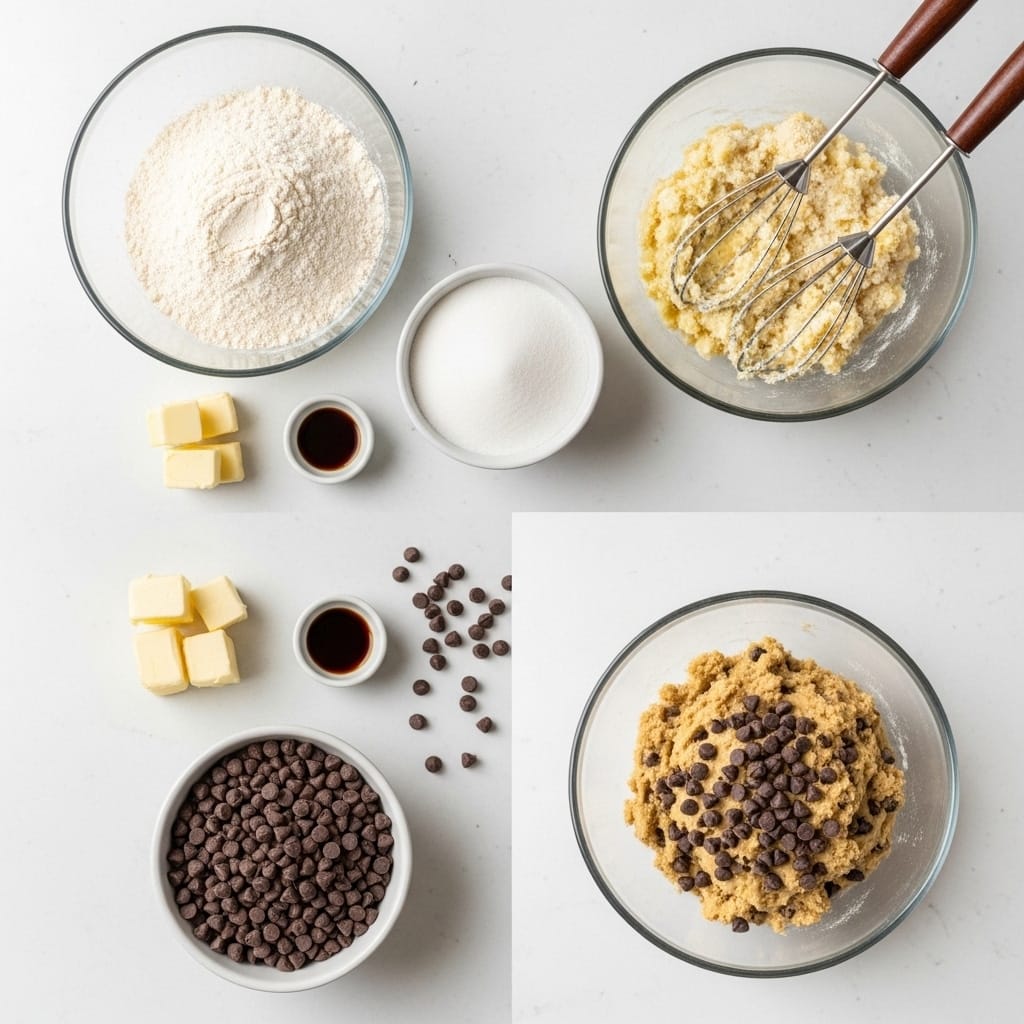
Step 2: Cream Butter and Sugars
In a large bowl or stand mixer, combine:
- ½ cup room-temperature butter
- ½ cup tightly packed brown sugar
- 2 tbsp granulated sugar
Beat the mixture for about 2 minutes. The goal is a smooth, creamy mixture without any lumps of butter.
This creaming step helps give the bites their soft, rich consistency.
Step 3: Mix in Dry and Wet Ingredients
Next, add the following to your butter-sugar mixture:
- The cooled, heat-treated flour
- 1 tbsp milk
- ½ tsp vanilla extract
- A pinch of sea salt
Mix everything until fully combined. If the dough seems dry, add an extra splash of milk. Once smooth, it’s time for the chocolate.
Step 4: Add the Chocolate Chips
Now fold in:
- ⅓ cup mini chocolate chips
Make sure they’re evenly distributed. At this point, your cookie dough bites are ready to shape and chill.
Don’t miss our Mini Pineapple Upside Down Cheesecakes if you love sweet no-bake treats.
Step 5: Roll and Chill
Using your hands or a small cookie scoop, roll the dough into bite-sized balls. Place them on a lined tray or plate.
You can:
- Serve immediately for a soft texture
- Or refrigerate for 20 minutes for a firmer bite
Keep any leftovers in an airtight container and refrigerate for up to 7 days. You can also freeze them for longer shelf life—just thaw before enjoying.
Ben and Jerry’s Cookie Dough Bites Breakdown
What’s Inside the Famous Ben & Jerry’s Bites?
If you’ve ever scooped into a pint of Ben & Jerry’s ice cream, you’ve likely stumbled upon their signature chunks—those irresistible cookie dough bites. These doughy pieces are more than just mix-ins; they’re the stars of some of Ben & Jerry’s most iconic flavors.
So, what exactly goes into them?
Ben & Jerry’s cookie dough bites usually include:
- Heat-treated flour for safety
- Brown sugar and cane sugar for sweetness
- Butter for richness
- Pasteurized eggs (in some versions)
- Vanilla extract for flavor
- Chocolate chips
- Salt to balance the sweetness
Unlike homemade recipes, commercial dough bites often contain a few extra ingredients—such as natural stabilizers or emulsifiers. These additions help preserve texture and consistency during freezing and shipping. However, the essential flavor and mouthfeel remain deeply nostalgic and comforting.
Because of this balance of soft texture, rich taste, and cold contrast, every bite feels like a flashback to licking the spoon as a kid.
Looking for inspiration? Try our Chocolate Chip Cookie Dough Brownie Bombs for another bold way to enjoy raw dough in a decadent form.
DIY Ben & Jerry’s Style Cookie Dough Bites
Craving that same frozen-cookie-dough experience at home? Luckily, you don’t need fancy equipment to make it happen. You just need the right steps.
First, follow the base recipe in Part 3 using heat-treated flour and mini chocolate chips. Then, roll the dough into small, marble-sized balls. For best results, freeze them for 30 minutes.
After that, fold the bites into your favorite vanilla or chocolate ice cream. Make sure the ice cream is slightly softened so the dough blends in easily. Once mixed, return the batch to the freezer until it firms back up.
In contrast to larger dough balls, smaller frozen chunks give you that authentic pint-like feel. Even better, homemade versions allow you to tweak sweetness, texture, and mix-ins to your liking.
For example, add peanut butter chips or sprinkles for a playful spin. Or go classic with extra vanilla and salt for that unmistakable Ben & Jerry’s vibe.
Don’t miss our Cinnamon Swirl Pancakes with Cream Cheese Glaze if you love soft, rich treats with a hint of nostalgia.

Why Cookie Dough Bites Are So Addictive
Flavor, Texture, and Sweet Satisfaction
There’s something undeniably magical about cookie dough bites. They’re not just sweet—they’re crave-worthy. So, what exactly makes them so addictive?
First, it’s the texture. Cookie dough bites offer a soft, melt-in-your-mouth experience. Unlike baked cookies, which have a crunchy or chewy finish, these bites stay creamy and doughy all the way through. That smooth consistency keeps you coming back for more.
Second, the flavor balance is spot on. The brown sugar gives a deep, molasses-like richness. Meanwhile, the vanilla adds warmth, and the mini chocolate chips bring in just the right amount of crunch. Together, it’s the perfect sweet-salty combo.
Additionally, they’re naturally portioned, which makes them easy to snack on without thinking. One bite turns into two, and suddenly, the container is halfway empty.
Because of that, cookie dough bites hit all the sensory marks—sweetness, smoothness, and instant satisfaction.
Check out our Healthy Breakfast Cookies if you want a chewy, nutrient-packed snack that satisfies cravings in a healthier way.
Nostalgia Factor and Snackability
Beyond flavor and texture, cookie dough bites tap into something deeper—nostalgia. A lot of us grew up sneaking spoonfuls of raw cookie dough straight from the mixing bowl. These bites offer that same feeling, but in a safer, bite-sized form.
Moreover, their compact size makes them super snackable. You can grab one or two between meetings, during a movie, or as a midnight snack. Because they don’t need baking, they feel casual and effortless—yet indulgent.
In addition, they fit into all sorts of treats. You can blend them into milkshakes, sprinkle them over ice cream, or dip them in chocolate for an extra layer of richness. The possibilities are endless, which makes them even more addictive.
Looking for inspiration? Try our Easy Crumbl Sugar Cookie Recipe if you enjoy desserts with a doughy, buttery base.
Health & Safety Tips for Eating Cookie Dough
Why You Might Feel Sick After Eating Edible Dough
Even though cookie dough bites are made to be safe, some people still feel uneasy after eating them. So what’s going on?
In most cases, it’s not about food poisoning. Instead, it’s about your body’s reaction to rich ingredients. These bites are full of butter, sugar, and flour. If you eat a lot at once—or on an empty stomach—your digestive system may not be thrilled.
For example, the high fat content can slow digestion. That heavy feeling afterward? It’s usually your stomach working overtime. If you’re sensitive to dairy or gluten, the symptoms may feel more intense.
Additionally, some store-bought versions include preservatives or artificial flavors. These can upset your stomach, especially if you’re not used to processed snacks.
To avoid discomfort:
- Eat smaller portions.
- Drink water afterward.
- Choose homemade bites with simple, clean ingredients.
Looking for a cleaner option? Try our Mini Lemon Cheesecakes for a lighter, refreshing dessert.
How to Avoid Digestive Discomfort from Cookie Dough Bites
Luckily, you can enjoy cookie dough bites without side effects by following a few simple tips. It starts with ingredients and moderation.
First, use heat-treated flour and skip raw eggs. That removes the major health risks right away. Always bake your flour at 350°F for 5–7 minutes before mixing it into the dough.
Next, pay attention to your mix-ins. Mini chocolate chips are usually safe, but avoid additives like food dyes or artificial sweeteners if you have a sensitive stomach.
Also, don’t overeat. Even though they’re small, cookie dough bites are calorie-dense. Stick to a few at a time and savor the flavor.
In addition, consider using dairy-free or gluten-free substitutes if you’re prone to bloating or cramping. These adjustments can make your bites easier to digest without sacrificing taste.
Don’t miss our Cinnamon Swirl Pancakes with Cream Cheese Glaze for another satisfying but rich treat—enjoyed best in moderation.
Storage Tips and Shelf Life
Refrigeration and Freezing Instructions
Once your cookie dough bites are rolled and ready, proper storage is key to keeping them fresh and safe. Fortunately, it’s simple to store them the right way.
First, let them chill in the fridge for at least 20–30 minutes before serving. This step firms up the texture, making them easier to handle and even more satisfying to bite into.
To store them long-term:
- Place the bites in an airtight container.
- Store them in the fridge and enjoy within 7 days.
- For longer storage, freeze them for up to 2 months.
Make sure to label your container with the date so you know how long they’ve been stored. If you’re freezing them, separate layers with parchment paper. This prevents sticking and makes it easier to grab just one or two.
For best results, thaw frozen bites in the fridge overnight before serving. You can also let them sit at room temperature for 10 minutes if you’re in a hurry.
Check out our Mini Pineapple Upside Down Cheesecakes for another freezer-friendly dessert you can make ahead.
How Long Do Cookie Dough Bites Last?
The shelf life of your cookie dough bites depends on how you store them. Here’s a quick breakdown:
| Storage Method | Shelf Life |
|---|---|
| Room Temperature | Not recommended |
| Refrigerator (sealed) | Up to 7 days |
| Freezer (sealed) | Up to 2 months |
Always look for signs of spoilage—such as sour smells, changes in color, or a slimy texture. If anything seems off, it’s better to toss them and make a fresh batch.
In addition, avoid leaving them out at room temperature for long. Since they contain butter and milk, unrefrigerated bites can spoil quickly.
Because of that, your safest bet is to keep them chilled and only take out what you plan to eat. That way, you enjoy every bite while keeping things food-safe.
Fun Variations & Flavor Ideas
Peanut Butter, S’mores, and More Creative Combos
One of the best things about cookie dough bites is how easy they are to customize. You can start with the basic recipe, then let your imagination take over. With just a few tweaks, you’ll end up with a flavor that fits any mood or season.
Peanut Butter Cookie Dough Bites:
- Swap half the butter with creamy peanut butter.
- Add chopped peanuts for crunch.
- Drizzle with melted chocolate for extra indulgence.
S’mores Style:
- Mix in mini marshmallows, graham cracker crumbs, and chocolate chips.
- Freeze the bites and enjoy them cold for a cool campfire twist.
Birthday Cake Bites:
- Use white chocolate chips instead of semi-sweet.
- Add a splash of almond extract.
- Stir in colorful sprinkles for a fun, party-ready treat.
For example, if you’re making these for a holiday party, add peppermint extract and crushed candy canes. Or go fall-themed with cinnamon and pumpkin spice.
Don’t miss our Easy Crumbl Sugar Cookie Recipe for another creative base you can flavor any way you like.

Holiday and Party Versions of Cookie Dough Bites
Cookie dough bites aren’t just for weeknight snacking. With the right mix-ins, they can become the highlight of any gathering.
Here are a few festive ideas:
| Theme | Flavor Twist |
|---|---|
| Christmas | Add peppermint bits & white chocolate chips |
| Valentine’s Day | Mix in strawberry powder & heart sprinkles |
| Halloween | Use orange food coloring & candy eyes |
| Thanksgiving | Try pumpkin spice & cinnamon sugar coating |
| 4th of July | Add red, white, and blue sprinkles |
Because these bites don’t need baking, you can prep them ahead and refrigerate until it’s time to serve. This makes them perfect for parties, potlucks, or gifting.
They’re also perfect for getting kids involved in the kitchen. Let little hands roll the dough and choose toppings. Not only is it fun—it turns dessert into a full-on activity.
Looking for more inspiration? Try our Healthy Breakfast Cookies for a treat that balances flavor and nutrition.
FAQs About Cookie Dough Bites
What are the ingredients in Ben and Jerry’s cookie dough bites?
Ben and Jerry’s cookie dough bites typically contain:
Heat-treated flour
Brown sugar and cane sugar
Butter or pasteurized eggs (depending on the variety)
Vanilla extract
Chocolate chips
Salt
These ingredients combine to form safe, edible dough chunks that remain soft and flavorful—even when frozen. Commercial versions may also include stabilizers or emulsifiers to keep the texture consistent in cold conditions.
Have Cookie Dough Bites been discontinued?
No, cookie dough bites have not been discontinued. In fact, they remain a popular item in both the candy aisle and frozen dessert sections. While certain flavors or limited-edition batches may come and go, brands like Ben & Jerry’s and other snack companies still offer various options. You can also find DIY versions trending on social media and food blogs.
How to make Ben and Jerry’s cookie dough bites?
To replicate Ben & Jerry’s-style cookie dough bites at home:
Follow a basic edible cookie dough recipe (see Part 3).
Use mini chocolate chips and shape into small, marble-sized chunks.
Freeze the bites for 30 minutes before mixing them into softened ice cream.
Re-freeze the ice cream to lock in that signature frozen dough texture.
Pro tip: Add a pinch of sea salt and a splash of extra vanilla for a more authentic flavor.
Why are Cookie Dough Bites so good?
Cookie dough bites hit all the right notes. They’re sweet, soft, and packed with nostalgic flavor. The buttery base, combined with brown sugar and chocolate chips, creates a smooth, crave-worthy bite. Plus, their no-bake nature makes them feel spontaneous and fun—like sneaking a taste from the bowl, but without the risk.
Because of their texture, flavor, and simplicity, they’ve earned a place as one of the most addictive desserts around.
Conclusion: A Sweet, Safe, and Simple Treat to Love Anytime
Cookie dough bites aren’t just a trend—they’re a nostalgic, no-bake classic that anyone can make and enjoy. Whether you crave the creamy texture, rich chocolate chips, or just want something easy to share with family, these bites check every box.
From learning how to safely heat-treat your flour to creating Ben & Jerry’s-style frozen chunks, this guide has covered it all. You’ve seen how to mix up the flavors, store them right, and even troubleshoot tummy troubles.
So next time you need a quick dessert, skip the oven and roll up a batch of cookie dough bites instead. They’re fun, flavorful, and always hit the spot.
Don’t miss our Chocolate Chip Cookie Dough Brownie Bombs or our Mini Pineapple Upside Down Cheesecakes for more irresistible ideas to pair with your bites.
Let’s connect! Follow me for more Joylicious Recipes:
PrintMake These Easy Cookie Dough Bites – Safe to Eat Raw!

These no-bake cookie dough bites are safe to eat, egg-free, and made with just 7 simple ingredients. Soft, sweet, and ready in minutes!
- Prep Time: 5 minutes
- Cook Time: 5 minutes
- Total Time: 10 minutes
- Yield: 12 servings 1x
- Category: Dessert
- Cuisine: American
Ingredients
1 cup flour (gluten-free 1-to-1 or all-purpose), heat-treated
½ cup unsalted butter, at room temperature
½ cup light brown sugar, tightly packed
2 tablespoons granulated sugar
1 tablespoon milk
½ teaspoon vanilla extract
Pinch of sea salt
⅓ cup mini chocolate chips
Instructions
Heat-Treat the Flour:
Preheat oven to 350°F. Spread flour on a parchment-lined baking sheet. Bake for 5–7 minutes. Let cool completely.Cream the Butter and Sugars:
In a large bowl, beat the butter, brown sugar, and granulated sugar for 2 minutes until smooth and creamy.Add Remaining Ingredients:
Mix in the cooled flour, vanilla extract, milk, and sea salt. Stir until a dough forms.Fold in Chocolate Chips:
Gently stir in mini chocolate chips until evenly distributed.Shape the Bites:
Roll the dough into bite-sized balls using your hands or a small scoop.Chill and Serve:
Place on a tray and refrigerate for 20–30 minutes before serving.
Notes
Heat-treating the flour ensures it’s safe to eat raw.
For firmer bites, chill longer or freeze.
You can substitute butter with vegan butter for a dairy-free version.
Store in an airtight container in the fridge for up to 7 days.
These bites freeze well for up to 2 months.
Nutrition
- Serving Size: 12 servings
- Calories: 175kcal
- Sodium: 68mg
- Fat: 9g
- Saturated Fat: 6g
- Trans Fat: 1g
- Carbohydrates: 22g
- Fiber: 1g
- Protein: 1g
- Cholesterol: 21mg
Keywords: Brown sugar, milk, all purpose flour, salted butter, Vanilla ice cream, mini chocolate chips, sweet chocolate chips
Let’s connect! Follow me for more Joylicious Recipes: Facebook, Instagram, Pinterest