S’mores Cookies Made Simple – Your New Favorite Dessert
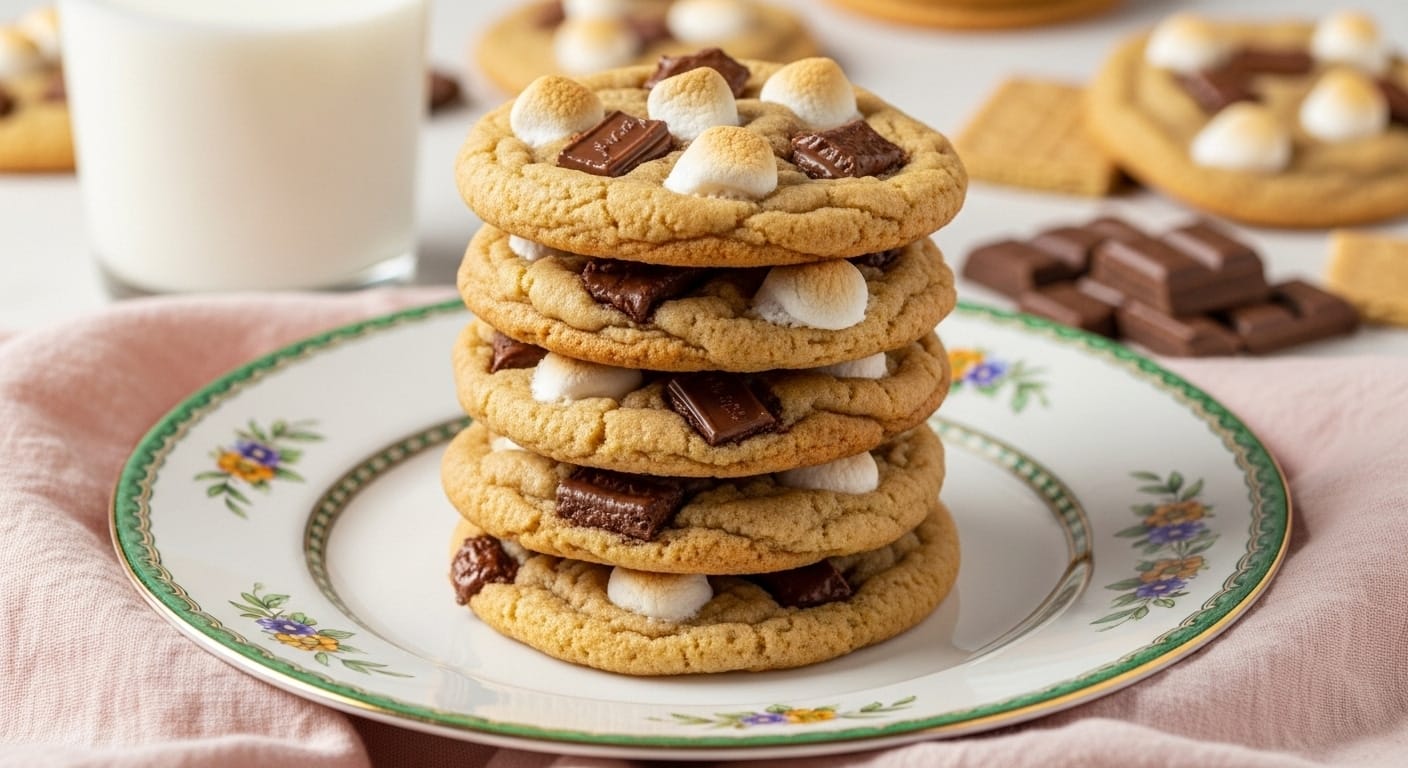
S’mores cookies are the best way to enjoy campfire flavors—without needing a firepit. Each bite blends crispy graham crackers, gooey marshmallows, and melty chocolate into a chewy delight.
Ideal for bake sales, gatherings, or a quiet night in. With every bite, you get layers of texture and sweetness that feel familiar and exciting.
This guide walks you through making the ultimate s’mores cookie from scratch. From baking tips to ingredient swaps and fun variations, we’ve got you covered.
Want to avoid marshmallow blowouts or burnt edges? We’ll explain how. Love Hershey’s bars? We’ll show you how to use them right.
Don’t miss our easy crumbl sugar cookie recipe if you’re craving more bakery-style treats!
Understanding the Classic S’mores Cookie Flavor Profile
What Makes S’mores Cookies So Irresistible?
S’mores cookies deliver bold texture and flavor in every bite. With crunchy graham cracker pieces, melted chocolate, and chewy marshmallow ribbons, they strike the perfect balance between rustic and indulgent. Instead of tasting like just another chocolate chip cookie, they bring a nostalgic, campfire-style experience straight to your kitchen.
While other cookie recipes lean on a single flavor note, these combine gooey, crisp, and creamy elements all at once. The result is a cookie that’s chewy in the center, slightly crisp around the edges, and irresistibly rich throughout.
Graham Crackers: The Crunchy Backbone
Graham crackers give s’mores cookies their signature crunch and mild sweetness. Since they’re made with whole wheat flour and a hint of honey, they introduce a subtle nuttiness that complements the marshmallows beautifully.
For the best texture, chop graham crackers roughly—don’t crush them into crumbs. That way, the pieces stay visible and offer a pleasant crunch inside the soft dough. Additionally, using real graham crackers (not graham-flavored cereal) gives you that classic, comforting flavor.
Chocolate Choices: Why Hershey’s Still Reigns Supreme
Without question, Hershey’s bars bring the authentic s’mores taste. They melt faster than chips and offer that creamy texture we associate with a toasted treat. Even so, mixing in a few semisweet chocolate chips adds richness and depth to the cookie.
To boost the chocolate factor, try placing Hershey’s squares on top of the cookies right before the final minutes of baking. This creates a visually stunning cookie with irresistible melted pools of chocolate.
Marshmallows: Gooey, Toasted, and Totally Essential
Mini marshmallows give s’mores cookies their signature goo. But to prevent messy blowouts, it’s smart to tear them in half before mixing them into the dough. Doing this keeps the marshmallow from overtaking the cookie and helps it melt evenly.
If you want a toasted top, reserve a few marshmallow bits. Place them on top of the cookies about 2 minutes before they’re done baking. That way, they brown perfectly and give your cookies that golden, roasted look—without burning or bubbling over.
Ingredients Breakdown and Pro Baking Tips for S’mores Cookies
Essential Ingredients for Authentic S’mores Cookie Flavor
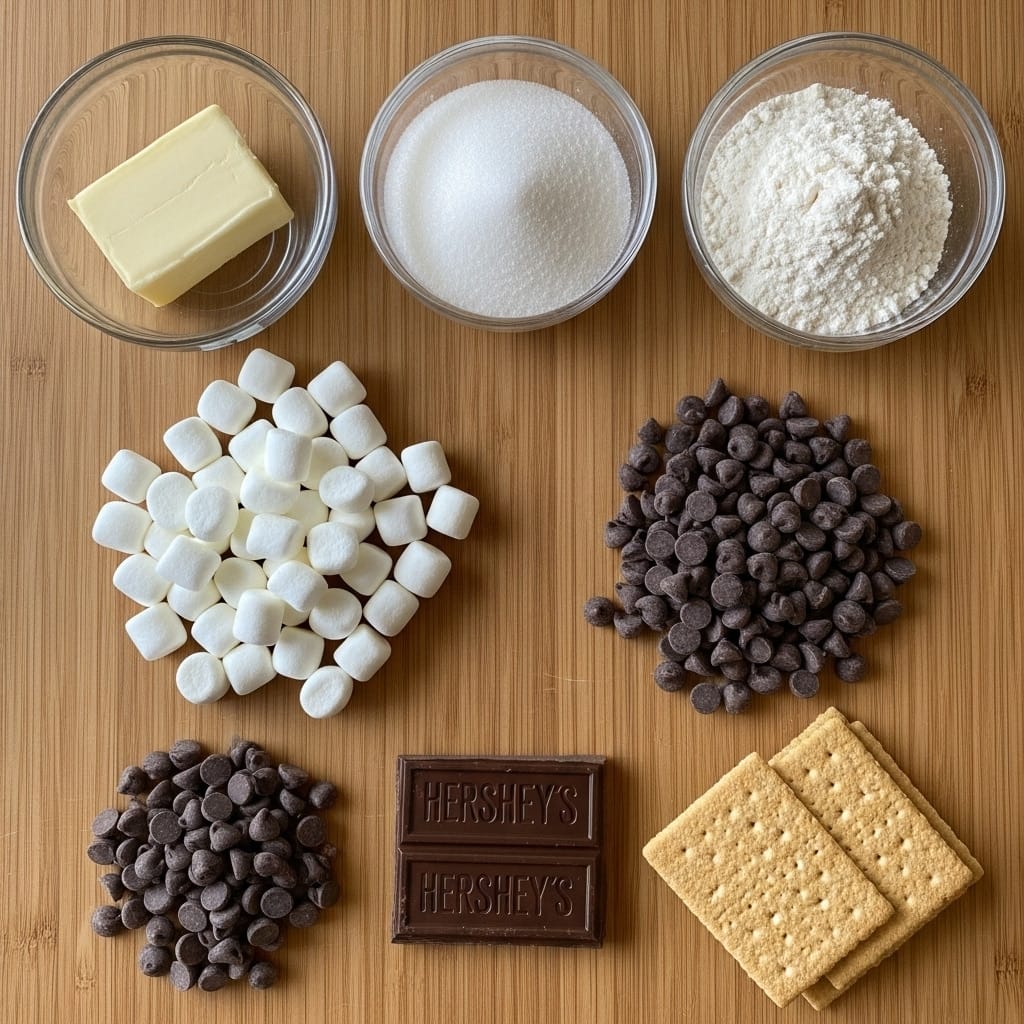
To nail that iconic taste and texture, every ingredient matters. Here’s a breakdown of what makes these cookies unforgettable:
| Ingredient | Purpose |
|---|---|
| All-purpose flour (1 ½ cups / 180g) | Gives structure to the cookie dough |
| Baking soda & baking powder (½ tsp each) | Work together to help the cookies rise and spread just right |
| Cornstarch (1 tsp) | Adds softness and chewiness to the final texture |
| Unsalted butter (10 tbsp) | Provides richness and helps create a tender crumb |
| Granulated sugar (¼ cup) | Adds sweetness and helps with spread |
| Light brown sugar (½ cup) | Boosts moisture and gives a hint of caramel flavor |
| Egg (1 large) | Binds ingredients and adds richness |
| Vanilla extract (1 tsp) | Enhances every flavor element |
| Salt (¼ tsp) | Balances sweetness and boosts chocolate notes |
| Semisweet chocolate chips (¾ cup) | Offer rich flavor contrast to milk chocolate |
| Mini marshmallows (1 cup) | Create gooey, toasted pockets inside the cookie |
| Hershey’s bar (1.55 oz) | For that classic, nostalgic s’mores chocolate finish |
| Graham crackers (4 whole, 56g) | Add crunch and warm, honey graham flavor |
Don’t forget: use a digital scale if you have one. Too much flour is one of the most common mistakes that ruins texture.
Pro Tip: Prep Your Marshmallows the Smart Way
Mini marshmallows can puff up wildly during baking. For best results, tear each one in half. This controls how much they expand and helps them melt into the dough, rather than explode out of it.
Also, always reserve a handful of marshmallows to press into the top mid-bake. This gives you that golden, roasted finish every s’mores cookie needs.
Why Room-Temperature Butter Matters
Softened butter beats more easily with sugar, helping create a creamy, smooth texture. This allows more air to incorporate into the dough, which leads to a lighter cookie.
Cold butter won’t mix well and melted butter makes the dough too runny—stick with room temp for the perfect base.
How to Mix for Maximum Texture
Beat the butter and sugars for at least 2 minutes. This ensures the sugar is well-dissolved and the dough is airy. Once you add the dry ingredients, mix only until the flour disappears—overmixing leads to tough cookies.
As a final step, stir in the chocolate chips, graham crackers, and marshmallows gently with a spatula or on low speed to avoid crushing them.
Chill the Dough—It’s Worth It
Refrigerate the dough for at least an hour. Chilled dough bakes up thicker and helps prevent the marshmallows from melting too fast. Plus, it gives the flour time to hydrate, improving the overall flavor and chew.
Step-by-Step Instructions to Bake S’mores Cookies Like a Pro
Step 1: Prep the Mix-Ins
Start by roughly chopping the graham crackers and Hershey’s chocolate bar into small bite-sized pieces. Then, tear the mini marshmallows in half. This keeps them from puffing too much during baking.
Doing this early helps everything mix in evenly and prevents last-minute mess. If you’re using marshmallow bits instead of mini marshmallows, you can skip the tearing step—but keep an eye on them during baking.
Step 2: Mix the Dry Ingredients
In a medium bowl, whisk together:
- 1½ cups all-purpose flour
- ½ teaspoon baking soda
- ½ teaspoon baking powder
- 1 teaspoon cornstarch
- ¼ teaspoon salt
Set this aside. This mix provides structure and chew, while cornstarch ensures a soft, tender cookie.
Step 3: Cream the Butter and Sugars
Using a stand or hand mixer, beat together:
- 10 tablespoons of room temperature unsalted butter
- ¼ cup granulated sugar
- ½ cup light brown sugar
Cream until fluffy—about 2 minutes. This aerates the dough and gives your cookies lift and spread.
Step 4: Add the Egg and Vanilla
Next, add:
- 1 large egg
- 1 teaspoon vanilla extract
Beat until fully combined, scraping the bowl as needed. These add moisture, structure, and flavor to the base dough.
Step 5: Combine Wet and Dry
Slowly add your flour mixture into the creamed butter. Use low speed to prevent overmixing. The finished dough will feel soft and pliable, but not overly sticky.
Step 6: Stir in the Mix-Ins
Fold in:
- The torn marshmallows (save some for later)
- The chopped graham crackers
- ¾ cup semisweet chocolate chips
- Half of the chopped Hershey’s bar
Mix just until evenly distributed—don’t overdo it or the crackers will disintegrate.
Step 7: Chill the Dough
Refrigerate the dough for at least 1 hour, preferably longer. This firms the dough and controls spread. It also helps the marshmallows and chocolate set into place.
Step 8: Bake the Cookies
Preheat the oven to 350°F (175°C). Line a baking sheet with parchment paper.
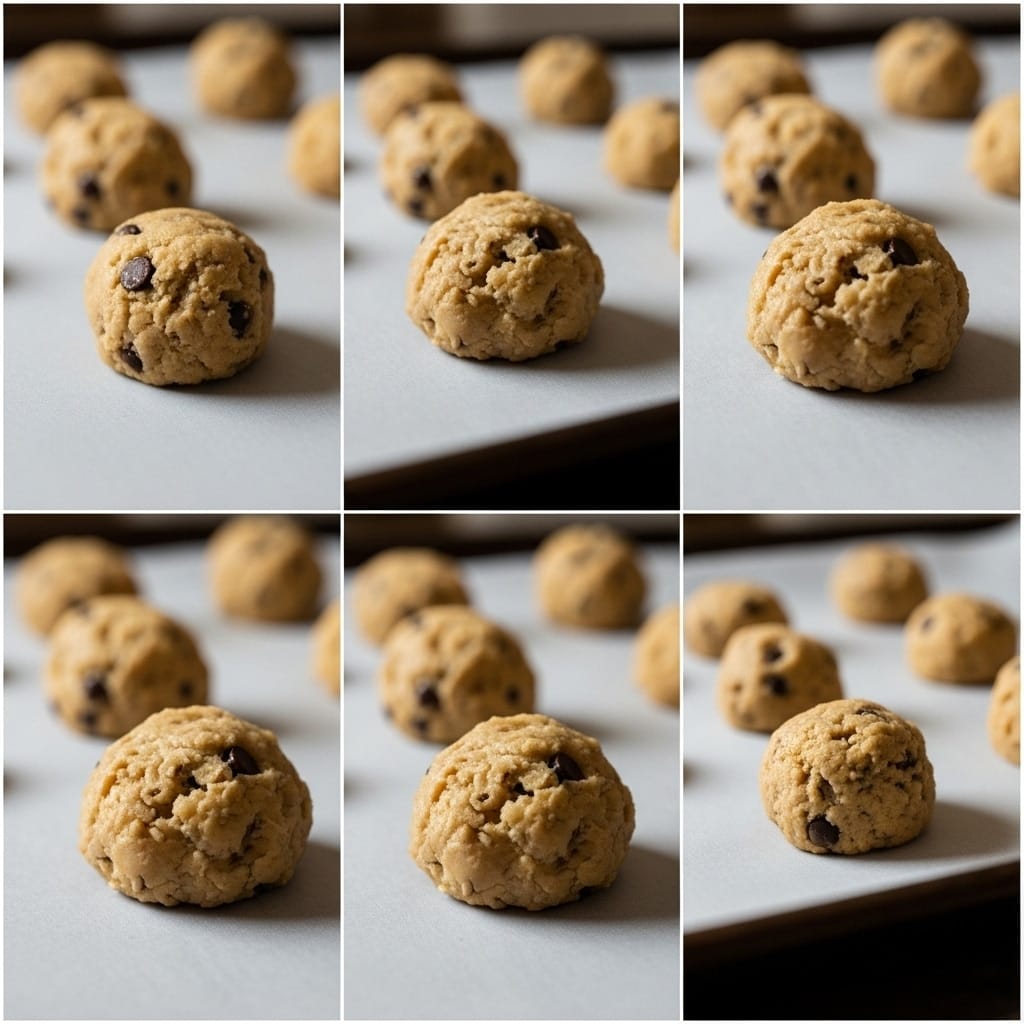
Scoop roughly 2-tablespoon portions and roll into balls. Space cookies 2 inches apart on the sheet.
Bake for 8 minutes, then pull the tray out briefly. Press a few reserved marshmallows and Hershey’s pieces into the tops. Return the tray to the oven for 2–3 more minutes, just until golden.
Step 9: Cool and Shape if Needed
If your cookies look uneven or marshmallows leaked out, use a round cookie cutter or a spoon to nudge them back into shape while warm.
Let cookies cool completely on the baking sheet. They’ll be soft at first but firm up perfectly as they rest.
Common Mistakes and How to Fix Them
Mistake #1: Using Too Much Flour
This is the #1 issue bakers run into. Even just a little extra flour can turn your s’mores cookies dry and crumbly instead of soft and chewy.
Fix it: Use a kitchen scale if possible. If not, spoon flour into your measuring cup, then level it with a knife. Never scoop directly from the bag—it’s almost guaranteed to over-pack.
Mistake #2: Skipping the Chill Time
Not chilling the dough often results in overly flat cookies that spread and turn greasy. The dough needs time to firm up so the butter and marshmallows don’t melt too fast.
Fix it: Chill your dough for at least 1 hour. Overnight is even better for flavor and structure.
Mistake #3: Using Whole Marshmallows
While tempting, tossing whole marshmallows into your cookie dough usually ends with burnt sugar messes. They puff up, explode, and ooze out everywhere.
Fix it: Tear mini marshmallows in half before adding them. Save a few to press into the tops during the last 2–3 minutes of baking for that golden, toasted look.
Mistake #4: Overmixing the Dough
Once you add the dry ingredients, too much mixing can make your cookies tough and cakey instead of tender.
Fix it: Mix until just combined. As soon as the flour disappears, stop. Fold in the chocolate and graham pieces gently to avoid breaking them up.
Mistake #5: Not Reshaping Marshmallow Blowouts
Marshmallows can still escape and create oddly shaped cookies—don’t panic. This is totally normal with gooey add-ins.
Fix it: While cookies are still warm, use a round cookie cutter, spatula, or spoon to push the sides back into a neat circle. Work fast before they cool and harden.
Creative Variations of S’mores Cookies to Try
1. Brown Butter S’mores Cookies
Want to deepen the flavor? Swap regular butter with browned butter. It adds nutty, caramel-like notes that pair perfectly with the sweetness of marshmallows and chocolate.
Tip: Let the browned butter cool slightly before creaming it with sugar, or your dough may turn runny.
2. Peanut Butter S’mores Cookies
Add ¼ cup of peanut butter to the dough for a salty-sweet twist. The combination of gooey marshmallows and rich peanut butter is truly irresistible.
Optional add-in: Try using peanut butter chips or Reese’s Pieces to take it even further.
3. Oreo-Stuffed S’mores Cookies
For the ultimate indulgence, wrap a scoop of cookie dough around a whole Oreo before baking. When combined with the graham and marshmallow mix, you get a double-layered cookie with a surprise crunch in the center.
Just be sure to bake these a minute or two longer to account for the extra size.
4. S’mores Cookies with Sea Salt
Add a light sprinkle of flaky sea salt to each cookie just before baking. This enhances the chocolate flavor and cuts through the sweetness, balancing every bite.
It’s a small touch, but it really elevates the whole recipe.
5. Campfire Toasted S’mores Cookies
After baking, carefully toast the marshmallow tops with a kitchen torch to give them that smoky, campfire-charred edge. This trick also works with broiling—just watch closely to avoid burning.
Warning: Keep a safe distance and don’t overdo it—the sugars can burn quickly.
6. Gluten-Free S’mores Cookies
Use a 1:1 gluten-free baking flour and make sure your graham crackers are certified gluten-free. The flavor stays true, but the texture might be slightly more delicate.
Chilling the dough is even more important here to keep cookies from spreading too much.
How to Store, Freeze, and Reheat S’mores Cookies Properly
Short-Term Storage: Keep Them Soft and Fresh
Freshly baked s’mores cookies can stay soft for up to 5 days—if stored right. Let the cookies cool completely first. Next, store them in an airtight container and keep at room temperature.
To help maintain moisture, toss in a slice of white bread. The cookies absorb just enough humidity from the bread to stay tender without getting soggy.
Avoid storing them uncovered—exposure to air quickly makes the marshmallows hard and the cookies dry.
Freezing the Dough for Later
If you want to prep ahead, this dough freezes beautifully. Scoop the chilled dough into balls and freeze them on a tray. Once solid, transfer to a freezer-safe bag or container.
Label and date the bag, and they’ll stay good for up to 3 months. Bake the dough straight from frozen—simply increase the baking time by 1–2 minutes.
Freezing Baked Cookies
Yes, you can freeze fully baked s’mores cookies. Lay them in a single layer inside a sealed freezer-safe bag. Use parchment paper between layers to prevent sticking.
When you’re ready to enjoy, let them thaw at room temp or warm them gently in the microwave for 10–15 seconds to revive that gooey marshmallow center.
Best Way to Reheat for a Gooey Center
Want that fresh-from-the-oven feel? Here’s how:
- Microwave: Heat one cookie at a time for 10–15 seconds.
- Oven: Bake at 300°F (150°C) for 4–5 minutes. This brings back the crispy edges and gooey center.
Pro tip: Don’t overheat. Too much time can make the marshmallows rubbery or melt the chocolate unevenly.
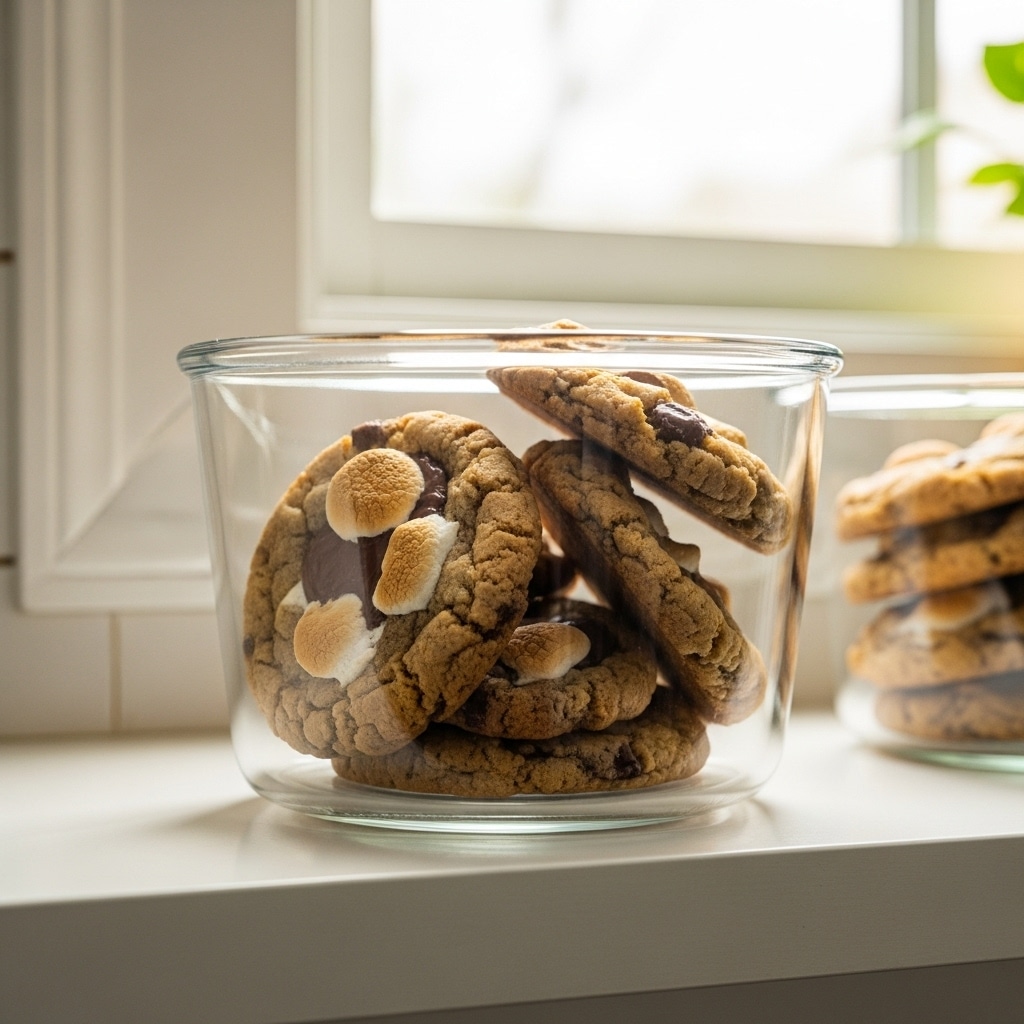
S’mores Cookies vs. Girl Scout Cookies – What’s the Real Difference?
Different Styles, Same Inspiration
While both s’mores cookies and Girl Scout S’mores cookies share a common flavor base—graham, marshmallow, and chocolate—they’re very different in form and texture.
Homemade s’mores cookies are soft, gooey, and filled with mix-ins. Girl Scout S’mores, depending on the bakery, are either sandwich-style cookies or chocolate-dipped shortbread with marshmallow flavor.
Texture and Freshness
Homemade s’mores cookies are fresh-baked with crisp edges and chewy centers. They’re loaded with real marshmallows, chocolate chunks, and crumbled graham crackers. On the other hand, Girl Scout versions are shelf-stable and crunchier. They’re convenient, but they lack that warm, gooey experience.
Looking for that fresh-baked gooeyness? You’ll only get it by making your own.
Availability and Ingredients
Girl Scout cookies are seasonal. They’re sold only for a few weeks each year—and depending on your region, you may get a different version. They’re produced by two different bakeries—ABC Bakers and Little Brownie Bakers—each offering a unique version.
Homemade versions let you use high-quality chocolate, real butter, and fresh eggs—something you won’t find in the boxed kind. Plus, there’s no guessing which version you’re getting.
Price and Quantity
Girl Scout cookies come in small boxes, often with just a dozen cookies—and you’ll pay a premium to support the fundraiser. Baking at home is far more economical and yields more cookies for the cost.
So, Which is Better?
It depends on what you’re after. If you’re craving a rich, gooey, bakery-style dessert with control over ingredients and flavor, homemade wins every time. But if you love the nostalgia and want a snack-on-the-go version, the Girl Scout s’mores cookie has its place too.
FAQs About S’mores Cookies (Based on Google’s People Also Ask)
Do the Girl Scouts still sell S’mores cookies?
Yes, but availability varies. Girl Scouts still offer S’mores cookies, though which version you get depends on your region and the bakery supplying them. Some areas may have phased them out temporarily, so it’s best to check with your local troop or online cookie sales.
Are ABC Bakers S’mores discontinued?
As of recent seasons, ABC Bakers has discontinued their version of S’mores cookies in some regions. However, Little Brownie Bakers still produces a chocolate-coated variety. Cookie lineups change often, so discontinuation doesn’t always mean permanent removal.
What happened to the S’mores Blizzard at Dairy Queen?
The S’mores Blizzard was a seasonal item at Dairy Queen that became a fan favorite. However, it’s no longer part of the standard menu. DQ rotates flavors throughout the year, and this one typically appears during summer promotions. If it’s missing, it may return in future seasons—so stay tuned!
What Girl Scout cookies are discontinued?
Several cookies have been retired over the years. These include Thanks-A-Lot, Savannah Smiles, Dulce de Leche, and some versions of S’mores. Discontinuations usually happen due to low demand, ingredient changes, or rotation of new cookie varieties.
What is the most popular Girl Scout cookie?
Thin Mints hold the crown as the most popular Girl Scout cookie nationwide. Their crisp, chocolatey, minty flavor is hard to beat. Following closely are Samoas (Caramel deLites) and Tagalongs (Peanut Butter Patties). While S’mores cookies gained a following, they’ve never quite reached the top three.
Final Thoughts on Baking the Perfect S’mores Cookies
Making s’mores cookies at home is more than just baking—it’s about recreating a nostalgic, gooey experience in a soft, golden cookie. Whether you stick to the classic combo of graham crackers, melted chocolate, and mini marshmallows or experiment with fun variations, one thing’s certain—these cookies are always a crowd-pleaser.
From choosing the right mix-ins to mastering the bake, this guide gives you everything you need for chewy, crispy-edged success. Skip the seasonal search and enjoy the campfire flavor any day of the year.
Want more dessert inspiration?
Check out these delicious bakes from Joylicious Recipes:
- Discover great ideas like this dessert at Joylicious Recipes
- Don’t miss our easy crumbl sugar cookie recipe
- Check out these delicious fudgy chewy brookies
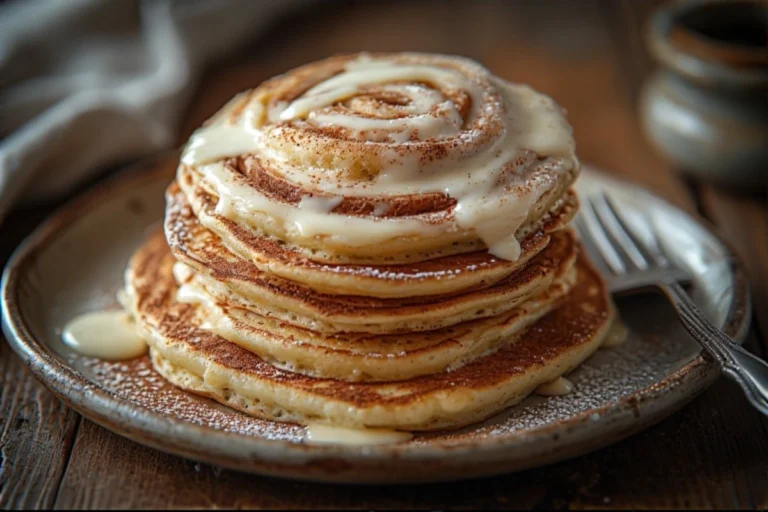
- Learn more about cinnamon swirl pancakes with glaze
- Looking for inspiration? Try chocolate chip cookie dough brownie bombs
- Explore our lemon blueberry sheet cake treat
S’mores Cookies Made Simple – Your New Favorite Dessert

These gooey s’mores cookies are loaded with graham cracker chunks, melted chocolate, and toasted marshmallows—bringing classic campfire flavor straight to your oven.
- Prep Time: 10 minutes
- Chill Time: 1 hour
- Cook Time: 10 minutes
- Total Time: 1 hour 20 minutes
- Yield: 20 cookies 1x
- Category: Dessert
- Cuisine: American
Ingredients
1½ cups all-purpose flour (180g)
½ tsp baking powder
½ tsp baking soda
1 tsp cornstarch
¾ cup semisweet chocolate chips
10 tbsp unsalted butter, room temperature
¼ cup granulated sugar
½ cup light brown sugar
1 large egg
1 tsp vanilla extract
¼ tsp salt
1 cup mini marshmallows (or marshmallow bits), divided
1 bar Hershey’s Chocolate (1.55 oz)
4 graham crackers (56g), roughly chopped
Instructions
Prep the Add-ins:
Roughly chop the graham crackers and Hershey’s bar. Tear the mini marshmallows in half to prevent blowouts.Whisk Dry Ingredients:
In a medium bowl, combine flour, baking powder, baking soda, cornstarch, and salt. Set aside.Cream Butter & Sugars:
Beat butter, granulated sugar, and brown sugar until smooth and fluffy (about 2 minutes).Add Egg & Vanilla:
Mix in the egg and vanilla extract until fully incorporated.Combine Dry & Wet:
Slowly add the dry mixture into the wet ingredients. Mix just until a soft dough forms.Fold in Mix-ins:
Gently fold in the torn marshmallows, chocolate chips, and chopped graham crackers. Reserve a handful of marshmallows and Hershey’s for topping.Chill the Dough:
Refrigerate the dough for at least 1 hour.Bake:
Preheat oven to 350°F (175°C). Scoop 2-tablespoon portions, roll into balls, and place on a lined baking sheet, 2 inches apart.Mid-Bake Topping:
Bake for 8 minutes. Remove briefly, press reserved marshmallows and chocolate pieces into the tops, then return to the oven for 2–3 more minutes.Cool & Shape (Optional):
Let cookies cool on the pan. If marshmallows blow out, use a round cookie cutter or knife to reshape them while warm.
Notes
Flour Accuracy: Use a scale or the spoon-and-level method to measure flour.
Marshmallow Control: Halving marshmallows prevents them from expanding too much during baking.
Chilling Matters: Chilled dough = thicker cookies and less marshmallow mess.
Storage Tip: Store in an airtight container at room temperature for up to 5 days with a slice of bread for softness.
Freezing Dough: Freeze cookie balls and bake directly from frozen—add 1–2 extra minutes.
Nutrition
- Serving Size: 1cookie
- Calories: 123kcal
- Sugar: 12g
- Sodium: 66mg
- Fat: 7g
- Saturated Fat: 4g
- Carbohydrates: 14g
- Fiber: 1g
- Protein: 1g
- Cholesterol: 21mg
Keywords: brown sugar, sweet chocolate chips, egg, dark brown sugar, Cinnamon graham crackers, Chocolate chip cookie, large marshmallows
Let’s connect! Follow me for more Joylicious Recipes: Facebook, Instagram, Pinterest