Celebrating Spring’s Bounty: Easter Nest Cookies for Your Holiday Table
A Festive Treat That Captures the Season
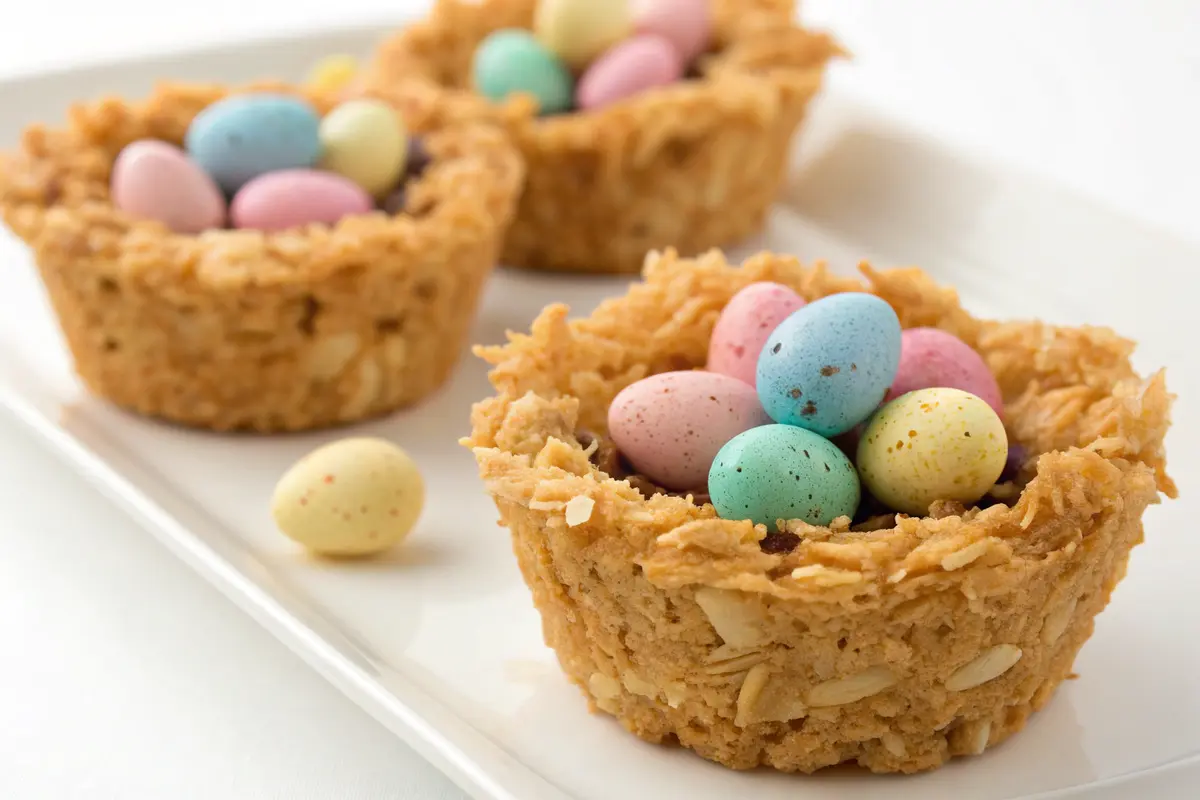
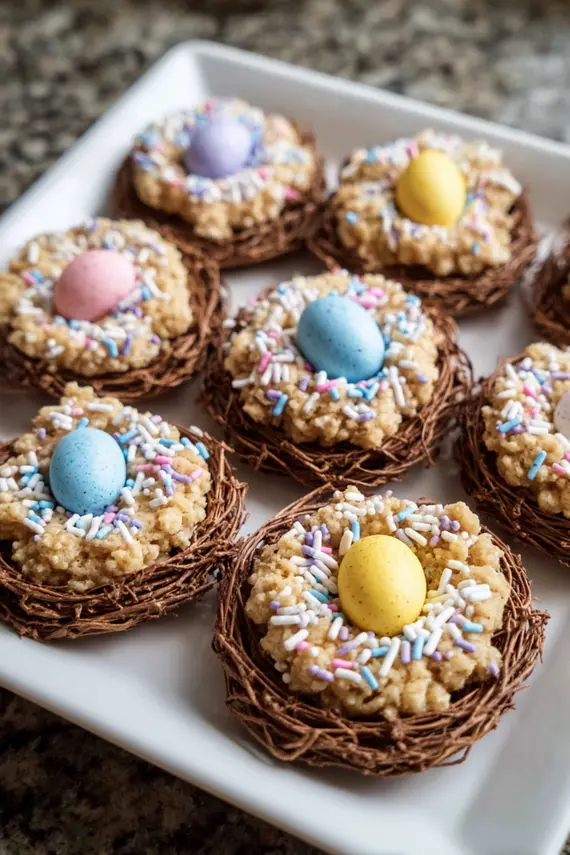
Easter nest cookies are the perfect blend of buttery shortbread and festive spring charm. These delightful treats feature a tender cookie base shaped into adorable nests that cradle colorful sprinkles, mimicking the joyful aesthetic of Easter baskets and spring bird nests. “For another holiday baking idea, these Holiday Cookie Gift Box recipes make wonderful presents throughout the year.” The subtle vanilla flavor pairs beautifully with the sweet decorations, creating a treat that’s as delicious as it is visually appealing.
These charming cookies are perfect for Easter celebrations, spring brunches, or afternoon tea with family. They make a wonderful activity to create with children, who will delight in forming the nest shapes and decorating them with colorful sprinkles. The simplicity of the recipe makes it approachable for bakers of all skill levels, while the result looks impressively festive on any holiday dessert table.
Gathering Your Nest-Building Materials: Essential Ingredients
The Foundation of Perfect Easter Cookies
Creating these adorable Easter nest cookies starts with gathering quality ingredients. The base is a simple shortbread-style dough that’s easy to work with and maintains its shape during baking. “If you enjoy making homemade treats as gifts, try these Mason Jar Cookie Mix recipes for beautiful, shareable treats that friends and family will love.” Below is a comprehensive list of everything you’ll need:
| Base Ingredients | Quantity | Notes |
|---|---|---|
| All-purpose flour | 2 cups | Measured correctly by spooning into cups and leveling off |
| Powdered sugar | 1/2 cup | Sifted to remove lumps for smoother dough |
| Unsalted butter | 1/2 cup | Softened at room temperature for 30-45 minutes |
| Vanilla extract | 1 tsp | Pure vanilla extract for best flavor |
| Egg yolk | 1 large | Room temperature for better incorporation |
| Salt | 1/4 tsp | Fine sea salt preferred for even distribution |
| Colored sprinkles | As needed | Pastel colors work best for Easter theme |
Optional Enhancements for Flavor and Visual Appeal
| Enhancement Ingredients | Quantity | Purpose |
|---|---|---|
| Lemon zest | 1 tsp | Adds fresh spring flavor |
| Almond extract | 1/4 tsp | Pairs well with vanilla for deeper flavor |
| Mini chocolate eggs | 36-48 pieces | For decorating finished nests (3 per cookie) |
| Shredded coconut | 1/2 cup | Can be tinted green with food coloring for grass-like texture |
| White chocolate | 1/2 cup | Melted to drizzle over nests or to help secure decorations |
| Food coloring | Few drops | To tint coconut or create colored dough variations |
Crafting Your Springtime Treats: Detailed Baking Instructions
Perfecting the Nest Cookie Technique
Follow these detailed steps to create delightfully festive Easter nest cookies that will be the highlight of your spring celebration. The key is handling the dough gently to maintain its tender texture while creating distinctive nest shapes. “For a no-bake option perfect for making with children, these Cookie Dough Bites Recipe offers a safe-to-eat treat that requires no oven time.”
- Prepare your workspace: Preheat your oven to 350°F (175°C) and line two baking sheets with parchment paper. Ensure your butter and egg yolk are at room temperature for optimal mixing.
- Mix dry ingredients: In a medium bowl, whisk together the 2 cups of all-purpose flour, 1/2 cup powdered sugar, and 1/4 teaspoon salt until evenly combined. This ensures your cookies have a consistent texture throughout.
- Cut in the butter: Add the 1/2 cup softened unsalted butter to the dry ingredients. Using a pastry cutter or two forks, work the butter into the flour mixture until it resembles coarse crumbs about the size of peas. The mixture should hold together when pressed between your fingers but still appear somewhat crumbly.
- Incorporate wet ingredients: Add the 1 teaspoon vanilla extract (and optional 1/4 teaspoon almond extract if using) and the egg yolk to the mixture. Gently stir until the dough comes together. If adding lemon zest, fold it in at this stage. The dough should be cohesive but not sticky.
- Chill the dough: For easier handling, wrap the dough in plastic wrap and chill for 15-20 minutes. This helps prevent the cookies from spreading too much during baking and makes the dough easier to shape.
- Form the nests: Take about 1 tablespoon of dough for each cookie. Roll into a ball, then flatten slightly in your palm. Using your thumb or the back of a rounded teaspoon, create an indentation in the center to form a nest shape. The edges should be slightly built up to hold the decorations.
- Add decorative elements: Place your shaped nests about 2 inches apart on the prepared baking sheets. Sprinkle colored sprinkles into the indentation of each nest. If you’re using coconut, you can add it now or save it for after baking.
- Bake to perfection: Bake in the preheated oven for 12-15 minutes, or until the edges are just beginning to turn golden. The cookies should remain mostly pale, as overbaking will make them too crisp.
- Cool completely: Allow the cookies to cool on the baking sheet for 5 minutes before transferring to a wire rack to cool completely. The cookies will firm up as they cool, so handle them gently at first.
- Decorate finished nests: Once completely cool, add any additional decorations like mini chocolate eggs or a drizzle of melted white chocolate to secure decorative elements. If using tinted coconut, you can sprinkle it around the edges to simulate grass.
Nesting Success: Pro Tips for Perfect Easter Cookies
Expert Advice for Baking and Decorating
Follow these expert tips to ensure your Easter nest cookies turn out perfectly every time, with the ideal texture and appearance:
- Temperature matters: Make sure your butter is properly softened but not melted. It should yield slightly to pressure but still hold its shape. If it’s too warm, the cookies will spread too much; if too cold, the dough will be difficult to work with.
- Handle with care: Work the dough gently to keep your cookies tender. Overworking develops gluten, which can make cookies tough rather than the melt-in-your-mouth texture you want.
- Chilling is crucial: If your kitchen is warm or your dough feels sticky, don’t skip the chilling step. Cold dough holds its shape better during baking and creates more defined nests.
- Uniform sizing: Use a cookie scoop or measuring tablespoon for consistent cookie sizes. Uniform cookies will bake evenly and look more professional on your Easter dessert table.
- Watch for doneness: The cookies should remain fairly pale with just a hint of golden color at the edges. They’ll continue to firm up as they cool, so avoid overbaking, which can make them dry and crumbly.
- Decoration timing: Add mini chocolate eggs or candies after the cookies have cooled completely. If added before baking, many candies will melt or change color. For secure placement, use a small dab of melted white chocolate as “glue” to hold decorations in place.
- Get creative with fillings: Beyond sprinkles, try filling your nests with colorful buttercream, lemon curd, or even jam for different flavor variations that still maintain the nest appearance.
Troubleshooting Common Issues
Even experienced bakers encounter challenges! Here’s how to address common problems with Easter nest cookies:
- Spreading cookies: If your nests are flattening too much during baking, your dough may be too warm. Chill it longer before shaping, and consider refrigerating the shaped cookies for 10 minutes before baking.
- Crumbly dough: If your dough won’t hold together, it may be too dry. Add 1/2 tablespoon of water or milk at a time until it reaches the right consistency.
- Uneven baking: Rotate your baking sheet halfway through the baking time to ensure all cookies brown evenly, especially if your oven has hot spots.
Preserving Your Easter Treasures: Storage and Freshness
Keeping Your Nest Cookies Fresh for Days
Proper storage ensures your Easter nest cookies stay fresh and delicious for as long as possible, allowing you to prepare them ahead of your holiday celebration.
- Short-term storage: Once completely cooled, store your Easter nest cookies in an airtight container at room temperature for up to 5 days. Place a piece of parchment paper between layers to prevent cookies from sticking together or damaging decorations.
- Refrigeration: While not usually necessary, you can refrigerate the cookies in an airtight container if your kitchen is particularly warm. Just be aware that refrigeration can sometimes make shortbread-style cookies softer rather than maintaining their crisp-tender texture.
- Freezing options: These cookies freeze beautifully for up to 3 months. For best results, freeze them without decorative elements like mini chocolate eggs or coconut. Place cooled cookies in a single layer on a baking sheet until frozen solid (about 1 hour), then transfer to a freezer-safe container with parchment paper between layers.
- Thawing: When ready to enjoy, thaw frozen cookies at room temperature for about 1-2 hours. Once thawed, add any decorative elements that you didn’t freeze with the cookies.
- Dough storage: You can also freeze the unformed cookie dough for up to 3 months. Wrap it tightly in plastic wrap, then place in a freezer bag. Thaw overnight in the refrigerator before shaping and baking.
- Freshness indicators: Fresh Easter nest cookies should have a pleasant vanilla aroma and slightly crisp exterior with a tender interior. If they develop an off smell or become excessively hard, it’s best to discard them.
Make-Ahead Tips for Holiday Planning
Easter celebrations often involve multiple dishes and preparations. Here’s how to fit these cookies into your holiday planning:
- Two days ahead: Make and shape the cookie dough, then refrigerate unbaked cookies on baking sheets, tightly wrapped.
- One day ahead: Bake the cookies and store in airtight containers once completely cooled.
- Day of serving: Add final decorative touches like mini eggs or chocolate drizzle shortly before serving for the freshest appearance.
Beyond the Basic Nest: Creative Variations for Spring Cookies
Flavor and Style Adaptations
Take your Easter nest cookies to the next level with these creative variations that maintain the charming nest appearance while introducing new flavors and decorative elements.
Chocolate Nest Cookies
Transform your nests into chocolate delights by replacing 1/4 cup of the all-purpose flour with unsweetened cocoa powder. The rich chocolate base makes a beautiful contrast with colorful sprinkles or pastel-colored mini eggs. For extra decadence, drizzle with melted white chocolate after cooling.
Lemon-Poppy Seed Nests
Create a bright spring flavor by adding 1 tablespoon of lemon zest and 1 teaspoon of poppy seeds to the dough. The fresh citrus flavor pairs beautifully with the buttery shortbread base, and the poppy seeds add visual interest that resembles tiny speckled eggs. Fill these nests with lemon curd for an extra tangy treat.
Almond Nests with Cherry Centers
Replace the vanilla extract with almond extract and add 1/4 cup finely chopped almonds to the dough. After baking and cooling, place a dollop of cherry preserves in the center of each nest for a sophisticated flavor combination that adults will particularly appreciate.
Coconut-Rimmed Nests
After forming your nest shapes but before baking, brush the rims lightly with beaten egg white and dip in toasted coconut flakes. The coconut will toast further during baking, creating a realistic nest-like texture and adding a delightful tropical flavor. These are particularly beautiful when filled with blue or speckled candy eggs.
Gluten-Free Nest Cookies
Make these treats accessible to everyone by substituting the all-purpose flour with a high-quality gluten-free flour blend (one that contains xanthan gum). Add 1/4 teaspoon of xanthan gum if your blend doesn’t include it. The texture may be slightly different, but the charming appearance and delicious flavor remain.
Vegan Easter Nests
Create plant-based Easter nest cookies by replacing the butter with softened coconut oil or vegan butter, and substitute the egg yolk with 1 tablespoon of aquafaba (the liquid from canned chickpeas). Be sure to check that your sprinkles and decorations are also vegan-friendly. These adaptations maintain the festive appearance while accommodating dietary preferences.
Presenting Your Spring Creations: Serving Suggestions
Festive Displays for Easter Gatherings
Showcase your beautiful Easter nest cookies with these creative serving ideas that will elevate your spring celebrations and delight guests of all ages.
Easter Dessert Table Centerpiece
Create a stunning focal point for your Easter dessert spread by arranging the nest cookies on a tiered cake stand. Place larger nests on the bottom tier and smaller ones as you move upward. Intersperse with fresh spring flowers like daisies or tulips for a garden-inspired display that captures the season’s essence.
Individual Place Settings
For a seated Easter brunch or dinner, place one cookie at each guest’s place setting as an edible decoration. Wrap each cookie in clear cellophane tied with pastel ribbon, or place directly on a folded napkin with a name card for a personalized touch that doubles as a sweet take-home favor.
Easter Basket Stuffers
These cookies make charming additions to Easter baskets. Carefully wrap individual cookies in small cellophane bags tied with colorful ribbon. They’re sturdier than many Easter treats and provide a homemade touch among commercial candies and toys. Balancing sweet treats with healthy options like a three-bean salad can create a well-rounded Easter meal for the whole family.
Cookie and Milk Bar
Set up a charming cookie and milk station at your Easter gathering. Offer these nest cookies alongside other Easter treats with small glasses of regular and chocolate milk. Include colorful straws and perhaps flavored milk options like strawberry or vanilla for extra festivity.
Companion Desserts
While these cookies are delightful on their own, they pair beautifully with other spring desserts. Serve alongside:
- Fresh strawberry sorbet or ice cream
- Lemon posset or pudding
- Fresh fruit skewers with honey yogurt dip
- Vanilla bean custard
Packaging for Gifting
Easter nest cookies make thoughtful homemade gifts. Pack 6-8 cookies in a decorative tin lined with Easter grass, or stack them carefully in a clear glass jar tied with pastel ribbon. Attach a handwritten note with storage instructions so recipients can enjoy your treats at peak freshness.

Cracking Common Questions: Easter Nest Cookie FAQs
Answers to Your Baking Queries
Can I make these Easter nest cookies ahead of time?
Yes, these cookies store very well! You can bake them up to 5 days in advance and store in an airtight container at room temperature. For longer storage, freeze the baked, undecorated cookies for up to 3 months. Alternatively, you can freeze the shaped, unbaked cookies on a baking sheet, then transfer to a freezer bag once solid. Bake directly from frozen, adding 2-3 minutes to the baking time.
Why did my cookies spread too much and lose their nest shape?
Excessive spreading usually happens when the butter is too warm or the dough wasn’t chilled properly. For well-defined nests: 1) Make sure your butter is softened but still cool to the touch, 2) Chill the dough for at least 15-20 minutes before shaping, and 3) Consider chilling the shaped cookies for 10 minutes before baking, especially on warm days. Also check that your oven temperature is accurate, as an oven that runs hot can cause premature spreading.
What’s the best way to create the nest indentation?
For consistent, well-shaped nests, try one of these techniques: 1) Use your thumb to press a deep indentation in the center of each ball of dough, then use your index finger to widen it slightly, 2) Use the back of a rounded teaspoon measuring spoon, or 3) For deeper, more uniform wells, press the end of a wooden spoon handle into the center of each cookie. Whatever tool you use, if the indentation starts to lose definition during baking, you can gently re-press it when the cookies are just out of the oven while they’re still soft.
How can I make these Easter nest cookies more colorful?
There are several ways to add more spring color to your nest cookies: 1) Divide the dough and tint different portions with gel food coloring before shaping, 2) After baking and cooling, pipe colored royal icing or buttercream around the edges to create a decorative nest rim, 3) Use naturally colorful ingredients like matcha powder (green), freeze-dried berry powder (pink/purple), or cocoa (brown) to create different colored doughs, or 4) Brush the edges with egg wash before baking and apply colored sanding sugar for a sparkling, colorful rim.
Sweet Spring Endings: Embracing the Easter Cookie Tradition
The Joy of Holiday Baking
Easter nest cookies embody the spirit of spring with their charming appearance and delicious buttery taste. These delightful treats strike the perfect balance between simple preparation and impressive presentation, making them an ideal addition to your Easter celebrations. “For a warming savory dish to balance your sweet Easter treats, this Creamy Vegetable Chowder makes a nourishing lunch or light dinner option during the holiday weekend.”
The versatility of these cookies allows for endless creativity, whether you’re crafting them with children as a fun holiday activity or preparing an elegant dessert display for guests. From the basic recipe to the numerous variations we’ve explored, there’s an Easter nest cookie style to suit every taste preference and dietary need.
Remember that the true magic of these cookies lies in their ability to bring people together around the shared experience of holiday traditions. As you shape each little nest and carefully place the decorative elements, you’re not just creating a sweet treat—you’re crafting memories that will be associated with Easter celebrations for years to come.
We encourage you to make these Easter nest cookies part of your spring baking repertoire, adapting them to your family’s tastes and creating your own signature variations. The joy on your loved ones’ faces when they spot these adorable treats on your Easter table will be well worth the effort. Happy baking and happy Easter!
PrintEaster Nest Cookies

- Delightful buttery shortbread cookies shaped into adorable nests with colorful sprinkle filling.
- Perfect for Easter celebrations and spring gatherings.
- A versatile treat that’s as fun to make as it is to eat!
- Prep Time: 25
- Cook Time: 15
- Total Time: 40 minutes
- Yield: 24 cookies 1x
- Category: Dessert
- Method: Baking
- Cuisine: American
Ingredients
- 2 cups all-purpose flour
- 1/2 cup powdered sugar, sifted
- 1/2 cup unsalted butter, softened
- 1 tsp vanilla extract
- 1 large egg yolk, room temperature
- 1/4 tsp salt
- Colored sprinkles for filling
- 1 tsp lemon zest (optional)
- 1/4 tsp almond extract (optional)
- 1/2 cup white chocolate chips for drizzling (optional)
- 1/2 cup shredded coconut (optional)
- Mini chocolate eggs for decorating (optional)
Instructions
- Preheat oven to 350°F (175°C) and line baking sheets with parchment paper.
- In a medium bowl, whisk together flour, powdered sugar, and salt.
- Cut in softened butter using a pastry cutter or two forks until mixture resembles coarse crumbs.
- Add vanilla extract and egg yolk (plus optional lemon zest or almond extract if using) and stir until dough forms.
- Chill dough for 15-20 minutes for easier handling.
- Take 1 tablespoon of dough for each cookie, roll into a ball, then create an indentation in the center to form a nest shape.
- Place nests 2 inches apart on prepared baking sheets.
- Sprinkle colored sprinkles in the center of each nest.
- Bake for 12-15 minutes until edges are just beginning to turn golden.
- Let cool on baking sheet for 5 minutes before transferring to a wire rack.
- Once completely cool, add any additional decorations like mini chocolate eggs or drizzle with melted white chocolate if desired.
Notes
- For best results, ensure butter is properly softened but not melted.
- Don’t skip the chilling step, especially on warm days.
- The cookies will be very soft when first removed from the oven but will firm up as they cool.
- For deeper nests, re-press the indentation immediately after removing from the oven.
- Nutrition facts are estimates and may vary based on ingredients used, portion sizes, and preparation methods.
Nutrition
- Serving Size: 1 cookie
- Calories: 98
- Sugar: 4
- Sodium: 25
- Fat: 5
- Saturated Fat: 3
- Unsaturated Fat: 2
- Carbohydrates: 12
- Fiber: 0
- Protein: 1
- Cholesterol: 18
Keywords: easter nest cookies, easter cookie recipes, nest cookie ideas, spring cookies, holiday baking
Let’s connect! Follow me for more Joylicious Recipes: Facebook, Instagram, Pinterest