Savory Garlic Sourdough Bread: The Perfect Homemade Artisan Loaf
The Flavor Powerhouse in Your Kitchen
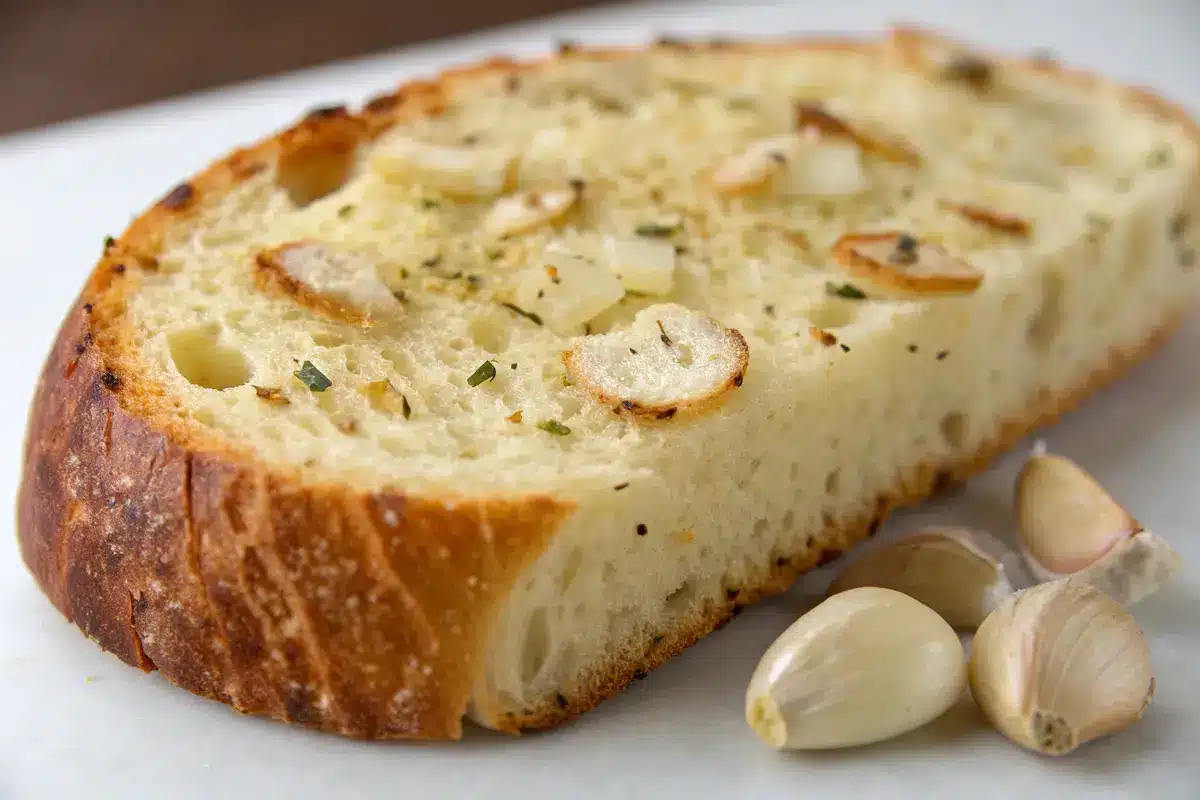
Garlic sourdough bread combines the tangy complexity of wild yeast fermentation with the aromatic punch of fresh garlic. This artisan bread recipe creates a stunning loaf with a crackling crust and airy, chewy interior that will elevate your breakfast table and impress dinner guests alike. The slow fermentation process develops deep flavor notes that simply can’t be replicated in quick-rise breads. “The Hummingbird Cake Banana Bread uses similar slow-developing techniques to create complex flavors in a sweet application.”
This versatile bread shines as the foundation for avocado toast at breakfast, paired with hearty soups at lunch, or served alongside roasted vegetables for dinner. The garlic-infused crumb adds a subtle but distinctive flavor that transforms even the simplest meals into something special. The hands-on time is minimal, but the results are professional-quality bread that will have everyone asking for your secret.
Essential Components for Your Garlic Sourdough Success
Building Blocks for Perfect Sourdough
Creating artisan-quality garlic sourdough bread requires quality ingredients and an active sourdough starter. The table below outlines everything you’ll need to craft a loaf with that perfect combination of crispy crust and fluffy crumb that defines great sourdough.
| Ingredient | Amount | Notes |
|---|---|---|
| Active sourdough starter | 150g (about 3/4 cup) | Should be bubbly and recently fed (8-12 hours before use) |
| Bread flour | 500g (about 4 cups) | Higher protein content creates better structure |
| Water | 350g (about 1 1/2 cups) | Filtered, room temperature |
| Salt | 10g (about 2 teaspoons) | Fine sea salt preferred |
| Fresh garlic | 6-8 cloves, minced | Adjust according to your preference for garlic intensity |
| Extra virgin olive oil | 2 tablespoons | Helps incorporate the garlic evenly |
| Roasted garlic (optional) | 1 head | Creates sweeter garlic notes |
| Fresh herbs (optional) | 1-2 tablespoons | Rosemary, thyme, or chives work beautifully |
| Grated Parmesan (optional) | 1/4 cup | Adds umami depth to the bread |
| Rice flour | For dusting | Prevents sticking in proofing baskets |
“If you enjoy working with fresh dough, our Low Carb Lasagna offers another opportunity to create impressive homemade results with simple ingredients.”
Master Method: Creating Your Perfect Garlic Sourdough Loaf
The Fermentation Journey
Follow these detailed steps to create a garlic sourdough bread with a perfectly crispy crust and fluffy interior crumb. This method uses time and technique rather than kneading to develop gluten structure.
- Start by combining 150g active sourdough starter, 500g bread flour, and 325g of the water in a large mixing bowl. Mix until no dry flour remains and you have a shaggy, somewhat sticky dough. Cover with a damp cloth and let rest for 30 minutes (this autolyse period allows flour to fully hydrate).
- Add 10g salt and remaining 25g water to the dough, gently working them in with wet hands using a pinching motion. The dough will initially feel wet but will become smoother as you mix. Perform 4-5 stretch and folds in the bowl to begin developing structure.
- Cover the dough and let rest for 30 minutes at room temperature (ideally 70-75°F).
- While the dough rests, prepare your garlic mixture. Heat 2 tablespoons olive oil in a small pan over low heat. Add 6-8 cloves of minced garlic and sauté gently for 2-3 minutes until fragrant but not browned. Remove from heat and allow to cool completely.
- Perform your first set of stretch and folds: with wet hands, grab one side of the dough, stretch it up and fold it over itself. Rotate the bowl 90 degrees and repeat until you’ve worked around the entire dough ball (4 folds). The dough should start to feel tighter and more elastic.
- Cover and rest for another 30 minutes. Perform a second set of stretch and folds.
- During the third set of stretch and folds (30 minutes later), gently spread the cooled garlic and oil mixture over the dough. As you perform the stretching and folding, the garlic will become incorporated throughout the dough.
- Cover the dough and allow to bulk ferment at room temperature for 3-4 hours total from when you mixed in the salt. The dough should increase in volume by about 50%, develop a smoother surface, and show visible bubbles.
- Turn the dough out onto a lightly floured work surface. Using a bench scraper and floured hands, gently shape into a round by pulling the edges toward the center to create tension on the surface.
- Let the dough rest, seam side down, for 20-30 minutes (bench rest).
- Final shaping: Flip the dough over, gently stretch it into a rectangle, then fold the sides in like a letter. Roll from the top down to create a tight package. The seam should be on the bottom.
- Prepare a proofing basket (banneton) by dusting generously with rice flour. Place the shaped dough seam-side up in the basket.
- Cover the basket and refrigerate overnight (8-12 hours) for the final proof. This cold fermentation develops flavor and makes the dough easier to handle.
- The next day, place a Dutch oven in the oven and preheat to 475°F for at least 45 minutes.
- When ready to bake, carefully remove the dough from the proofing basket onto a piece of parchment paper. Score the top with a sharp blade or bread lame to control expansion.
- Using the parchment as a sling, lower the dough into the preheated Dutch oven. Cover with the lid and bake for 25 minutes.
- Remove the lid and continue baking for another 20-25 minutes until the crust is deep golden and the internal temperature reaches at least 205°F.
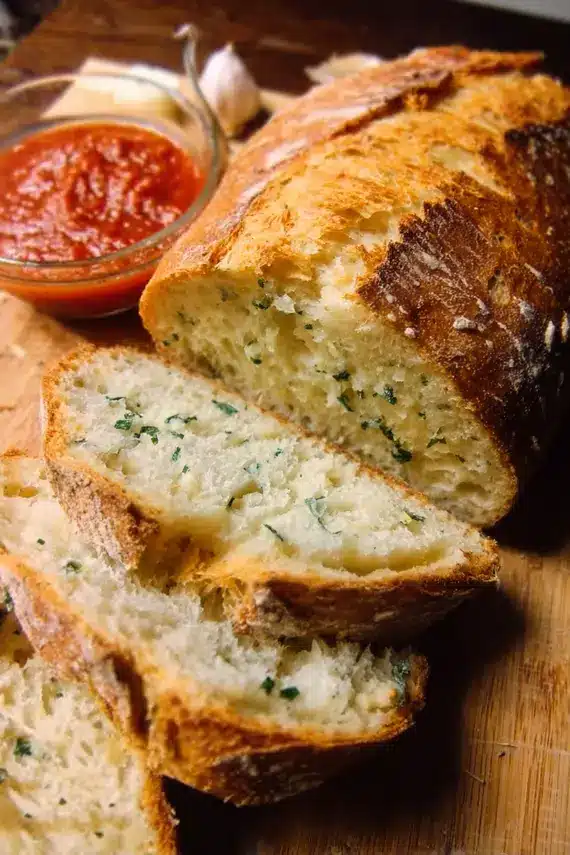
- Transfer to a wire rack and allow to cool completely (at least 2 hours) before slicing to allow the crumb structure to set.
Expert Advice for Sourdough Success Every Time
Troubleshooting Common Issues
Follow these professional tips to elevate your garlic sourdough bread from good to exceptional:
- Starter Activity Check: Your sourdough starter should at least double in size after feeding and pass the float test (a small amount should float in water) before using it in your dough.
- Temperature Control: Dough fermentation is highly temperature-dependent. Warmer rooms speed up fermentation, while cooler environments slow it down. Aim for 70-75°F for consistent results.
- Garlic Variations: For milder garlic flavor, use roasted garlic cloves instead of fresh. For more intense flavor, add a teaspoon of garlic powder along with the fresh garlic.
- Flour Choices: While bread flour provides the best structure, you can substitute up to 20% whole wheat, rye, or spelt flour for more complex flavors. Just increase water by about 5% to compensate for higher absorption.
- Scoring Technique: Score the dough about 1/4-inch deep at a 45-degree angle just before baking. This controlled cut allows for proper expansion and creates that artisanal look.
- Steaming Alternative: If you don’t have a Dutch oven, place a metal baking pan on the bottom rack of your oven during preheating. When you put your bread in to bake, add a cup of ice cubes to the hot pan to create steam.
- Test for Doneness: Besides visual cues, tap the bottom of the loaf—it should sound hollow when fully baked.
“The Creamy One-Pan Chicken and Rice recipe would pair beautifully with a slice of this garlic sourdough bread for soaking up the delicious sauce.”
Keeping Your Artisan Bread Fresh and Delicious
Maintaining Optimal Texture
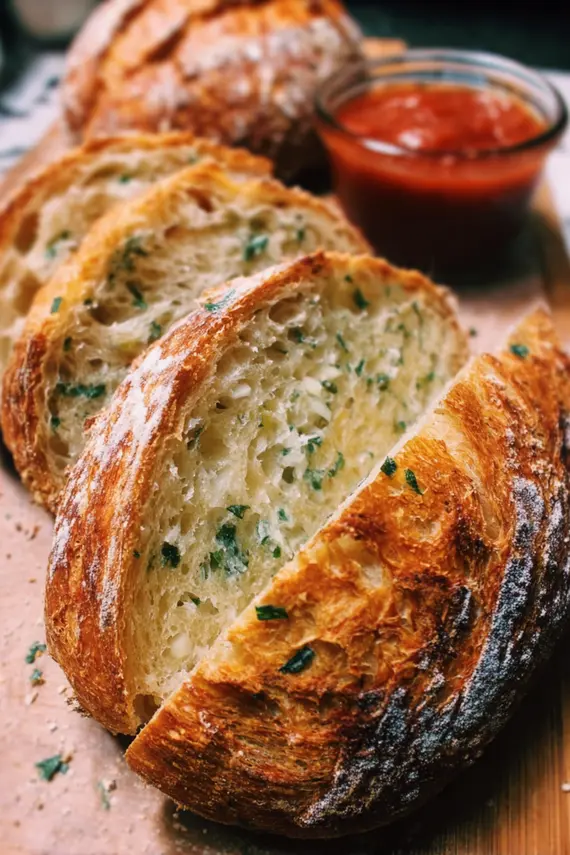
Proper storage is crucial for preserving the incredible texture contrast between the crispy crust and fluffy crumb of your garlic sourdough bread. Unlike commercial bread with preservatives, homemade sourdough requires specific storage methods.
For the first day after baking, store your cooled loaf at room temperature with the cut side down on a cutting board. This maintains the crispy crust while protecting the exposed crumb. For longer storage, wrap the bread in a clean cotton kitchen towel or place it in a paper bag to allow some air circulation while preventing it from drying out too quickly.
After the first day, you can store the bread in a bread box or a sealed container with a small vent. Avoid plastic bags, as they trap moisture and quickly soften the crust. If you’ll need more than 3-4 days to consume the loaf, consider slicing and freezing it. Frozen sourdough slices can be toasted directly from frozen with excellent results.
To refresh day-old bread, lightly sprinkle the crust with water and heat it in a 350°F oven for about 10 minutes. This revives the crust’s crispiness and makes the bread taste almost freshly baked. For bread that’s several days old, transform it into delicious garlic bread by slicing, buttering, adding extra garlic and herbs, then toasting until golden.
“If you need meal inspiration to serve with your sourdough bread, our Chicken Leg Marinade creates juicy, flavorful chicken that pairs perfectly with a slice of fresh garlic bread.”
Creative Twists on Classic Garlic Sourdough
Customizing Your Artisan Loaf
While the classic garlic sourdough is delicious on its own, these variations allow you to customize your loaf for different occasions and flavor preferences.
Roasted Garlic & Rosemary Version: Replace the sautéed fresh garlic with a whole head of roasted garlic. To prepare, cut the top off a head of garlic, drizzle with olive oil, wrap in foil, and roast at 400°F for 30-40 minutes until soft and caramelized. Squeeze the cloves out and mix with 2 tablespoons chopped fresh rosemary before incorporating into the dough. This creates a sweeter, more mellow garlic flavor with aromatic herbal notes.
Mediterranean Olive & Garlic Sourdough: Add 1 cup of chopped kalamata olives along with the garlic during folding. The briny olives complement the garlic perfectly and create beautiful purple-black spots throughout the crumb. Finish with a sprinkle of flaky sea salt on the crust before baking.
Three-Cheese Garlic Bread: Incorporate 1/4 cup each of grated Parmesan, Asiago, and pecorino Romano cheeses during the final fold with the garlic. The cheeses create pockets of savory flavor and a slightly richer texture. This version makes incredible toast for breakfast or sandwiches.
Whole Wheat Garlic Herb Loaf: Replace 150g of the bread flour with whole wheat flour for a nuttier, more rustic loaf. Add 2 tablespoons of mixed fresh herbs like thyme, oregano, and chives along with the garlic. Increase the water by about 25g to account for the whole wheat flour’s higher absorption.
Spicy Garlic Sourdough: Add 1-2 teaspoons of red pepper flakes or one finely minced jalapeño (seeds removed) along with the garlic for a bread with a pleasant heat that builds. This variation pairs exceptionally well with soups and stews.
No-Knead Overnight Version: For an even simpler approach, mix all ingredients including the garlic at once, cover, and let ferment at room temperature for 18-24 hours. Shape, proof for 1-2 hours, then bake as directed. This method requires less hands-on time but still produces excellent results.
Delightful Ways to Enjoy Your Homemade Garlic Sourdough
From Breakfast to Dinner
Your freshly baked garlic sourdough bread deserves to be showcased in ways that highlight its exceptional flavor and texture. Here are some inspired serving suggestions that make the most of your artisan creation.
For a simple yet satisfying breakfast, toast thick slices of garlic sourdough and top with smashed avocado, a sprinkle of everything bagel seasoning, and a perfectly poached egg. The crispy garlic-infused bread provides the perfect foundation for the creamy avocado and runny yolk.
Create elevated lunch sandwiches by layering roasted vegetables, hummus, and microgreens between slices of your garlic sourdough. The bread’s flavor complements rather than competes with the fillings. This healthy ground turkey taco salad can be served with garlic sourdough croutons for added texture and flavor.
For dinner entertaining, slice the loaf horizontally, spread with compound butter (mix softened butter with additional fresh herbs), then reassemble and wrap in foil. Heat in a 350°F oven until warm throughout for an impressive bread service that will have guests reaching for seconds.
Transform day-old bread into the world’s best panzanella salad by cutting it into 1-inch cubes, tossing with olive oil, and toasting until golden. Mix with ripe tomatoes, cucumber, red onion, basil, and a simple vinaigrette for a stunning side dish or light meal.
For portion sizing, one loaf generally serves 8-10 people as a side. If featuring the bread as the star of a meal (such as with dips or as part of a bread board), plan for 4-6 servings per loaf. The substantial nature of sourdough means a little goes a long way, especially with the flavorful garlic infusion.
Common Questions About Homemade Garlic Sourdough
Solutions to Your Sourdough Challenges
Can I make this bread if I don’t have a sourdough starter yet?
While a mature sourdough starter is essential for true sourdough bread, you can begin creating your own starter today. Mix equal parts (by weight) of flour and water in a jar, cover loosely, and leave at room temperature. Discard half and feed with equal parts flour and water daily. In 7-10 days, you should have an active starter ready for baking. Meanwhile, you can make a simplified version using 1/4 teaspoon instant yeast added to the initial mix, though it won’t have the same complex flavor.
Why did my bread spread out instead of rising up during baking?
Flat bread usually indicates either underproofed dough or insufficient surface tension during shaping. Make sure your starter is very active before mixing the dough. During shaping, create good tension by pulling the edges toward the center and allowing the dough to rest seam-side up in the proofing basket. Finally, ensure your dough isn’t overhydrated – if it feels too sticky to shape, you can reduce the water by 25-50g next time.
How can I get a more open, airy crumb structure?
For more open crumb, increase hydration gradually with subsequent bakes (try adding 25g more water). Use gentler handling during bulk fermentation – stretch and folds should be deliberate but gentle to preserve gas bubbles. Ensure proper fermentation by watching for signs like increased volume and visible bubbles. Finally, maintain dough temperature between 75-78°F during bulk fermentation, as cooler temperatures can result in denser bread.
Wrapping Up Your Sourdough Adventure
Celebrating Your Baking Achievement
Mastering garlic sourdough bread connects you to centuries of baking tradition while creating something truly unique to your kitchen. The process of nurturing your sourdough starter, patiently developing the dough, and finally pulling a golden, crackling loaf from the oven offers satisfaction beyond the delicious result. Each loaf becomes a reflection of your environment, ingredients, and technique—truly a living craft.
Remember that sourdough baking is as much about the journey as the destination. Even professional bakers continue to learn with every loaf, so embrace the occasional flat bread or dense crumb as part of the experience. The wonderful thing about sourdough is that even imperfect loaves are usually delicious.
We hope this recipe becomes a staple in your baking repertoire, adapting to your preferences and needs over time. Share your freshly baked garlic sourdough with friends and family to spread the joy of artisan bread. “The Broccoli Casserole makes a perfect companion to a slice of this garlic sourdough bread for a complete and satisfying meal.”
For those with a sweet tooth, don’t forget to check out our “Oreo Peanut Butter Truffles” for a delightful dessert to follow your garlic sourdough feast. Happy baking, and may your bread always rise beautifully!
PrintGarlic Sourdough Bread
- Homemade garlic sourdough bread with a perfectly crispy crust and fluffy, aromatic interior.
- The slow fermentation process develops deep flavor notes that can’t be replicated in quick-rise breads.
- This artisan loaf elevates everything from breakfast toast to dinner accompaniments.
- Prep Time: 30
- Cook Time: 45
- Total Time: 1 hour 15 minutes
- Yield: 1 large loaf (12 slices) 1x
- Category: Breakfast & Brunch
- Method: Baking
- Cuisine: Artisan
Ingredients
- 150g active sourdough starter (about 3/4 cup)
- 500g bread flour (about 4 cups)
- 350g water, room temperature (about 1 1/2 cups)
- 10g fine sea salt (about 2 teaspoons)
- 6–8 cloves fresh garlic, minced
- 2 tablespoons extra virgin olive oil
- Rice flour for dusting proofing basket
Instructions
- Combine sourdough starter, bread flour, and 325g water in a large bowl. Mix until no dry flour remains. Cover and rest for 30 minutes.
- Add salt and remaining water, gently working them in with wet hands. Perform 4-5 stretch and folds in the bowl.
- Cover the dough and rest for 30 minutes at room temperature (70-75°F).
- Meanwhile, heat olive oil in a small pan over low heat. Add minced garlic and sauté for 2-3 minutes until fragrant but not browned. Cool completely.
- Perform your first set of stretch and folds (grab dough, stretch up and fold over itself, rotate bowl 90° and repeat 3 more times).
- Cover and rest for 30 minutes. Perform a second set of stretch and folds.
- During the third set (30 minutes later), gently spread the cooled garlic and oil over the dough. Incorporate through the stretching and folding process.
- Cover and allow to bulk ferment for 3-4 hours total from when you mixed in the salt. Dough should increase by about 50%.
- Turn dough onto a lightly floured surface. Shape into a round by pulling edges toward the center. Let rest seam-side down for 20-30 minutes.
- For final shaping, flip dough over, stretch into a rectangle, fold sides in like a letter, then roll from top down into a tight package.
- Prepare a proofing basket by dusting with rice flour. Place shaped dough seam-side up in the basket.
- Cover and refrigerate overnight (8-12 hours) for final proof.
- Place Dutch oven in oven and preheat to 475°F for at least 45 minutes.
- Remove dough from proofing basket onto parchment paper. Score the top with a sharp blade.
- Using parchment as a sling, lower dough into preheated Dutch oven. Cover with lid and bake for 25 minutes.
- Remove lid and continue baking 20-25 minutes until deep golden and internal temperature reaches at least 205°F.
- Transfer to wire rack and cool completely (at least 2 hours) before slicing.
Notes
- Your sourdough starter should be very active and bubbly before use – feed it 8-12 hours before making your dough.
- The cold overnight proof develops flavor and makes the dough easier to handle.
- For best results, use a kitchen scale to measure ingredients precisely.
- Nutrition facts are estimates and may vary based on ingredients used, portion sizes, and preparation methods.
Nutrition
- Serving Size: 1 slice
- Calories: 185
- Sugar: 0.5
- Sodium: 195
- Fat: 3
- Saturated Fat: 0.5
- Unsaturated Fat: 2.5
- Carbohydrates: 33
- Fiber: 1.5
- Protein: 6
Keywords: garlic sourdough bread, sourdough starter, artisan bread, crispy crust, fluffy crumb, homemade bread
Let’s connect! Follow me for more Joylicious Recipes: Facebook, Instagram, Pinterest