Easy Bannock Recipe: Traditional Indigenous Flatbread Made Simple
Bannock is a traditional flatbread with deep roots in Indigenous North American cultures, particularly among First Nations, Métis, and Inuit communities. This simple yet versatile bread has sustained generations of Indigenous peoples and has evolved over centuries from a basic survival food to a celebrated cultural dish. Originally made with simple ingredients like flour and water, bannock was cooked over open fires during hunting expeditions and gatherings. Today, this humble bread represents resilience, tradition, and the sharing of cultural knowledge across generations.
What Makes Bannock Special
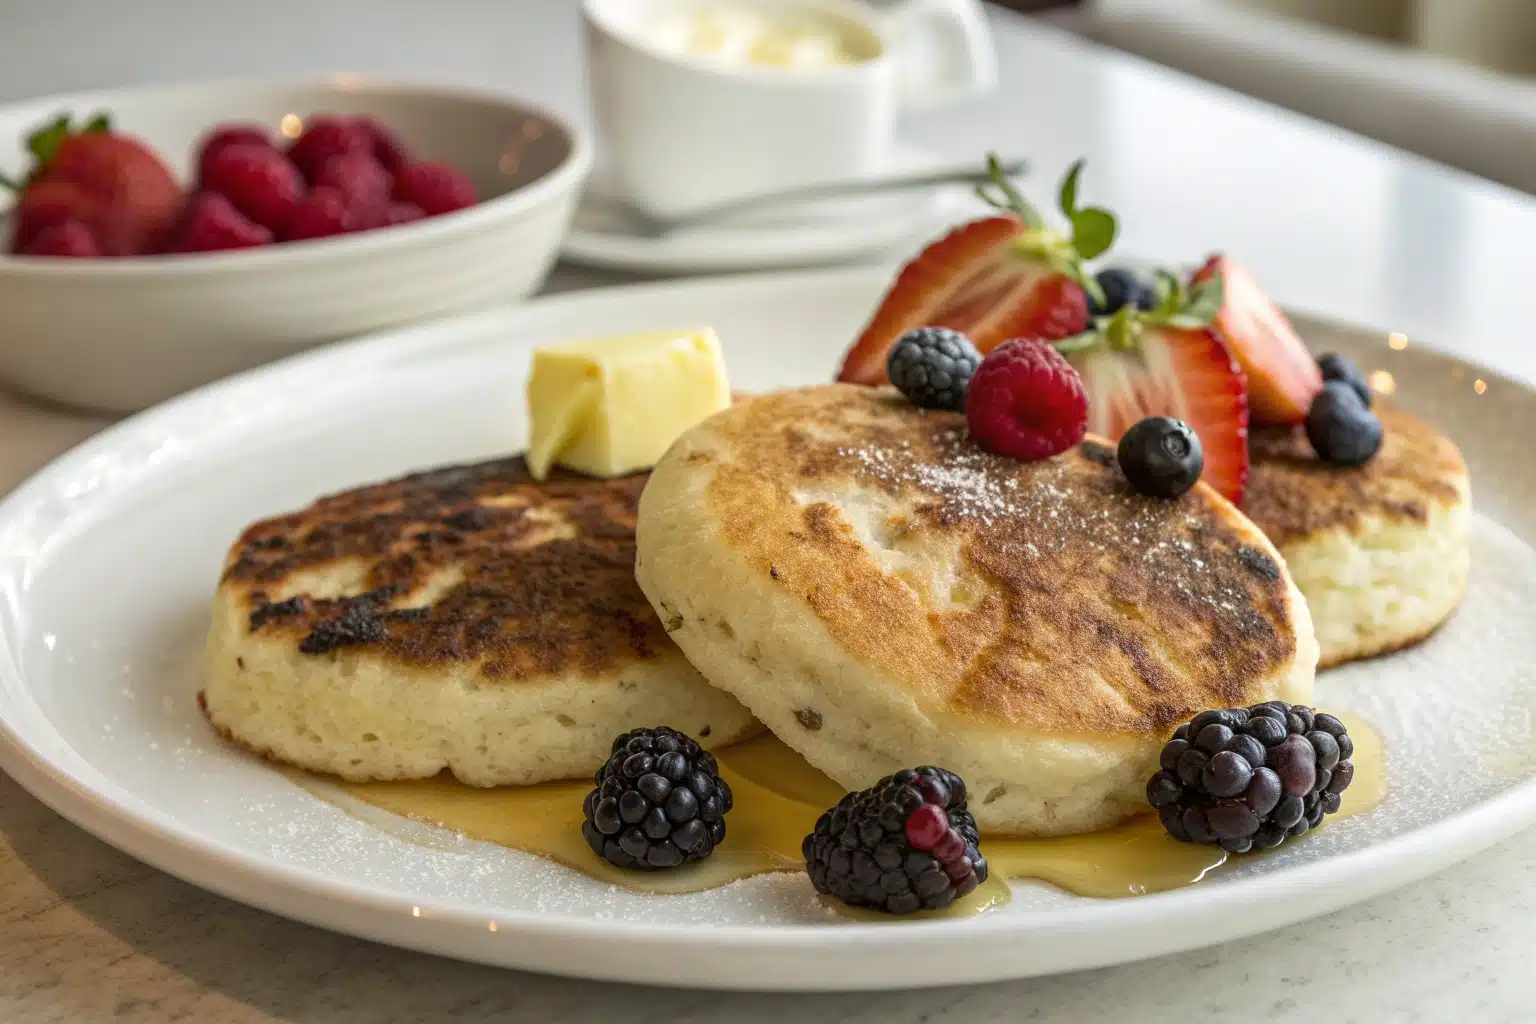
Unlike conventional yeasted breads, bannock is a quick bread that doesn’t require rising time or complex techniques. Its unique texture—crispy on the outside and soft, slightly dense on the inside—makes it instantly recognizable. Bannock is remarkably versatile; it can be fried, baked, or even cooked on a stick over an open fire. The simplicity of bannock is perhaps its greatest strength, allowing for countless variations while maintaining its distinctive character. Whether enjoyed as a side dish, a base for toppings, or simply on its own, bannock offers a delicious connection to Indigenous food traditions.
Ingredients and Preparation
Understanding Bannock Basics
Traditional bannock requires just a few pantry staples, making it an accessible bread for anyone to prepare. The foundation of good bannock lies in maintaining the right ratio of dry to wet ingredients. While historically bannock might have been made with whatever flours were available, modern recipes typically use all-purpose flour for consistent results. Baking powder provides the necessary lift without requiring yeast or proofing time.
“If you enjoy simple, delicious bread recipes, you might also appreciate our Condensed Milk Bread Recipe for another quick option.”
Essential Ingredients List
| Ingredient | Amount | Purpose |
|---|---|---|
| All-purpose flour | 2 cups | Base structure |
| Baking powder | 2 teaspoons | Leavening agent |
| Salt | 1/2 teaspoon | Flavor enhancer |
| Olive or vegetable oil | 1 tablespoon | Adds moisture and tenderness |
| Water | 3/4 cup | Creates dough consistency |
| Vegetable oil for frying | As needed | Cooking medium |

Step-by-Step Bannock Recipe
Mixing the Dough
Preparing bannock dough is straightforward, but attention to detail makes all the difference. Begin by whisking your dry ingredients thoroughly in a large bowl. This ensures the baking powder and salt are evenly distributed throughout the flour, resulting in consistent texture and flavor. When adding the oil, use a fork to distribute it evenly throughout the dry mixture—this creates tiny pockets of fat that will contribute to the bannock’s tender texture. As you gradually add water, the dough will begin to come together. Stop adding water when the dough is just moist enough to hold together without being overly sticky.
Shaping and Cooking Techniques
- In a large bowl, thoroughly whisk together 2 cups all-purpose flour, 2 teaspoons baking powder, and 1/2 teaspoon salt.
- Add 1 tablespoon olive or vegetable oil and whisk with a fork until evenly distributed.
- Gradually add 3/4 cup water while stirring until the dough almost holds together.
- Transfer the dough to a lightly floured surface and gently knead about 10 times just until it comes together (avoid overworking).
- Divide the dough into 5 equal balls and flatten each with the palm of your hand to about 1/2-inch thickness.
- Heat enough vegetable oil to cover the bottom of a medium frying pan to 350°F (175°C).
- Carefully place the flattened dough pieces in the hot oil, cooking until golden brown (about 2-3 minutes per side).
- Remove with a slotted spoon and drain on paper towels before serving.
“Looking for more delicious bread options? Check out our No-Knead Seeded Oat Bread for another easy homemade recipe.”
Recognizing When Bannock Is Done
Perfectly cooked bannock displays a golden-brown exterior with a slightly puffy appearance. When pressed gently, the center should feel firm but still have some give—similar to a well-cooked pancake. If you’re uncertain, you can insert a toothpick into the thickest part; it should come out clean or with just a few moist crumbs. The cooking time will vary based on the thickness of your bannock and your cooking method, so visual cues are more reliable than strict timing. Listen for the sizzle to quiet down as the moisture cooks out, which is another indicator that your bannock is nearing completion.

Essential Tips and Tricks
Avoiding Common Mistakes
The path to perfect bannock has a few potential pitfalls. One common mistake is overworking the dough, which develops gluten and results in tough, chewy bannock rather than tender bread. Handle the dough with a light touch, kneading just enough to bring it together. Another frequent error is cooking with oil that’s not hot enough, which allows the dough to absorb excess oil and become greasy. Test your oil by dropping a tiny piece of dough—it should sizzle immediately but not smoke. Finally, don’t rush the cooking process; bannock needs time to cook through the center while developing that characteristic golden crust.
Perfecting Your Technique
Achieving consistent results with bannock comes down to developing an intuitive feel for the dough. The ideal bannock dough should be slightly tacky but not sticky enough to cling to your fingers. If your dough feels too wet, add flour a tablespoon at a time; if too dry, add water by the teaspoon. The thickness of your bannock affects both cooking time and texture—thinner pieces cook faster and become crispier, while thicker pieces stay softer in the center.
“Want to explore different flatbread techniques? Our Crispy Bagel Bites Recipe offers another delicious option for bread lovers.”
Adjusting for Different Cooking Methods
While frying produces traditional bannock with its characteristic crispy exterior, you can adapt this versatile bread to different cooking methods. For baked bannock, preheat your oven to 400°F (200°C) and bake on a greased baking sheet for 20-25 minutes until golden. For campfire cooking, wrap the dough around a clean stick and hold over the fire, rotating frequently until cooked through. Each method imparts a slightly different character to the bannock—fried versions are more indulgent with a pronounced crispness, baked versions are lighter and less oily, while campfire bannock takes on smoky notes that complement its rustic texture.
Storing and Preserving
Short-Term Storage Solutions
Bannock is best enjoyed fresh, but proper storage can help maintain its quality for a short period. Once completely cooled, place leftover bannock in an airtight container lined with paper towels to absorb any excess moisture. At room temperature, properly stored bannock will keep for 1-2 days before the texture begins to deteriorate. To refresh day-old bannock, wrap it in foil and warm in a 300°F (150°C) oven for about 10 minutes, or briefly toast individual pieces to restore some crispness to the exterior.
Freezing and Reheating Guidelines
For longer storage, bannock freezes surprisingly well. Allow the bread to cool completely, then wrap individual pieces tightly in plastic wrap followed by aluminum foil or place them in freezer-safe bags with the air pressed out. Properly frozen bannock can maintain good quality for up to 3 months.
“If you’re interested in make-ahead breakfast options, don’t miss our Overnight Berry Breakfast Casserole for another convenient recipe.”
Making Bannock Ahead of Time
If you’re planning to serve bannock for a special occasion, you can prepare elements in advance. The dry ingredients can be mixed and stored in an airtight container for several weeks. For partially prepared bannock, mix the dough up to the point of dividing and shaping, then wrap tightly and refrigerate for up to 24 hours. Let the chilled dough sit at room temperature for 30 minutes before shaping and cooking. You can also fully cook the bannock ahead of time, freeze as directed above, and reheat just before serving for nearly fresh-tasting results.
Delicious Variations
Sweet Options
Transforming traditional bannock into a sweet treat opens up a world of possibilities. For cinnamon-sugar bannock, mix 1/4 cup sugar with 1 tablespoon cinnamon and sprinkle over freshly cooked bannock while still warm. Berry bannock incorporates 1/2 cup of fresh or frozen blueberries, cranberries, or saskatoon berries into the dough before cooking. For a decadent version, drizzle cooked bannock with honey or maple syrup and dust with powdered sugar. Sweet bannock makes an excellent breakfast or dessert option, especially when paired with fresh fruit or a dollop of whipped cream.
Savory Twists
Savory variations can turn bannock into a substantial accompaniment for meals or a standalone snack. Herb bannock incorporates 2 tablespoons of fresh herbs like rosemary, thyme, or chives into the dough. Cheese bannock adds 1/2 cup of grated cheddar, parmesan, or other firm cheese to the mixture before cooking. For garlic bannock, add 2 minced garlic cloves and a tablespoon of dried parsley to the dough.
“For more ideas on savory bread options, check out our Cheesy Garlic Chicken Wraps that would pair wonderfully with bannock.”
Regional and Cultural Variations
Across North America, different Indigenous communities have developed their own distinctive bannock traditions. In the Pacific Northwest, bannock might include ingredients like seaweed or seafood. Prairie versions often incorporate wild berries or game meat. In Alaska and northern Canada, bannock might be made with rendered animal fat instead of oil for additional flavor and calories. Some modern Indigenous chefs are creating fusion versions that incorporate international flavors while honoring traditional techniques. These regional variations reflect the adaptability of bannock and its continued evolution as a living cultural food tradition.
Serving and Perfect Pairings
Traditional Accompaniments
In many Indigenous communities, bannock has traditionally been served alongside hearty stews, soups, and wild game. The bread’s neutral flavor and sturdy texture make it perfect for sopping up rich broths and sauces. Common traditional pairings include venison stew, buffalo soup, or salmon chowder. Bannock is also frequently enjoyed with berry preserves or jams made from foraged fruits like chokecherries, saskatoon berries, or wild blueberries. These classic combinations highlight the bread’s role as both a practical staple and a vehicle for seasonal flavors.
Modern Serving Suggestions
Today’s culinary landscape offers endless possibilities for serving bannock. Use it as a base for Indigenous-inspired tacos topped with bison, corn, and wild herbs. Create breakfast sandwiches with eggs, bacon, and maple-infused cheese. For appetizers, cut bannock into small pieces and top with smoked fish, berries, and crème fraîche. Bannock also makes an excellent accompaniment to contemporary salads, adding substance and texture to lighter fare. Its versatility allows it to bridge traditional and modern cuisine while maintaining its cultural significance.
Bannock as a Meal Component
Bannock can easily transition from side dish to main event. Create bannock pizzas by topping freshly cooked pieces with sauce, cheese, and toppings before briefly broiling. For a hearty breakfast, serve bannock with eggs and traditional ingredients like wild onions or foraged mushrooms.
“Want to explore more breakfast ideas? Try our Breakfast Twice Baked Potatoes for another satisfying morning meal option.”
Bannock wraps filled with smoked meat, fresh vegetables, and herb-infused spreads make satisfying lunches. The bread’s ability to complement both simple and complex flavors makes it an infinitely adaptable component in countless meal combinations.

Frequently Asked Questions
What is bannock made of?
Bannock is usually made from flour, baking powder, salt, water, and a bit of fat such as oil or butter. While older versions used whatever flours or fats were available, today’s recipes often rely on all-purpose flour and vegetable oil. Variations may include berries, herbs, or cheese.
What makes bannock different from bread?
Unlike yeast bread, bannock is a quick bread that uses baking powder, so it doesn’t need time to rise. It’s denser, often fried or cooked over fire, and develops a crispy exterior. Though it can be baked, it doesn’t have the airy texture of yeast-based loaves.
Is bannock a bread or a biscuit?
Bannock sits between the two. It has the heft of bread but uses chemical leavening like biscuits. The result is denser than most breads but lighter than many biscuits, making it a category of its own.
What is the difference between a bannock and a scone?
Scones usually include eggs and dairy, giving them a richer, cake-like quality, and they’re always baked. Bannock, on the other hand, relies on a simpler water-based dough and is traditionally fried or cooked as a single piece before being cut.
Is bannock sweet or savory?
By itself, bannock is neutral in flavor, which makes it versatile. It can lean sweet with berries or honey, or savory with cheese and herbs.
Do I need baking powder for bannock?
Yes, baking powder is key for lift and texture. Without it, bannock turns out flat and heavy. A mix of baking soda and an acid like lemon juice can work as a substitute.
Conclusion
Connecting Through Traditional Foods
Bannock serves as more than just sustenance—it’s a tangible connection to Indigenous cultural heritage and food traditions. By preparing and sharing bannock, we participate in a culinary practice that spans generations and connects diverse communities across North America. The continued popularity of bannock speaks to both its practical value as an accessible, satisfying food and its deeper significance as a symbol of Indigenous resilience and adaptation.
“For those interested in exploring more cultural recipes, discover our Venezuelan Desserts collection for another window into traditional foods.”
Preserving Indigenous Food Knowledge
As interest in Indigenous cuisine grows, bannock provides an accessible entry point for learning about traditional food systems and knowledge. By acknowledging bannock’s origins and cultural context, we can appreciate this bread as part of a rich culinary heritage rather than just a simple recipe. Many Indigenous chefs and food educators are working to preserve and share traditional preparation methods while adapting bannock for contemporary contexts. These efforts ensure that the knowledge and practices associated with bannock continue to thrive and evolve for future generations to enjoy and learn from.
PrintBannock

Traditional Indigenous flatbread that’s crispy on the outside and soft inside.
- Prep Time: 10 minutes
- Cook Time: 10 minutes
- Total Time: 20 minutes
- Yield: 5 pieces 1x
- Category: Breakfast
- Cuisine: Canadian
Ingredients
- 2 cups all purpose flour
- 2 teaspoons baking powder
- ½ teaspoon salt
- 1 tablespoon olive oil or vegetable oil
- ¾ cup water
- vegetable oil for frying
Instructions
- Whisk flour, baking powder, and salt in a large bowl.
- Add olive oil and mix with a fork.
- Gradually add water until dough almost holds together.
- Transfer to floured surface and gently knead about 10 times.
- Divide into 5 balls and flatten each with your palm.
- Heat oil in a frying pan to 350°F (175°C).
- Fry until golden brown on both sides (2-3 minutes per side).
- Drain on paper towels and serve warm.
Notes
Nutrition facts are estimates and may vary based on ingredients used, portion sizes, and preparation methods.
Nutrition
- Serving Size: 5 pieces
- Calories: 210
- Sugar: 0g
- Sodium: 390mg
- Fat: 4g
- Saturated Fat: 0.5g
- Carbohydrates: 38g
- Fiber: 1g
- Protein: 5g
- Cholesterol: 0mg
Keywords: bannock, indigenous bread, flatbread, fried bread, quick bread
Let’s connect! Follow me for more Joylicious Recipes: Facebook, Instagram, Pinterest