Cherry Garcia Ice Cream – Your Complete Homemade Version Of The Famous Favorite
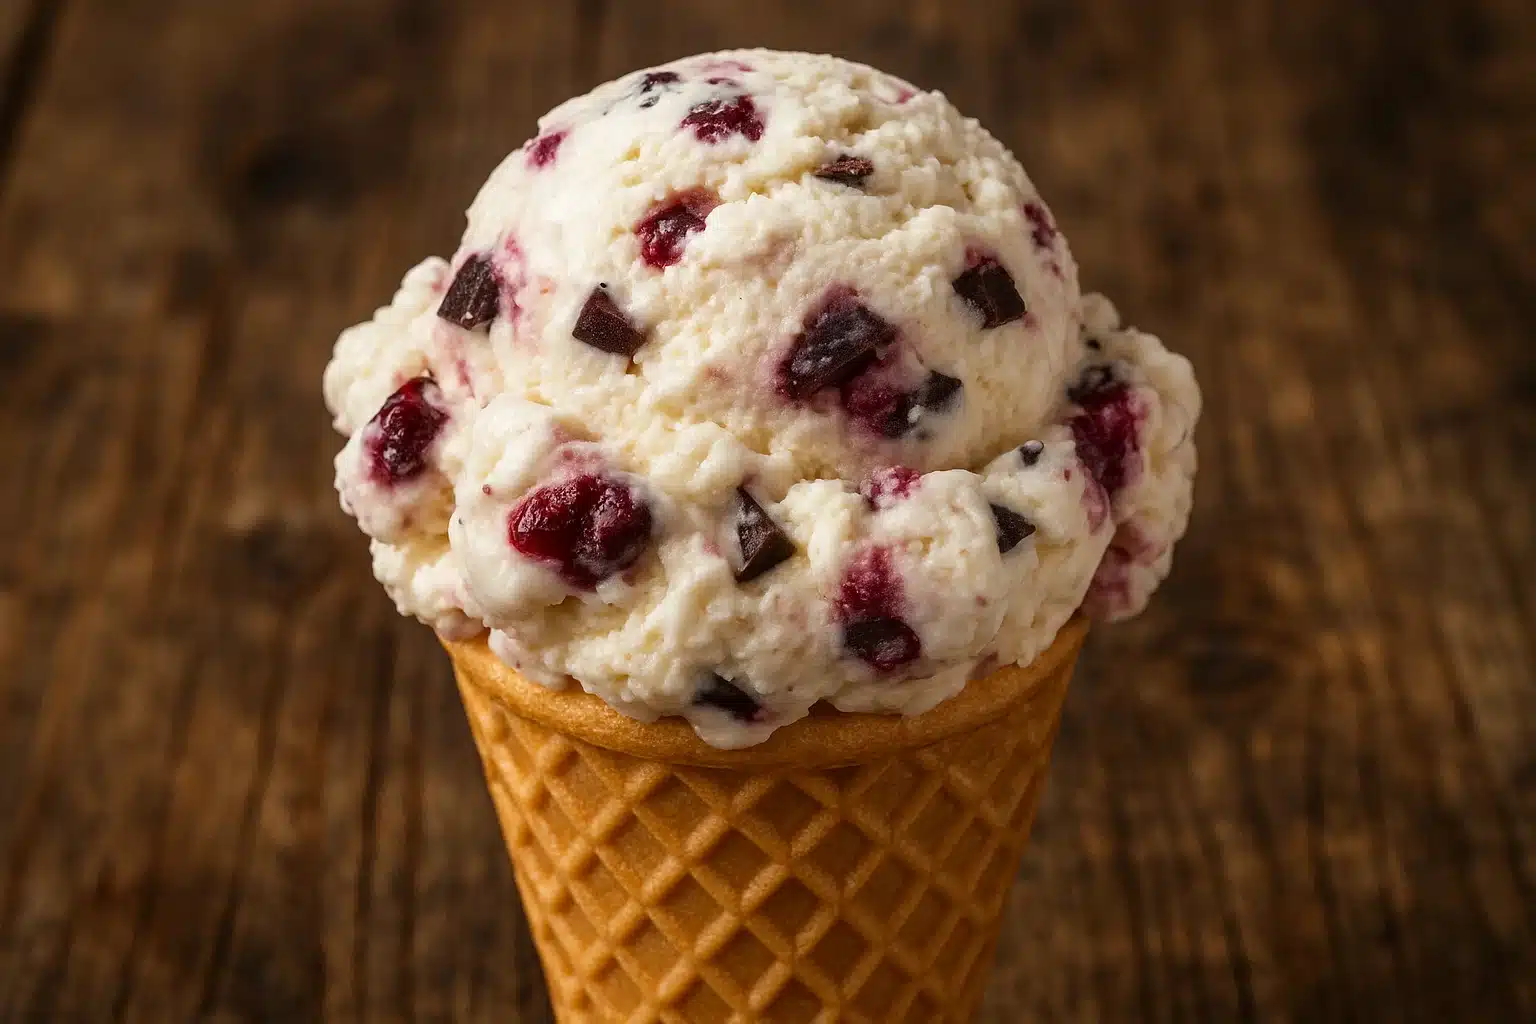
If you love creamy desserts with bold flavors, chances are you’ve fallen for cherry garcia ice cream. This beloved mix of cherries, dark chocolate, and rich cream is more than just a sweet treat—it’s an icon. Whether you’re a long-time Ben & Jerry’s fan or simply curious about making ice cream at home, this guide is for you.
In this article, you’ll discover how to make Cherry Garcia from scratch. We’ll start with its history, break down the ingredients, and show you step-by-step how to churn your own batch. Additionally, we’ll share how to make a no-churn version, explore storage tips, and even offer some flavor variations.
Looking for inspiration? Try this Vegan Ice Cream Recipe if you’re avoiding dairy but still want something indulgent.
The History Behind Cherry Garcia Ice Cream
Origin and Creation by Ben & Jerry’s
To truly appreciate Cherry Garcia, it helps to know its backstory. In 1987, a fan sent Ben & Jerry’s a postcard suggesting they create a flavor honoring Jerry Garcia, guitarist of the Grateful Dead. As a result, the team blended cherry and chocolate into a vanilla base—and just like that, Cherry Garcia was born.
It wasn’t just a clever marketing move. Rather, it was a flavor combination that made sense and appealed to a broad audience. By naming it after a rock icon, Ben & Jerry’s connected music culture and ice cream lovers in a way no one had done before.
Soon after its release, it became one of the company’s top-selling flavors. Even today, Cherry Garcia remains one of the brand’s most enduring hits.
Why It Became a Cultural Phenomenon
So, what exactly made it stand out? First of all, it used real cherries and real chocolate, not artificial syrup or imitation flavors. As a result, it delivered a freshness that other cherry ice creams lacked.
Secondly, it told a story. Most ice creams don’t come with a backstory or a cultural tie-in. However, Cherry Garcia did both. It honored a musical legend while satisfying a universal craving for fruit-and-chocolate desserts.
Even decades later, the flavor still resonates. That’s because it blends nostalgia, quality, and storytelling into every single bite.
What Makes Cherry Garcia Ice Cream Special?
Signature Flavor & Texture of Cherry Garcia Ice Cream
Cherry Garcia ice cream isn’t just popular because of the name—it’s loved for its bold, satisfying flavor and unique texture. At its core, the combination of sweet cherries and rich chocolate chunks creates a balance that appeals to nearly everyone. Unlike overly sweet or one-note ice creams, this one layers fruity brightness with deep, bittersweet richness.
The base usually features a silky vanilla custard that brings depth and creamy richness. But it’s the mix-ins that do the heavy lifting. The cherries provide a natural tartness, while the chocolate adds crunch and depth. Together, they deliver contrast in every bite—soft fruit against solid chocolate, all wrapped in silky cream.
In addition, the ice cream has a mouthfeel that’s thick but not too heavy. Because it uses both egg yolks and heavy cream, it coats your palate without feeling overly fatty. It’s indulgent, but not overwhelming.
Core Ingredients: Cherries, Chocolate, and Cream
To fully understand what sets this flavor apart, you need to look at its three core ingredients:
1. Cherries:
Real cherries—not syrup, not extract—are essential. The original recipe uses sweet cherries, which are pitted, cooked down, and folded in. These aren’t overly tart like sour cherries. Instead, they’re deep, jammy, and slightly tangy. This adds complexity without overpowering the cream.
2. Chocolate Chunks or Chips:
Most homemade recipes use either semi-sweet or dark chocolate chips, while some people prefer hand-chopped chocolate for a rustic feel. When mixed into the churned ice cream, they provide that unmistakable bite. Moreover, the size and placement of these chunks matter. They should be just large enough to chew but not so big they freeze too hard.
3. Custard Cream Base:
Unlike simple ice creams made with just milk and sugar, Cherry Garcia uses a custard base, meaning it includes egg yolks. This gives it a thicker consistency and a richer taste. Combined with heavy whipping cream and whole milk, it turns into a luxurious base that holds up well to mix-ins.
Don’t miss our Ice Cream Cones Guide for creative ways to serve this legendary treat.
As you can see, every element is designed to work in harmony. The result? An ice cream that delivers flavor and texture in perfect balance, bite after bite.
How to Make Cherry Garcia Ice Cream at Home
Ingredients & Equipment Needed
To recreate the magic of cherry garcia ice cream at home, start with these essentials:
Ingredients:
- 1 ½ lbs fresh cherries
- 1 ½ cups whole milk
- 2 cups heavy whipping cream
- 6 large egg yolks
- 1 ¼ cups granulated sugar
- 1 teaspoon lemon juice
- 1 teaspoon vanilla extract
- ¾ cup chocolate chips or chunks
- Pinch of salt
Kitchen Tools:
- Ice cream maker (or see for no-churn method)
- Medium saucepan
- Whisk
- Mixing bowls
- Fine mesh strainer
- Hand mixer (optional)
- Freezer-safe container
Step-by-Step: Churning Cherry Garcia Ice Cream with a Machine
Step 1: Freeze the Churn Bowl
Before anything else, place your ice cream maker bowl in the freezer. It should chill for several hours, or ideally overnight. This step ensures your base churns properly.
Step 2: Prepare the Cherries
Start by pitting all the cherries. Divide them into two portions—1 pound and ½ pound.
Add the 1 lb portion to a saucepan with ¼ cup of sugar. Let this sit for 30 minutes to allow the cherries to macerate and release their juices.
As that rests, slice the other ½ pound of cherries and place them in a bowl for later.
Step 3: Create the Custard Base
Fill a large bowl with ice and nest a medium bowl inside it. This ice bath will cool the custard later.
In a separate pot, heat the milk over medium-low, stirring regularly.
While it warms, whisk together egg yolks and 1 cup sugar until smooth.
Once the milk hits 195°F, slowly pour it into the egg-sugar mix while whisking. This prevents the eggs from curdling.
Pour everything back into the saucepan and cook on medium heat, whisking constantly until the mixture thickens. If it starts to lump, just keep whisking.
Strain the custard into the bowl over ice. Cover and refrigerate for 2 hours until fully chilled.
Step 4: Cook the Cherry Sauce
Once the macerated cherries have rested for 30 minutes, add lemon juice and heat over medium. Simmer until the cherry juices reduce to a syrup, about 30 minutes.
Strain through a mesh sieve, saving both the cherry sauce and the softened cherries separately.
Step 5: Mix the Ice Cream Base
Remove the chilled custard from the fridge. Whisk in the heavy cream, cherry syrup, vanilla, and a pinch of salt. Stir until smooth and creamy.
Step 6: Churn the Base
Pour the mixture into your ice cream maker. Churn for 20 minutes, or until it resembles soft serve. This is when the magic starts!
Step 7: Add the Mix-Ins
Toss in the chopped raw cherries, cooked cherries, and chocolate chunks. Churn for another 15 minutes to blend the add-ins evenly throughout.
Step 8: Freeze Until Firm
Spoon the freshly churned ice cream into a freezer-safe container. Smooth the top, cover tightly with plastic wrap, and freeze for 3 to 4 hours or until scoopable.
Looking for other creative frozen treats? Don’t miss our Berries and Cream dessert idea—it’s fruity, fast, and fun!
No-Churn Cherry Garcia Ice Cream Recipe
Ingredients for No-Churn Cherry Garcia
If you don’t own an ice cream maker, don’t worry—you can still enjoy homemade cherry garcia ice cream with a no-churn method that’s just as satisfying. This version skips the custard cooking and delivers rich, creamy texture using whipped cream and sweetened condensed milk.
You’ll Need:
- 1 ½ lbs fresh cherries (pitted)
- 2 cups heavy whipping cream
- 14 oz can sweetened condensed milk
- 1 teaspoon vanilla extract
- ¾ cup chocolate chips or chopped chocolate
- ¼ cup granulated sugar
- 1 teaspoon lemon juice
Making Cherry Garcia Ice Cream Without a Machine
Step 1: Prep the Cherries
Just like the churned version, start by pitting all the cherries. Separate them into 1 pound and ½ pound portions.
Add the 1 pound of cherries to a saucepan along with ¼ cup sugar. Let them sit for 30 minutes to macerate and release juice.
While that rests, roughly chop the remaining ½ pound and keep them aside.
Step 2: Cook the Cherry Sauce
After macerating, add lemon juice and simmer the cherries over medium heat. Simmer for roughly 30 minutes, or until the mixture thickens into a syrup.
Strain through a sieve, separating the cherry sauce from the softened fruit. Save both for later.
Step 3: Whip the Cream Base
In the bowl of a stand mixer, pour in the cold heavy whipping cream. Beat on high until soft peaks form. You want the texture thick but still smooth.
Step 4: Fold the Ice Cream Mixture
Gently fold in the sweetened condensed milk, vanilla extract, and cherry syrup. Stir carefully to avoid deflating the whipped cream.
Then, fold in the cooked cherries, chopped cherries, and chocolate chunks until everything is evenly distributed.
Step 5: Freeze It Firm
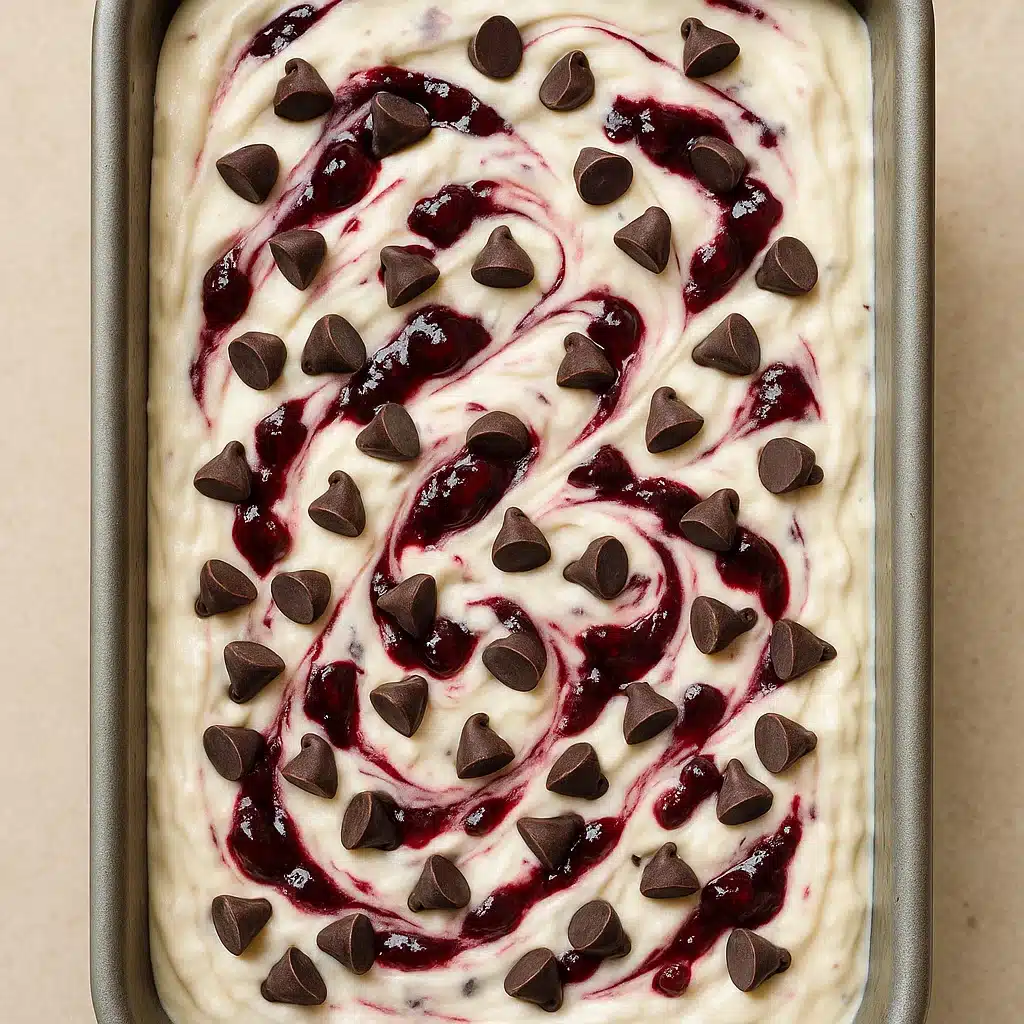
Pour the final mixture into a 9x5x3-inch loaf pan or any freezer-safe container. Cover the surface tightly with plastic wrap to prevent freezer burn.
Freeze for at least 5 hours, or until the ice cream is fully set and scoopable.
Check out Cookie Dough Bites for a fun topping idea to pair with your no-churn creation!
Custard vs. Cream Base in Cherry Garcia Ice Cream
What Is a Custard Ice Cream Base?
A custard base is one of the most traditional and luxurious methods of making ice cream. It uses egg yolks, milk, and cream to create a thick, velvety foundation. The eggs are slowly cooked with the milk to form a smooth, pudding-like consistency, which gives the final ice cream a rich flavor and ultra-creamy texture.
In the case of cherry garcia ice cream, the custard base plays a vital role. It holds up well to heavier mix-ins like cherries and chocolate chunks without becoming icy or watery. In addition, it helps lock in flavor, ensuring each bite is as delicious as the last.
Using a custard base does take more time and care. You’ll need to temper eggs, monitor temperature, and stir constantly to prevent scrambling. However, the payoff is huge—this style of base results in a dense, scoop-shop-quality dessert.
How the Base Impacts Cherry Garcia’s Flavor
So why does custard matter in a recipe like this? First off, egg yolks add depth. They provide a slight savoriness that balances the sweetness of the cream, cherries, and sugar. This makes the flavor feel complex rather than one-note.
Secondly, a custard base delivers superior mouthfeel. It coats your tongue with richness, creating that creamy satisfaction you expect from a premium scoop. It’s what makes cherry garcia ice cream feel indulgent without being overly heavy.
By contrast, simpler bases (like those in no-churn recipes) may lack that same body or richness. They’re lighter and easier to prepare, but the flavor can be more straightforward.
Still, both approaches have their place. If you want classic, scoopable texture with full-on indulgence, go with the custard. But if you’re short on time or tools, the cream-only no-churn version is a worthy alternative.
Don’t miss our Banana Chocolate Chip Cookies—they make the perfect side to a cherry-filled scoop!
Choosing the Best Cherries for Cherry Garcia Ice Cream
Fresh, Frozen, or Dried: Which Cherries Work Best?
Choosing the right type of cherry is one of the most important decisions in crafting this ice cream. The original Cherry Garcia uses sweet cherries, which bring a natural, rich flavor and vibrant color to the mix. But not all cherries are created equal—so let’s break it down.
Fresh Cherries:
Whenever possible, go with fresh, sweet cherries like Bing or Rainier. They offer the best texture, juiciness, and bold cherry flavor. Fresh cherries also retain their bite after cooking, which adds texture to your ice cream.
Frozen Cherries:
If fresh cherries aren’t in season, frozen cherries are the next best thing. They’re usually picked and frozen at peak ripeness, so you still get good flavor. Just be sure to thaw and drain them thoroughly to avoid watering down your base.
Dried Cherries:
While dried cherries aren’t ideal for the cherry sauce, they can work as mix-ins. However, they must be chopped and soaked in warm water or juice beforehand to soften them. Otherwise, they’ll be too chewy and can harden when frozen.
Tip: Always taste your cherries before using them. If they’re bland, your ice cream will be too. Aim for cherries that are juicy, sweet, and just a bit tart.
Cooking Cherry Sauce for Cherry Garcia
Once you’ve selected your cherries, it’s time to extract their flavor in the form of a cherry sauce. This concentrated mix adds color, sweetness, and a touch of tartness to the ice cream base.
Begin by mixing 1 pound of pitted cherries with ¼ cup of sugar. Let them sit for 30 minutes to release their natural juices (a process called maceration). After that, add lemon juice and cook the mixture over medium heat.
Let it simmer until the liquid reduces to a thick syrup—this usually takes about 30 minutes. Stir occasionally to prevent sticking. When done, strain the mixture through a mesh sieve. Save both the cooked cherries and the syrup separately.
The syrup will be blended into the custard or whipped base, and the softened cherries will be added later as a mix-in. This technique not only intensifies the flavor but also helps avoid icy textures in the final product.
Looking for more cherry dessert ideas? Don’t miss our Cherry-Infused Recipes collection for seasonal inspiration.
Chocolate in Cherry Garcia Ice Cream – Chunks vs Chips
What Kind of Chocolate Works Best?
The chocolate component in cherry garcia ice cream provides that irresistible bite that balances the creaminess and fruitiness. But not all chocolate is created equal when it comes to frozen desserts.
Semi-sweet chocolate is the most common choice. It offers a pleasant balance between bitterness and sweetness, and it pairs exceptionally well with cherries. You can use either chocolate chips or chopped chocolate bars, depending on your texture preferences.
Dark chocolate is a popular upgrade. It delivers a more intense cocoa flavor and less sugar, which some people prefer to offset the sweetness of the ice cream base. If you’re a dark chocolate lover, go for 60% to 70% cocoa solids for best results.
Milk chocolate, on the other hand, tends to get overly sweet and soft in ice cream. It doesn’t hold its shape as well during freezing and may get lost among stronger flavors. It’s not recommended for this particular recipe.
For an artisanal feel, consider using high-quality baking chocolate and chopping it by hand. The irregular sizes add personality and give your scoop that homemade, rustic look.
How to Add Mix-Ins for Perfect Distribution
When it comes to mix-ins like chocolate and cherries, timing is everything. If you add them too early, they may sink to the bottom or get pulverized in the churning process. If you add them too late, they may not blend in evenly.
Here’s the sweet spot:
Add chocolate chunks during the last 5 to 10 minutes of churning. This allows them to fold in without sinking or clumping. If you’re doing a no-churn version, gently fold the chocolate into the whipped base just before freezing.
Aim for uniform size—pieces that are too large can become rock-hard in the freezer. Chopping chocolate into small chunks gives the best mouthfeel, offering bits of chocolate in every bite without overpowering the other flavors.
Want more chocolate inspiration? Discover great ideas like our Smores Cookies Recipe for pairing with your next homemade batch.
Customization and Substitutions for
Flavor Twists – Almond, Dark Chocolate, Extra Cherry
While the classic cherry garcia ice cream recipe is hard to beat, there’s plenty of room to make it your own. These flavor twists can elevate your homemade batch without sacrificing its iconic charm.
Almond Extract:
Just a few drops of almond extract (about ¼ teaspoon) can deepen the cherry flavor dramatically. It mimics the natural notes found in cherry pits and adds a layer of complexity. But use it sparingly—it’s potent.
Dark Chocolate Swirl:
Instead of just chunks, try melting dark chocolate and drizzling it into the ice cream during the last minute of churning. It will create delicate ribbons of chocolate that break up into fudge-like flakes after freezing.
Extra Cherry Boost:
If you’re a cherry lover, double down. Add a swirl of cherry jam along with the chopped and cooked cherries. You’ll get bursts of flavor and a beautiful visual contrast throughout the container.
Chunky Monkey Fusion:
Feeling bold? Toss in a few sliced bananas or chopped walnuts for a funky fusion. It’s like Cherry Garcia meets Chunky Monkey—two Ben & Jerry’s classics in one scoop.
Dietary Substitutes – Dairy-Free, Vegan Options
Going dairy-free doesn’t mean missing out. With the right swaps, you can still enjoy a rich, creamy version of cherry garcia ice cream that suits vegan or lactose-intolerant diets.
Milk & Cream Substitutes:
Use full-fat coconut milk or coconut cream in place of dairy. These provide a similar texture and fat content, making your ice cream smooth and scoopable. Cashew milk or oat milk can also work, though the result may be slightly less creamy.
Egg-Free Base:
Skip the custard and go with a no-churn base using whipped coconut cream and sweetened condensed coconut milk. This combo mimics traditional texture without needing eggs or heat.
Vegan Chocolate:
Make sure to use dairy-free chocolate chips or bars. Many dark chocolate options are naturally vegan, but always check the label.
Sugar Options:
Swap granulated sugar for coconut sugar or maple syrup to keep things refined-sugar-free. Just note these will slightly darken the color and deepen the flavor.
Check out our Vegan Ice Cream Recipe for a fully plant-based frozen treat you’ll love!
Storing and Serving Cherry Garcia Ice Cream
Best Freezing Practices
Once you’ve crafted your perfect batch of cherry garcia ice cream, the way you store it can make or break the texture. Improper freezing leads to icy, hard-to-scoop ice cream—and nobody wants that.
Use a shallow, freezer-safe container.
Wide, shallow containers help the ice cream freeze evenly and scoop easily. Avoid deep bowls or oversized tubs that freeze unevenly or develop ice crystals.
Cover the surface tightly.
Place a piece of plastic wrap or parchment paper directly on the surface of the ice cream before sealing the container. This prevents freezer burn and keeps your ice cream ultra-smooth.
Let it cure.
Even if it looks ready straight from the churn, place it in the freezer for 3 to 4 hours before scooping. This “curing” process helps firm up the texture and locks in flavors.
Keep it near the back of your freezer.
The temperature is most stable there, reducing the risk of thaw-refreeze cycles that can ruin consistency.
Serving Suggestions (Waffles, Cones, Sandwiches)
Now for the fun part—how to serve it. Cherry Garcia ice cream isn’t just for bowls and spoons. Here are a few creative ways to elevate your scoop:
1. Classic Waffle Cones:
Spoon it into crisp waffle cones for that ice cream shop feel. Want a twist? Dip the rims of your cones in melted chocolate and roll them in chopped almonds or sprinkles.
2. Ice Cream Sandwiches:
Pair scoops with soft chocolate chip cookies or brownies for a crowd-pleasing dessert sandwich. Slightly underbake your cookies so they remain chewy even when frozen.
3. Dessert Bowls with Toppings:
Finish it off with cherry syrup, rich chocolate curls, or a light swirl of whipped cream. Add crushed nuts for crunch or a drizzle of hot fudge for richness.
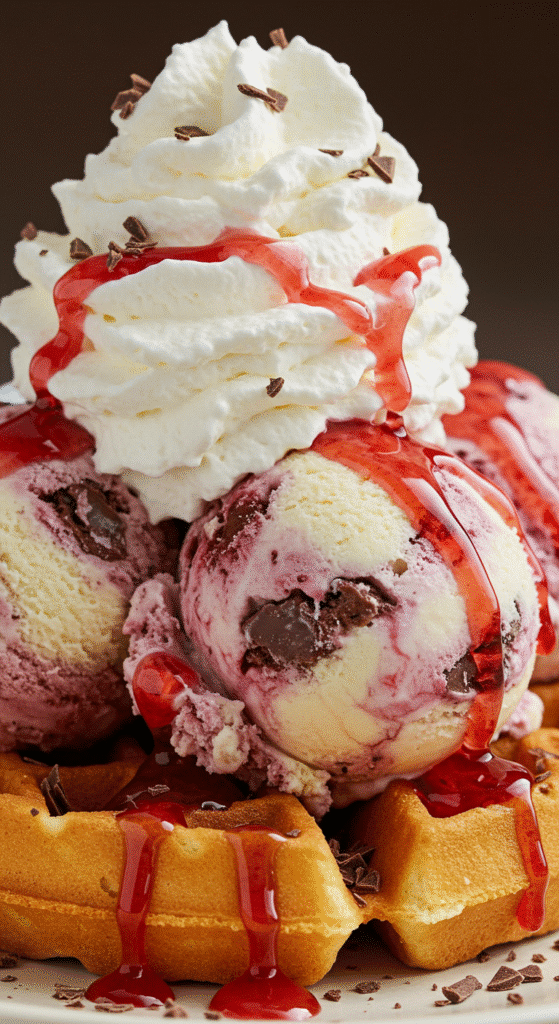
4. Over Pancakes or Waffles:
Yes—it’s breakfast and dessert. A scoop over warm waffles, with cherries and syrup on top, is an indulgent brunch or weekend treat.
5. DIY Ice Cream Bar:
Hosting a gathering? Create a sundae station. Offer chopped fruit, sauces, crushed candy, and multiple ice cream flavors for mix-and-match fun.
Don’t miss our Ice Cream Cones Guide for more delicious ways to showcase your Cherry Garcia creation!
FAQs: Cherry Garcia Ice Cream
What are the ingredients in Cherry Garcia ice cream?
Cherry Garcia ice cream is made with sweet cherries, chocolate chunks, heavy cream, whole milk, egg yolks, sugar, lemon juice, vanilla extract, and a pinch of salt. As a result, this blend offers a rich, fruit-forward ice cream with satisfying chocolate depth.
What is the base of Cherry Garcia?
This recipe starts with a custard-style foundation of egg yolks, milk, and cream. This creates a rich, velvety texture that supports chunky mix-ins like cherries and chocolate.
How do you make homemade ice cream?
Homemade ice cream starts with a chilled base that’s churned to incorporate air. Additionally, you can use an egg-based custard or a no-churn mixture of whipped cream and sweetened condensed milk. Add your desired flavors and freeze.
What kind of mixture is Cherry Garcia ice cream?
It’s a chunky ice cream featuring a smooth custard base with bits of cherry and chocolate mixed in. The texture combines creamy and chewy elements in every scoop.
What type of cherries are used in Cherry Garcia ice cream?
Sweet cherries, like Bing or Rainier, are ideal. They provide a natural sweetness and hold their shape after cooking or freezing. Fresh or thawed frozen cherries both work well.
How do you make homemade ice cream without a machine?
Whip heavy cream until soft peaks form. Fold in sweetened condensed milk, vanilla, and cherry mix-ins. Freeze in a loaf pan for at least 5 hours until firm.
Conclusion
Why Cherry Garcia Ice Cream Is Worth Making at Home
If you’re a fan of bold flavors and creamy textures, making your own cherry garcia ice cream is well worth the effort. You control the quality of ingredients, from fresh cherries to real chocolate, and can tweak every detail to suit your taste.
Regardless of which method you choose, whether you go the traditional custard route or opt for a quick no-churn method, homemade versions offer a level of richness and freshness that’s hard to find in store-bought pints. Additionally, making it at home allows you to experiment—adding more cherries, a different chocolate, or even trying out a dairy-free variation.
Final Tips for Ice Cream Success
- Chill everything well—from the base to the bowl—to prevent ice crystals.
- Choose ripe, sweet cherries to maximize flavor.
- Add mix-ins at the right time to keep textures intact.
- Let the ice cream cure in the freezer for at least 3–5 hours before serving.
And most of all, don’t forget to enjoy the process. Ice cream isn’t just dessert—it’s an experience.
Looking for more inspiration? Don’t miss our Easy Homemade Ice Cream Recipes that will have your freezer stocked with scoops for days!
Cherry Garcia Ice Cream
Creamy, dreamy, and packed with real cherries and chocolate chunks—this homemade Cherry Garcia Ice Cream is a rich, nostalgic treat you can easily make at home with or without an ice cream maker.
- Prep Time: 15 minutes
- Freezing: 6 hours
- Cook Time: 1 hour
- Total Time: 7 hours 15 minutes
- Yield: 6 cups 1x
- Category: Dessert
- Cuisine: American
Ingredients
1 1/2 lbs cherries
1 1/2 cups whole milk
2 cups heavy whipping cream
6 large egg yolks
1 1/4 cups granulated sugar
1 teaspoon lemon juice
1 teaspoon vanilla extract
3/4 cup chocolate chips or chunks
pinch salt
Instructions
Freeze Bowl: Chill the ice cream maker bowl in the freezer.
Prep Cherries: Pit cherries. Set aside ½ lb. Macerate 1 lb with ¼ cup sugar for 30 mins.
Chop Cherries: Roughly chop the reserved ½ lb of cherries.
Start Custard: Heat milk in a saucepan over medium-low.
Egg Mixture: Whip yolks and sugar until fully blended.
Temper Eggs: Slowly add hot milk into egg mixture, whisking constantly.
Cook Custard: Return mixture to pan; cook and whisk until thickened.
Chill Custard: Strain into a bowl over an ice bath. Cover and chill for 2 hours.
Make Cherry Sauce: Add lemon juice to macerated cherries. Simmer for 30 mins until syrupy.
Strain Sauce: Separate syrup and cooked cherries using a sieve.
Mix Base: Add cream, cherry syrup, vanilla, and salt to chilled custard. Whisk until smooth.
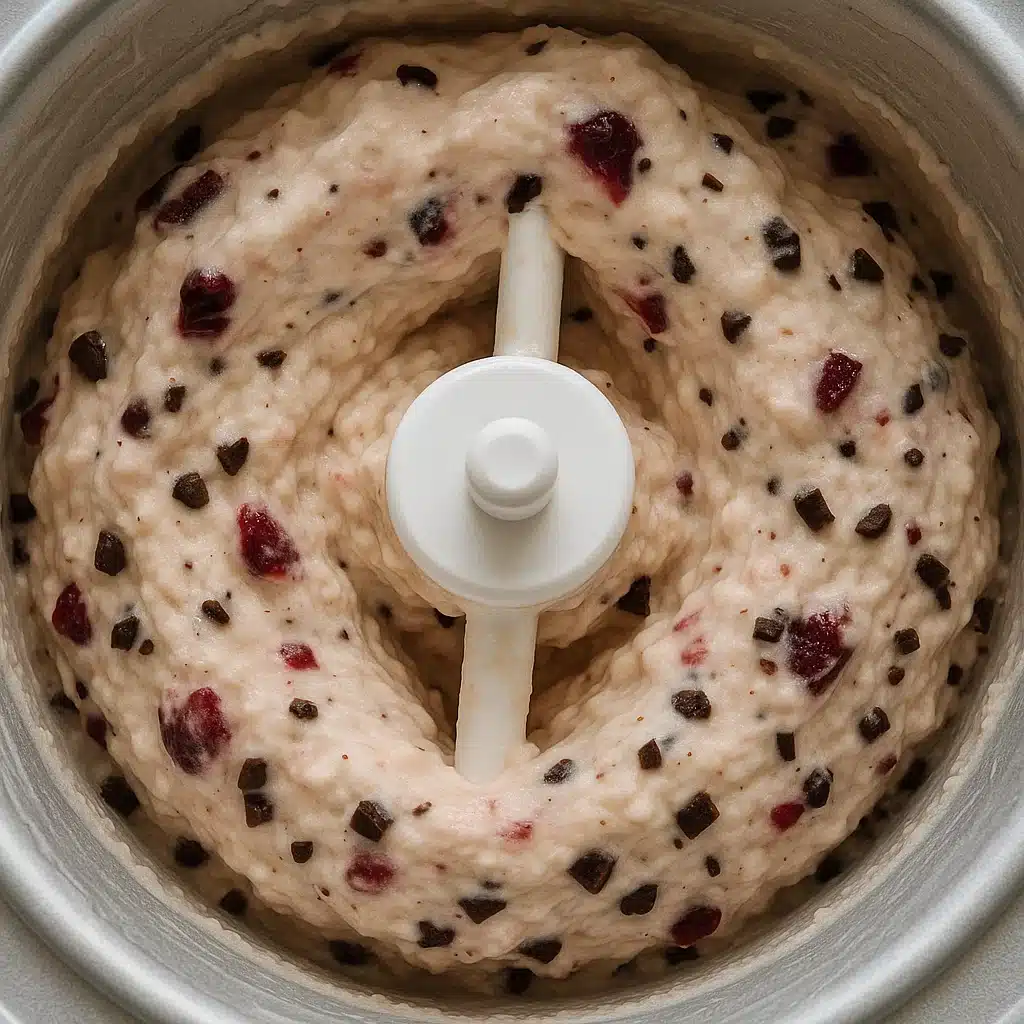
First Churn: Pour into ice cream maker and churn for 20 mins.
Add Mix-ins: Add chopped cherries, cooked cherries, and chocolate. Churn 15 mins more.
Freeze Firm: Transfer to container, cover, and freeze 3–4 hours.
Serve: Scoop and enjoy!
Notes
No-Churn Method:
Whip cold cream until soft peaks form.
Gently fold in sweetened condensed milk, cherry syrup, and vanilla.
Stir in chopped and cooked cherries with chocolate pieces.
Transfer to a loaf pan, cover, and freeze for 5+ hours.
DIY Churn Without a Machine:
Use half the recipe.
Prepare custard and cherry mixture as usual.
Place the ice cream base in a bowl set over an ice bath.
Blend using a hand mixer until thick like soft serve.
Mix in cherries and chocolate, then freeze overnight.
Flavor Swaps:
Customize with other fruits, chocolates, or extracts for your own twist.
Nutrition facts are estimates and may vary based on ingredients used, portion sizes, and preparation methods
Nutrition
- Serving Size: 6 cups
- Calories: 674kcal
- Sugar: 68g
- Sodium: 70mg
- Fat: 40g
- Saturated Fat: 24g
- Unsaturated Fat: 2g
- Carbohydrates: 75g
- Fiber: 2g
- Protein: 7g
- Cholesterol: 303mg
Keywords: Cherry Garcia Ice Cream, cherries, whole milk, heavy whipping cream, egg yolks, granulated sugar, lemon juice, vanilla extract, chocolate chips
Let’s connect! Follow me for more Joylicious Recipes: Facebook, Instagram, Pinterest