Why Sous Vide Is The Best Way To Cook Tender Tri Tip At Home
Sous vide tri tip is one of the best ways to cook this flavorful beef cut to absolute perfection. With sous vide, you seal the meat in a vacuum bag and cook it in a water bath at a steady temperature. This keeps it moist and delivers even doneness from edge to edge.
In this guide, you’ll learn how to master sous vide tri tip at home. We’ll cover everything—from prep and cook time to searing, slicing, and serving. Whether you’re just starting with sous vide or looking to improve, this article gives you the tools for consistent results.
Looking for inspiration? Try our Sous Vide Ribeye for another melt-in-your-mouth steak option.
Introduction to Sous Vide Tri Tip
What Is Sous Vide Cooking and Why Use It for Tri Tip?
Sous vide means “under vacuum” in French. You seal the food in a plastic bag, remove the air, and immerse it in hot water. A precision cooker controls the temperature, which keeps cooking consistent.
This method is perfect for tri tip, a cut that’s lean and full of flavor but prone to drying out. Unlike grilling or roasting, sous vide gently breaks down fibers while holding in juices. That’s why it delivers juicy, tender beef every time.
When cooking with sous vide, you avoid overcooked edges and raw centers. The meat is cooked evenly, which is especially helpful with tri tip’s irregular shape.
Understanding the Unique Flavor Profile of Tri Tip
Tri tip, also called triangle roast or Santa Maria steak, comes from the bottom sirloin. It has a bold, beefy taste and a slight chew that steak lovers appreciate.
It’s lean, so it needs careful cooking. With sous vide, you don’t risk drying it out. You can season it with garlic, herbs, salt, and pepper—or even marinate it.
Tri tip can be hard to find in some stores, but it’s growing in popularity. More butchers now offer it, especially on the West Coast.
Why Sous Vide Is the Best Method for Tri Tip
The Science Behind Sous Vide Precision Cooking
Cooking sous vide tri tip is more than just trendy—it’s science-backed. This method uses precise water temperature to slowly cook meat to an exact level of doneness. That means no overcooked edges or raw centers.
With sous vide, you cook low and slow. This gives the muscle fibers time to relax. It also helps collagen break down, making the meat juicy and tender. This is especially important for tri tip, which can be chewy if rushed.
Another key benefit? Control. You can set your sous vide machine to 131°F for medium rare. The meat won’t cook beyond that, no matter how long it stays in the water. This gives you freedom and flexibility while ensuring great results.
Even better, you don’t lose moisture. Traditional methods cause juices to escape into the pan. Sous vide traps them inside. The result is beef that’s packed with natural flavor and tenderness.
Check out Sous Vide Chicken Breast for another protein that benefits from this exact cooking approach.
Sous Vide vs. Traditional Roasting for Tri Tip
Let’s compare. With oven roasting or grilling, it’s easy to miss the mark. Tri tip can go from perfect to dry in just minutes. High heat makes it difficult to cook evenly.
Sous vide takes the guesswork out. Instead of aiming for a window of doneness, you lock it in. The meat bathes in a gentle temperature until it’s ready. No more slicing in to “check.”
Roasting also comes with timing stress. With sous vide, there’s no rush. You can leave the tri tip in the water bath for hours, and it won’t overcook.
Plus, sous vide lets you prep ahead. Cook the tri tip earlier in the day, store it in the fridge, then sear right before dinner. You get fresh-off-the-grill flavor—without hovering over the stove.
Want to explore another smart steak method? Discover great ideas like Pan Seared Steak with Butter Sauce for inspiration.
Preparing Tri Tip for Sous Vide
How to Trim and Season Your Tri Tip Roast
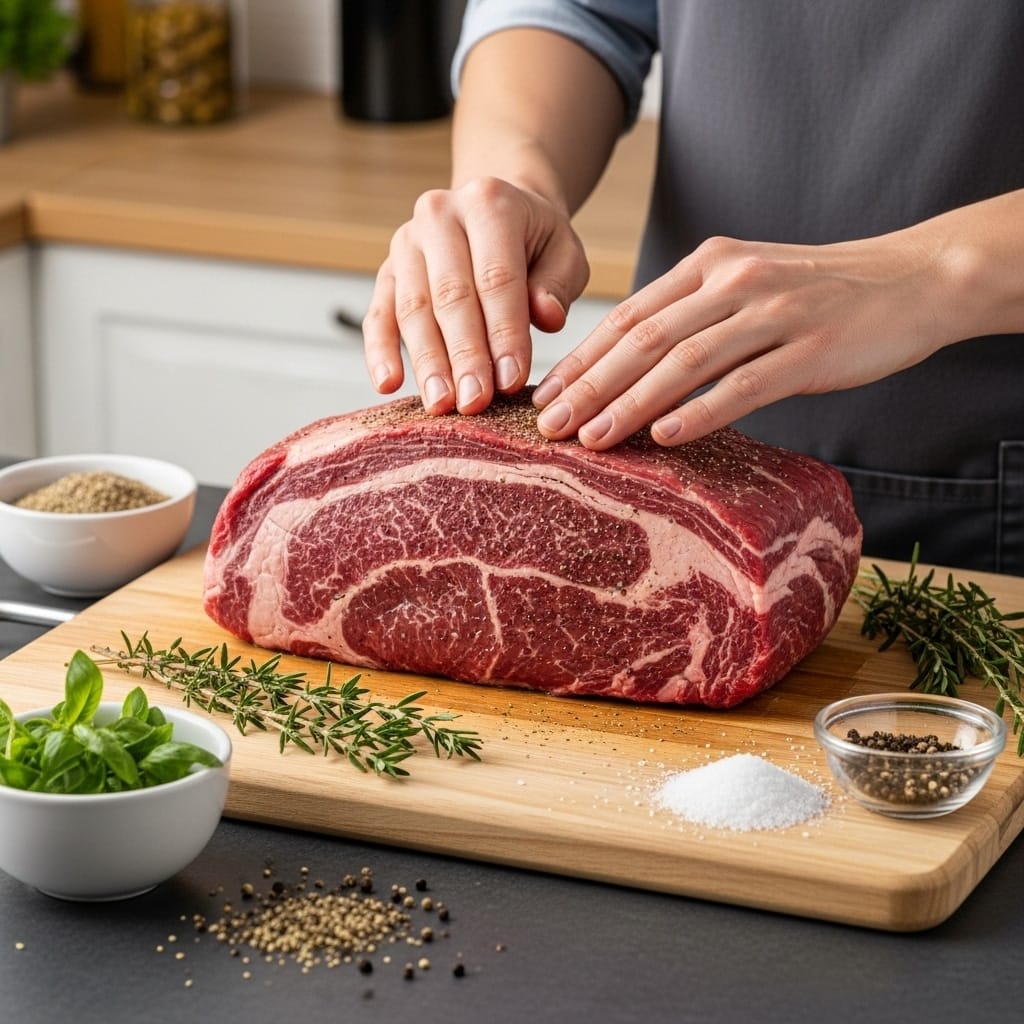
Before you start cooking sous vide tri tip, proper prep is essential. Begin by removing the tri tip from the fridge and let it sit at room temperature for about 30 minutes. This helps the meat cook evenly.
If your roast has a thick fat cap, trim it down a bit. You want some fat left for flavor, but not too much. Fat won’t render the same way in a water bath, so balance is key.
Next, make the seasoning rub. Mix together salt, pepper, garlic powder, onion powder, oregano, and thyme. This blend adds bold flavor without overpowering the meat.
Here’s the exact mix:
| Seasoning | Amount |
|---|---|
| Salt | 2 tsp |
| Black pepper | 1 tsp |
| Garlic powder | 1 tsp |
| Onion powder | ½ tsp |
| Oregano | ½ tsp |
| Thyme | ½ tsp |
Rub the mixture all over the roast. Be generous—tri tip is a thick cut and needs bold seasoning. If you prefer, you can use 3-4 teaspoons of your favorite spice blend instead.
After seasoning, place the roast in a vacuum-sealed bag or use a zip-top bag with the water displacement method. Make sure the seal is tight to prevent water leaks.
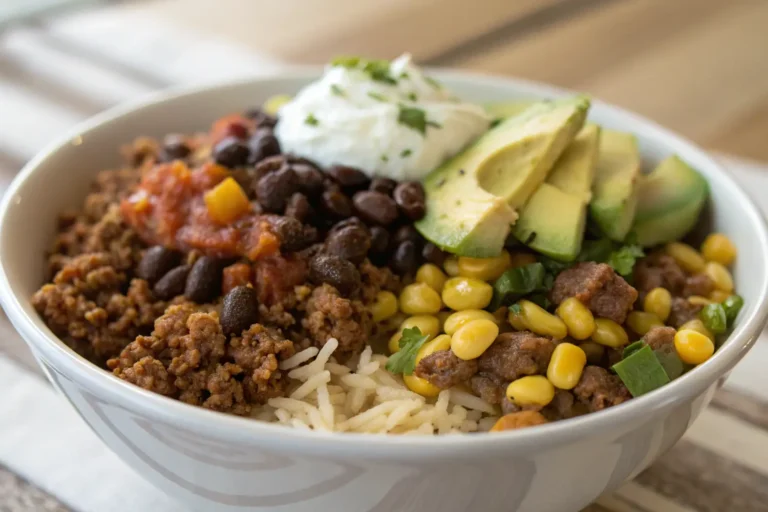
Need flavor combo inspiration? Check out Southwest Steak Bowl with Avocado for bold, balanced seasoning ideas.
Marinade vs. Dry Rub: What Works Best in Sous Vide?
You might wonder whether you should use a dry rub or a marinade for sous vide tri tip. Both options work, but they serve different purposes.
A dry rub is fast and flavorful. It sticks to the meat and forms a crust when seared. It also won’t dilute in the sous vide bag, so the flavor stays intense.
A marinade, on the other hand, adds extra moisture and complexity. Use acidic ingredients like vinegar, soy sauce, or citrus with care—long exposure can break down the meat too much.
For sous vide, dry rubs are often the better choice. They deliver flavor, work well during the water bath, and help create that savory crust when seared.
Pro tip: After seasoning, you can let the tri tip rest in the fridge overnight. This helps flavors absorb deeper into the meat.
The Ideal Sous Vide Temperature and Time for Tri Tip
What Is the Perfect Sous Vide Tri Tip Temperature?
Getting the temperature right is crucial when cooking sous vide tri tip. In fact, it directly affects how tender and juicy your final result will be.
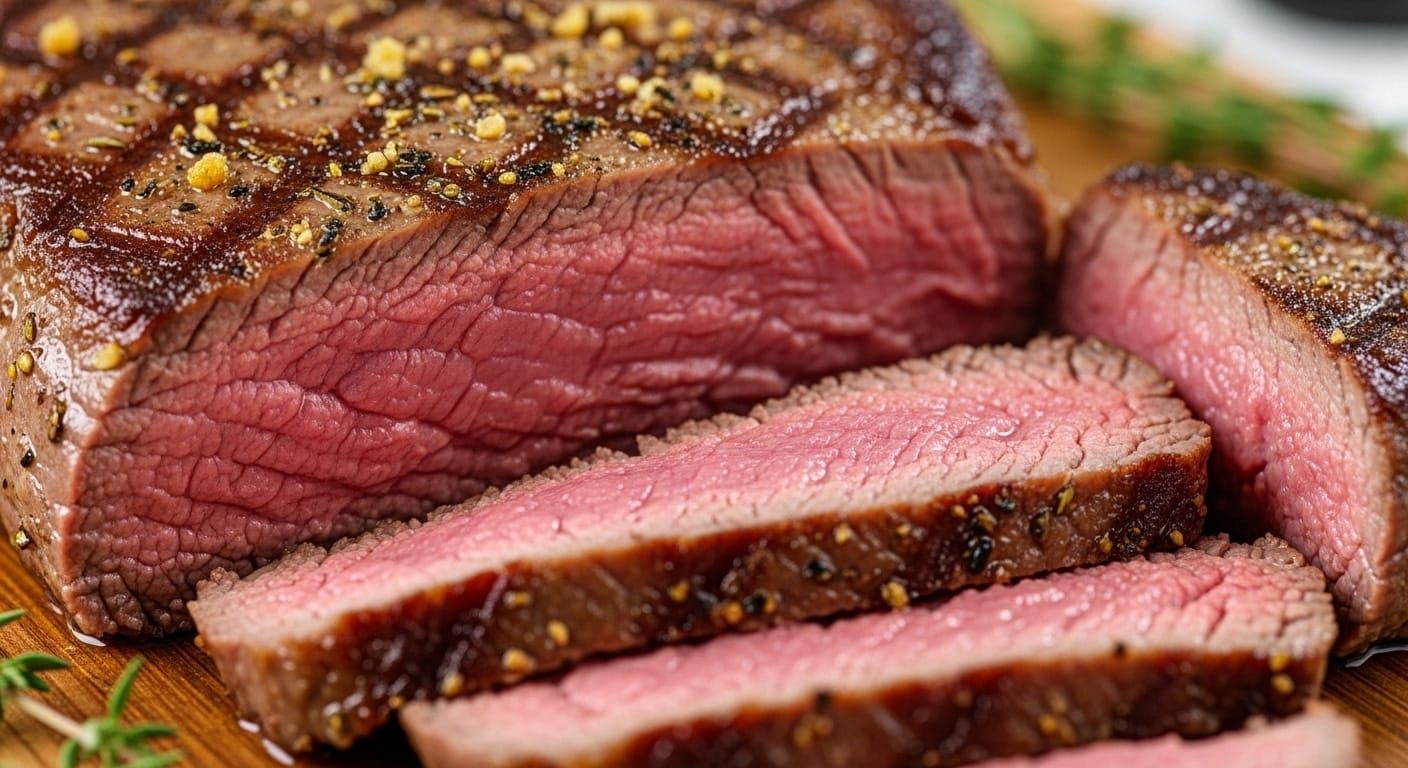
For the best experience, we recommend setting your sous vide cooker to 131°F (55°C). At this temperature, your tri tip will turn out perfectly medium-rare—pink in the center, juicy throughout, and incredibly tender.
Moreover, sous vide gives you complete control over the doneness level. For example, if you prefer a rarer steak, lower the temp slightly. Conversely, if you like your meat more cooked, raise it just a bit.
Here’s a quick breakdown of sous vide temperatures for tri tip:
| Doneness | Sous Vide Temp | Description |
|---|---|---|
| Rare | 125°F (52°C) | Very red, extremely tender |
| Medium-rare | 131°F (55°C) | Pink, juicy, ideal for most |
| Medium | 138°F (59°C) | Slightly firm, less pink |
| Medium-well | 145°F (63°C) | Mostly gray, firmer texture |
| Well-done | 155°F+ (68°C+) | Fully cooked, noticeably drier |
Therefore, if you’re unsure where to start, go with medium-rare. It offers the best balance of texture and flavor. In addition, the meat stays moist and rich without being overly soft.
Want more temp tips? Learn more about Sous Vide Ribeye for another cut that benefits from this precision.
How Long to Cook Tri Tip Sous Vide Based on Doneness
Time also plays a vital role in the final outcome. With sous vide, you can safely extend the cook time without drying out the meat.
Generally speaking, longer cook times lead to more tender results. However, going too long can make the texture overly soft, especially if you’re aiming for steak-like firmness.
Here’s a helpful time chart for reference:
| Cook Time | Result |
|---|---|
| 2–4 hours | Steak-like chew, slightly firm |
| 6 hours | Ideal balance of tenderness and bite |
| 8 hours | Ultra-tender, almost pull-apart texture |
For most home cooks, 6 hours at 131°F is the sweet spot. This duration allows enough time for connective tissues to soften without compromising the meat’s structure.
Additionally, remember to let the tri tip rest briefly after removing it from the bath. During this time, the juices redistribute, enhancing overall flavor.
Next, be sure to pat the meat dry before searing. A dry surface leads to a better crust.
Most importantly, keep in mind that sous vide is forgiving. Unlike grilling or oven-roasting, you don’t need to stress about overcooking. In fact, it’s one of the reasons why sous vide tri tip is perfect for beginners.
Discover great ideas like Sous Vide Beef Tenderloin if you want to experiment with other premium cuts.
Post-Sous Vide Finishing Techniques
How to Sear Tri Tip After Sous Vide (Pan, Grill, or Torch)
Once your sous vide tri tip has cooked for the desired time, it’s time to sear. This final step is where you add flavor, texture, and that irresistible crust.
First, remove the tri tip from the bag and pat it completely dry using paper towels. This step is crucial. Any moisture on the surface will prevent a proper sear.
Now it’s time to choose your searing method. Each approach has its strengths:
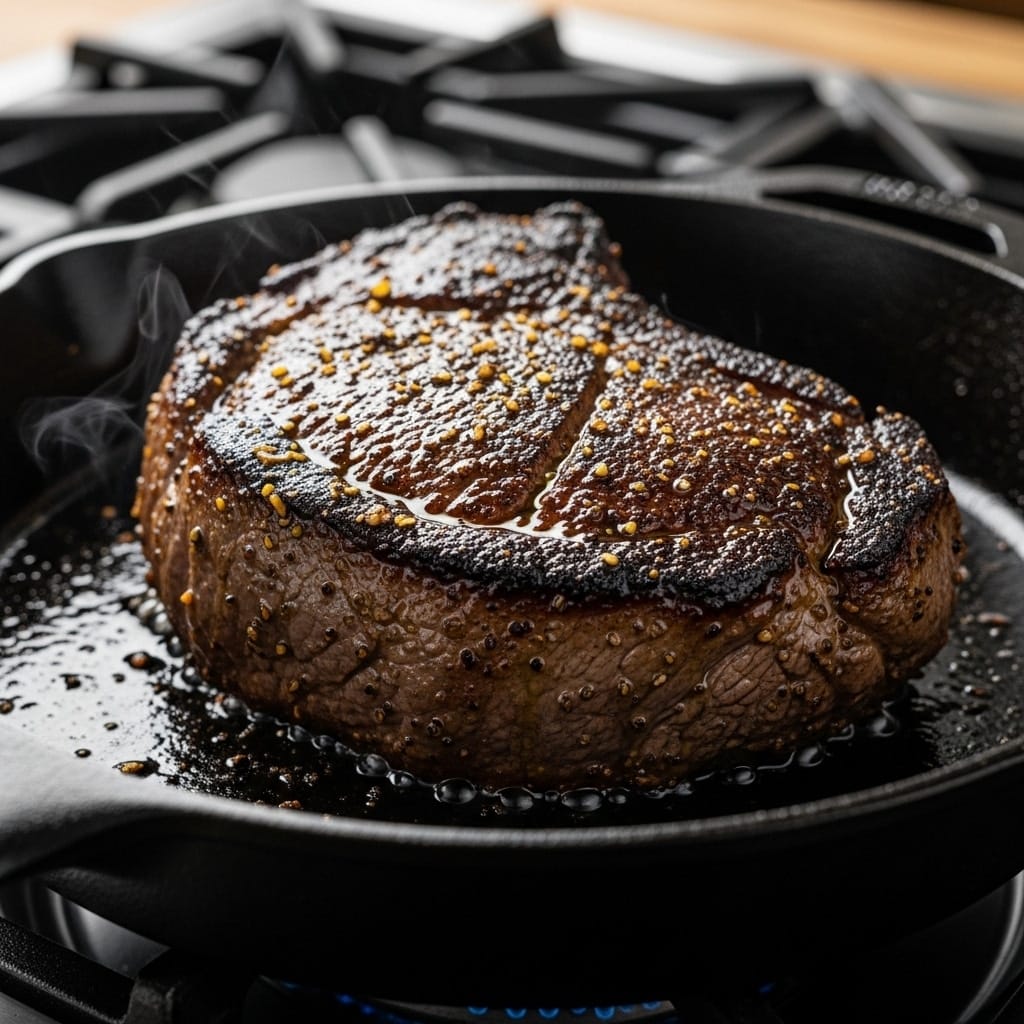
- Cast Iron Skillet: Heat a cast iron pan until it’s almost smoking. Add a high-heat oil like avocado oil, then sear the tri tip for 1 to 2 minutes per side. Flip once for even browning.
- Grill: Preheat your grill to high heat. Place the tri tip directly over the flame for 1 to 2 minutes on each side. Close the lid to hold in heat and boost char.
- Torch: For advanced users, a culinary torch can add a sear without overcooking. Torch evenly, keeping the flame moving to avoid burning.
No matter the method, the goal is the same: a golden-brown crust with deep flavor and zero gray bands inside.
For even more searing tips, check out our Garlic Parmesan Beef Chops which use similar finishing techniques.
Slicing and Serving for Maximum Juiciness
After searing, it’s tempting to slice right in—but don’t. Let the tri tip rest for 5 to 10 minutes. This step allows juices to settle, so you don’t lose flavor when slicing.
Next, identify the grain. Tri tip has a unique shape with muscle fibers running in different directions. Always slice against the grain. This breaks up the muscle fibers, resulting in a more tender bite.
Here’s a simple slicing guide:
| Step | Action |
|---|---|
| 1 | Let meat rest on a cutting board |
| 2 | Identify direction of muscle fibers |
| 3 | Slice perpendicular to the grain |
| 4 | Cut into thin, even slices |
Finally, serve immediately while it’s warm. You can pair it with mashed potatoes, roasted vegetables, or slice it for sandwiches and wraps.
Looking for other steak serving ideas? Don’t miss our Pan Seared Steak with Butter Sauce for classic comfort food inspiration.
Best Seasonings and Rubs for Sous Vide Tri Tip
Our Classic Tri Tip Dry Rub (With Garlic, Herbs & Spice)
When it comes to seasoning sous vide tri tip, simple blends work best. Why? Because the long cooking time allows flavors to deeply penetrate the meat. A balanced dry rub can elevate your tri tip without overpowering its natural flavor.
To get started, use this go-to blend:
| Ingredient | Amount |
|---|---|
| Salt | 2 teaspoons |
| Black Pepper | 1 teaspoon |
| Garlic Powder | 1 teaspoon |
| Onion Powder | ½ teaspoon |
| Dried Oregano | ½ teaspoon |
| Dried Thyme | ½ teaspoon |
Mix everything in a small bowl. Then rub it generously over the entire roast. The mix may seem heavy, but tri tip is a thick cut and needs bold flavors.
Don’t forget: letting your tri tip rest with the rub in the fridge for a few hours—or overnight—can boost the flavor even more. It also helps the salt break down tough muscle fibers, making your tri tip even more tender.
Want a zesty alternative? Try citrus-based blends like the ones used in our Southwest Steak Avocado Bowl for extra tang.
Creative Seasoning Combos That Work Well with Sous Vide
While the classic garlic-and-herb rub is always a winner, there are other exciting flavor paths to explore.
Here are a few combinations that work beautifully with sous vide tri tip:
- Smoky BBQ Rub: Combine smoked paprika, brown sugar, chili powder, and cumin. This adds a sweet, spicy bark after searing.
- Asian Fusion: Use soy sauce, garlic, ginger powder, and a touch of sesame oil. You can even finish it with a soy-based glaze after searing.
- Coffee Rub: A mix of ground coffee, brown sugar, garlic, and ancho chili powder brings rich, earthy notes.
- Chimichurri Style: Mix dried parsley, garlic, vinegar powder, and chili flakes to add a bold Argentine twist.
Remember, you can also mix in oil with your dry rub to make a paste. This helps seasoning cling to the meat, especially during vacuum sealing.
No matter which route you take, always season your tri tip before sealing the bag. This ensures even flavor distribution throughout the cooking process.
For more spice ideas, don’t miss our Sous Vide Chicken Breast which also benefits from bold, simple seasoning.
Recipe: Juicy Sous Vide Tri Tip (With Full Instructions)
Ingredients and Tools You’ll Need
To make perfectly tender sous vide tri tip, gather these ingredients and tools before you begin:
Ingredients:
- 2-pound tri-tip roast (approximate)
- ½ teaspoon dried thyme
- ½ teaspoon dried oregano
- 1 teaspoon garlic powder
- ½ teaspoon onion powder
- 2 teaspoons salt
- 1 teaspoon black pepper
- 1 tablespoon avocado oil (or other high-heat oil)
Tools:
- Sous vide immersion circulator
- Large container or pot for water bath
- Vacuum sealer or zip-top bag
- Tongs
- Cast iron skillet or grill
- Paper towels
Looking for another cut with flavor-packed results? Try our Sous Vide Ribeye for an excellent steak alternative.
Step-by-Step Cooking Instructions for Sous Vide Tri Tip
Step 1: Bring Meat to Room Temp
Remove the tri tip from the fridge and let it rest on the counter for 30 minutes. Additionally, this helps the meat cook evenly.
Step 2: Trim the Fat (If Needed)
If there’s a thick fat cap on the roast, trim it down. A small layer is fine, but too much will block seasoning.
Step 3: Make the Dry Rub
In a small bowl, mix salt, pepper, garlic powder, onion powder, oregano, and thyme. Rub this mixture all over the roast, coating it generously.
Step 4: Bag and Seal
Place the seasoned tri tip in a vacuum-seal bag. If using a zip-top bag, use the water displacement method to push out air. Make sure the seal is tight.
Step 5: Set Up Your Sous Vide Bath
Fill your water bath and set the temperature to 131°F for medium-rare. Let the water come to temperature before adding the meat.
Step 6: Cook the Tri Tip
Once the water is ready, submerge the bag. Use clips or weights if needed to keep it fully submerged. Cover the container to reduce evaporation. Cook for 6 hours.
Step 7: Remove and Pat Dry
After cooking, remove the roast and discard any juices in the bag. Pat the meat dry with paper towels. A dry surface ensures a great sear.
Step 8: Sear the Meat
Heat a grill or cast iron skillet over high heat. Add avocado oil. Sear the tri tip for 1 to 2 minutes per side, flipping once for even browning.
Step 9: Rest and Slice
Let the meat rest for 5 minutes. Then, identify the grain and slice against it for ultimate tenderness.
Want more comfort food tips? Don’t miss our Sous Vide Beef Tenderloin for another slow-cooked favorite.
Troubleshooting & Pro Tips for Sous Vide Tri Tip
Why Is My Tri Tip Tough? (And How to Fix It)
Even with sous vide, some users still end up with tough tri tip. So, what went wrong? Let’s break it down.
First, check your cook time and temperature. If the temperature was too low or the time too short, the collagen in the meat may not have had enough time to break down. For medium-rare tenderness, we recommend 131°F for at least 6 hours.
Second, your slicing technique matters. Slicing along the grain keeps muscle fibers long, which makes the meat tougher to chew. That results in a chewy texture. Instead, always slice against the grain to shorten those fibers and make the meat easier to chew.
Another common issue is not drying the meat before searing. If the surface is wet, the crust won’t form properly, which can also affect how juicy it tastes. Be sure to pat the roast completely dry before searing.
Finally, don’t forget to let the meat rest after searing. Rushing this step can cause juices to spill out during slicing, leaving you with a dry bite.
Want to see another recipe where tenderness is key? Check out our Sous Vide Chicken Breast for helpful techniques that apply across proteins.
Tips to Avoid Overcooking or Under-seasoning
Sous vide cooking offers a lot of control—but it’s not foolproof. Here are several expert tips to keep your sous vide tri tip on point:
- Use a digital thermometer if you plan to sear longer. This prevents overcooking the edges after the water bath.
- Don’t overseason. Since the tri tip cooks in a sealed bag, flavors intensify. A heavy hand with salt or garlic can become overwhelming.
- Preheat your searing surface properly. Whether it’s a grill or skillet, it must be hot. This allows you to build a crust quickly without cooking the inside further.
- Choose avocado oil or any high-smoke-point oil to avoid burning during searing. Olive oil burns too fast and may leave a bitter taste.
- Try seasoning the day before. Letting the rub sit overnight helps infuse deeper flavor, especially when combined with vacuum sealing.
Moreover, don’t be afraid to experiment. A major advantage of sous vide is its flexibility—you won’t easily overcook the meat. You can tweak time, flavor, and temperature until you find what works best for you.
For additional beef inspiration, explore our Sous Vide Prime Rib for a next-level holiday meal option.
Storing and Reheating Leftover Sous Vide Tri Tip
How to Properly Store Sous Vide Cooked Beef
After enjoying your perfectly cooked sous vide tri tip, you may find yourself with leftovers. Good news—you can easily store them without losing quality.
First, let the tri tip cool to room temperature. Don’t leave it out for more than two hours to avoid bacterial growth.
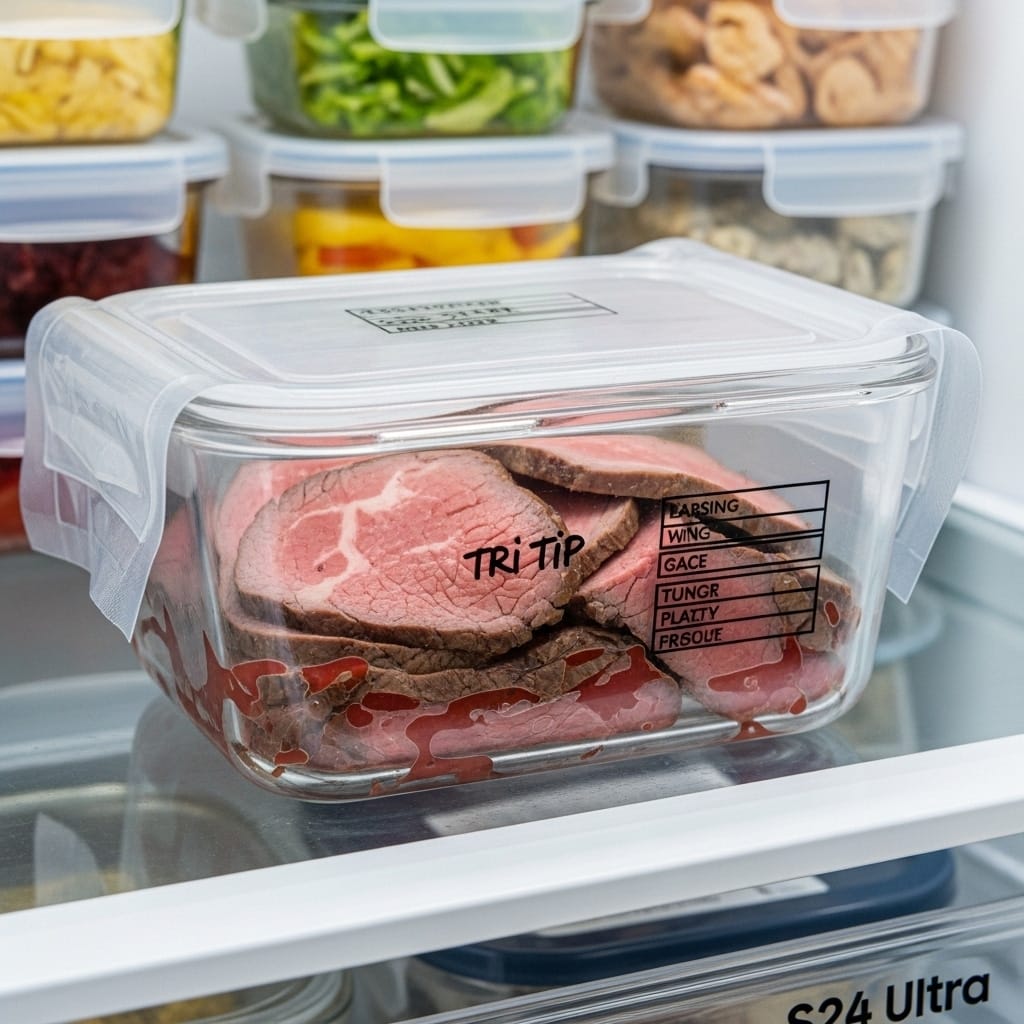
Next, wrap the slices tightly in plastic wrap or place them in an airtight container. For best results, store them in the refrigerator for up to 4 days.
If you plan to keep leftovers longer, freezing is a smart option. Simply seal the tri tip in a vacuum bag or freezer-safe zip-top bag. Make sure to remove excess air. Then, store in the freezer for up to 3 months.
Label the bag with the date so you know when it was stored. This keeps your freezer organized and helps avoid food waste.
For storage tips that apply to more than just steak, check out our Sous Vide Chicken Breast.
Reheating Methods That Preserve Moisture and Flavor
Now let’s talk about reheating. The key is to avoid drying out the meat or cooking it further.
Here are two safe and effective options:
- Reheat with Sous Vide:
- Preheat your water bath to 130°F.
- Place the tri tip in a sealed bag (vacuum or zip-top).
- Reheat for 30 to 45 minutes, depending on the thickness.
This method gently warms the meat without overcooking.
- Reheat in a Skillet:
- Heat a skillet over medium-low heat.
- Add a splash of beef broth or butter to retain moisture.
- Cover the pan to trap steam and warm slices for 1–2 minutes per side.
Avoid microwaving if possible—it tends to dry out meat and makes it rubbery. However, if you’re short on time, microwave on 50% power in short intervals with a damp paper towel over the meat.
Additionally, if you plan to serve leftovers cold, slice them thin and enjoy in sandwiches or wraps. The flavor holds up well even without reheating.
Don’t miss our handy tips in Sous Vide Ribeye for storing and reheating other cuts of beef just as easily.
Frequently Asked Questions (FAQs)
General Sous Vide Tri Tip Questions
Can I cook tri-tip sous vide?
Absolutely. Sous vide tri tip is one of the best ways to cook this cut evenly and keep it juicy. Because sous vide uses low, controlled heat, the tri tip cooks gently, avoiding overcooking and dryness. This method is ideal for home cooks wanting steakhouse results with minimal effort.
What is the ideal temperature for sous vide cooking?
For tri tip, the ideal sous vide temperature is 131°F for a medium-rare finish. However, you can adjust it based on your preference. For example, 125°F gives you rare, while 138°F leans toward medium. Consistent temperature control is what makes sous vide so effective for precision cooking.
Tenderness, Timing, and Texture
How do I make my tri-tip more tender?
Tenderness comes from time and slicing. Cooking sous vide tri tip at 131°F for at least 6 hours allows collagen to break down. Also, be sure to slice against the grain after cooking—this shortens muscle fibers and enhances tenderness with every bite.
How long should I sear tri-tip after sous vide?
Searing should take 1 to 2 minutes per side on a hot grill or skillet. The goal is to develop a golden-brown crust without further cooking the inside. Make sure the surface is dry and your pan is hot before you start.
Tri Tip Cooking Methods and Availability
Should tri-tip be cooked fast or slow?
Tri tip is best cooked low and slow, which is why sous vide is the perfect method. Quick, high-heat cooking methods like broiling or pan-frying can make it tough. In contrast, sous vide allows time for the connective tissues to soften while preserving moisture.
Why is tri-tip so hard to find?
Tri tip is more common on the West Coast of the U.S., especially in California. In many other regions, butchers may break it down into smaller cuts or label it differently. If you can’t find it, ask your local butcher for “bottom sirloin triangle roast.”
What is another name for tri-tip?
Tri tip is also known as the bottom sirloin roast, triangle roast, or Santa Maria steak. Depending on the region, you may see different names on the label, so it’s helpful to know these variations when shopping.
Conclusion: Perfecting Your Sous Vide Tri Tip at Home
By now, you’ve learned everything you need to know to master sous vide tri tip—from choosing the right temperature to slicing against the grain for ultimate tenderness. With this method, you no longer have to worry about overcooking or dry, chewy beef. Instead, you’ll enjoy restaurant-quality steak in your own kitchen, every single time.
Whether you’re making it for a weekend dinner, a holiday meal, or simply upgrading your weeknight menu, this recipe delivers consistent results with minimal effort. Remember: the key lies in low temperature, slow cooking, and a proper sear.
Ready to explore more gourmet-level beef recipes? Don’t miss our guide to Sous Vide Prime Rib for your next impressive main course.
Now go grab that tri tip, set your sous vide, and treat yourself to steakhouse flavor made easy.
Let’s connect! Follow me for more Joylicious Recipes:
PrintWhy Sous Vide Is The Best Way To Cook Tender Tri Tip At Home
Juicy, tender, and perfectly cooked every time—this sous vide tri tip is simple to make and full of flavor. A quick sear adds the perfect crust.
- Prep Time: 15 minutes
- Rest + Sear: 20 minutes
- Cook Time: 6 hours
- Total Time: 6 hours 35 minutes
- Yield: 6 servings 1x
Ingredients
2-pound Tri-tip roast (approximately)
½ teaspoon dried thyme
½ teaspoon dried oregano
1 teaspoon garlic powder
½ teaspoon onion powder
2 teaspoons salt
1 teaspoon black pepper
1 tablespoon avocado oil (or other high-heat oil)
Instructions
Bring to Room Temp:
Remove tri tip from the fridge and let it sit at room temperature for 30 minutes.Trim Fat (If Needed):
Trim excess fat cap from the roast, leaving a thin layer for flavor.Season the Roast:
In a small bowl, mix salt, pepper, garlic powder, onion powder, oregano, and thyme. Rub generously on all sides.Bag and Seal:
Place seasoned roast in a vacuum-seal bag or zip-top bag using the water displacement method. Seal tightly.Sous Vide Cook:
Preheat water bath to 131°F. Submerge the sealed bag and cook for 6 hours. Cover bath to avoid evaporation.Remove and Pat Dry:
Take the roast out of the bag. Discard juices and pat the surface dry with paper towels.Sear the Meat:
Heat a cast iron skillet or grill over high heat. Add oil. Sear tri tip for 1–2 minutes per side, flipping once.Rest and Slice:
Rest meat for 5–10 minutes. Slice against the grain to enhance tenderness.
Notes
Use avocado oil or another high-smoke-point oil for best searing results.
To boost flavor, refrigerate seasoned roast overnight before cooking.
For medium doneness, set sous vide temp to 138°F.
Always slice against the grain for maximum tenderness.
Leftovers can be stored for 4 days in the fridge or up to 3 months in the freezer.
Nutrition
- Serving Size: 6 servings
- Calories: 310 kcal
- Sodium: 580mg
- Fat: 18g
- Saturated Fat: 6g
- Carbohydrates: 1g
- Protein: 32g
- Cholesterol: 147mg
Keywords: Tri tip roast, avocado oil, garlic powder, onion powder, rosemary, black pepper, vegetable oil, olive oil
Let’s connect! Follow me for more Joylicious Recipes: Facebook, Instagram, Pinterest